
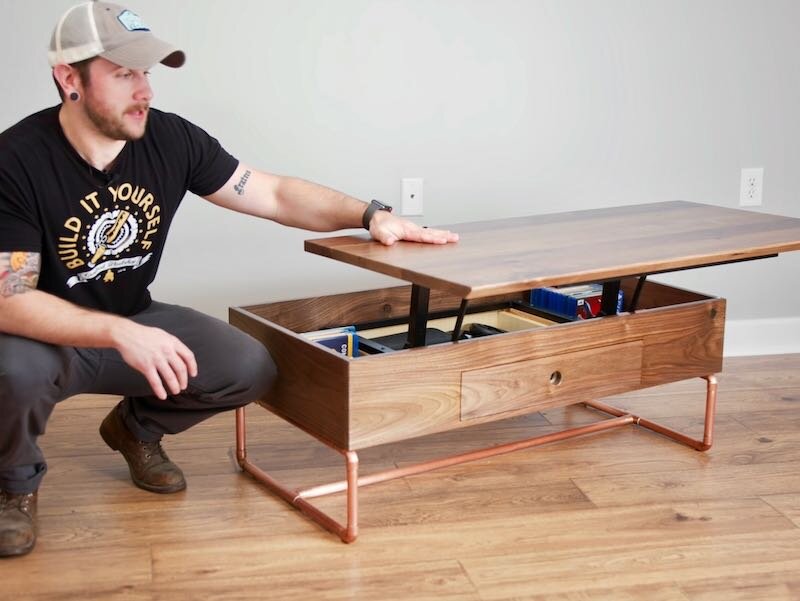
How To Build A Lift Top Coffee Table with Storage and Copper Pipe Base
I built this lift top coffee table, with TONS of video game and Blu-Ray storage, out of solid Walnut and copper pipe for the base. We use this coffee table daily and it is so great for working on your laptop, sipping on an adult beverage, and snacking on popcorn while watching a movie. I do have plans available for this coffee table as well!
Note: Links below are Amazon affiliate links
📦 Materials Used On The Lift Top Coffee Table:
🛠 Tools Used On The Lift Top Coffee Table:

Process For Building Your Lift Top Coffee Table:
Step 1: Choose Your Material To Build Your Coffee Table From
I decided to use solid Walnut on this build, mostly because I had a few Walnut boards hanging around that would work well for this project, so my first step was breaking down the boards into rough lengths.
Step 2: Mill Lumber
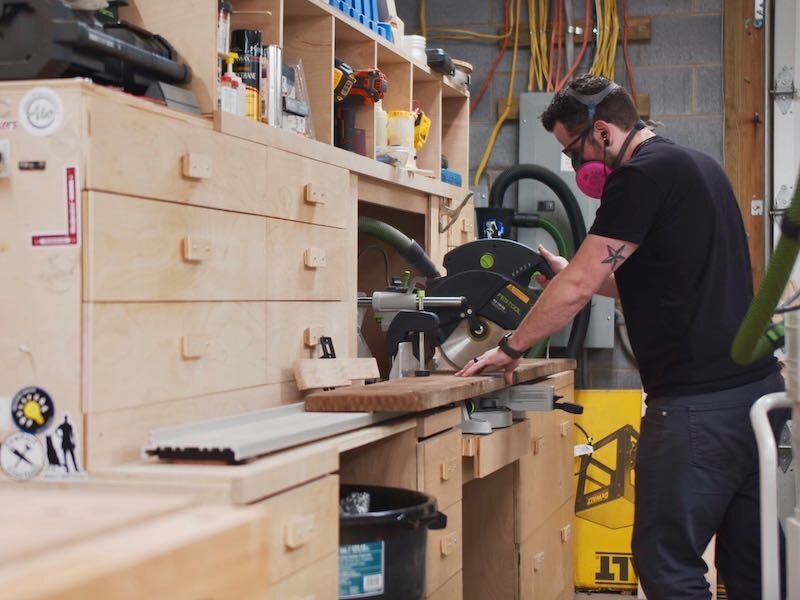
I like to use my miter saw for this, but I am always extremely careful when cutting rough lumber on the miter saw because kickback can happen really easily if the boards have a lot of tension and pinch the blade, which is what happened here. Now, I used the clamp to hold the material down and my hands were away from the blade, so I was safe, but it’s still a little startling when this happens.
After the boards were cut to rough length, I could square up one face and one edge at the jointer. If you don’t have tools to mill rough lumber like this, you could always just buy pre-milled lumber or use plywood instead. My local lumber place will mill the boards for me for a reasonable price, but I just prefer doing it myself.
Once the boards had two square surfaces, I could run them through the planer to bring the other face parallel to that flattened face. I actually did this whole milling process over the course of two days, first truing up the faces of the boards and letting them rest overnight to allow for any movement to occur and then flattening them again and bringing the boards down to final thickness.

Next, I ripped the boards to final width at the table saw. I am working on the boards for the table top here, so I was also paying attention to any defects that I wanted to remove. I had about an inch of extra width to play with, which meant I could rip out some of the larger knots.
Step 3: Glue Up Wood For Carcass Construction

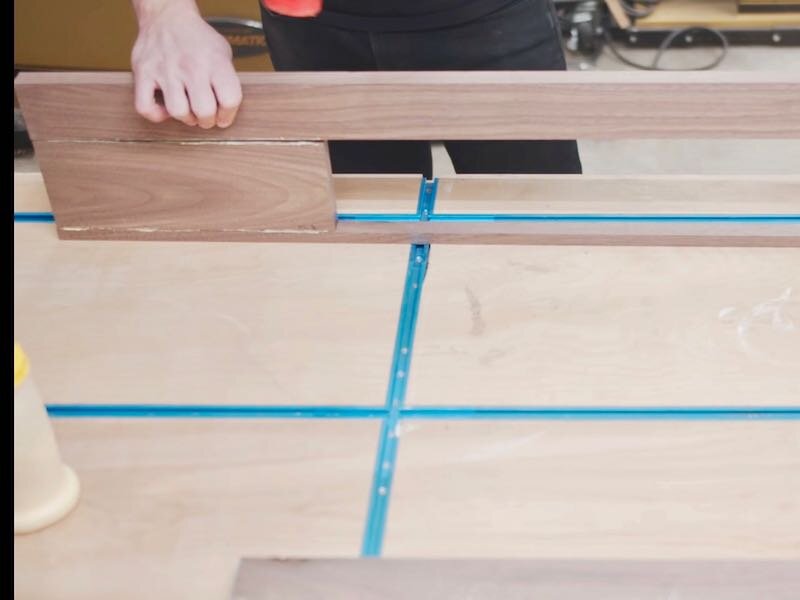
With the boards ripped to width, I could lay them out and mark locations for Dominos, which I used for alignment. I know I always say this, but biscuits or dowels would also work in the exact same way here, the Dominos are really just to keep the boards from slipping around during the glue up, which saves some sanding later.
Also, you might notice in the video, I was struggling with getting that first board seated, and that’s because I cut the first few Domino mortises on the loose setting. I know a lot of people like doing this as they feel it’s easier to align everything but I find it to be the opposite, even on boards with lots of Dominos like these. As long as you cut the mortises accurately, everything goes together with a light tap of the mallet.
The other three went together easily, and those all were cut on the tightest setting.
Step 4: Post Glue Up Clean Up

After a few hours in the clamps, I removed the clamps and scraped off any glue squeeze out, then I taped off a few knot holes on the underside of the top to prep for filling them with epoxy. I like to use a pressure roller to make sure my tape is really well adhered, it just helps prevent leaks.
I used TotalBoat High Performance epoxy here and mixed in some dark grey pigment, and poured the epoxy into the knot holes in a thin stream to try and allow as much air to escape as possible. Off camera, I came back with a propane torch and popped any bubbles in the surface of the epoxy.

After the epoxy cured overnight, I could remove the excess. I like to use a combination of a block plane and card scraper to do this, and I’ve found that it’s just about the fastest way to do this. The block plane removes the bulk extremely quickly and then the card scraper flushes up the surface really well. And no wasting sandpaper and creating tons of epoxy dust, which is always a plus!
Step 5: Constructing The Cabinet And Drawer Section Of Your Coffee Table

Before cutting the top to final size, I went ahead and worked on the cabinet section of the coffee table. The first thing I needed to do was work on the side of the cabinet which would house the drawer front. I wanted to try something new here and cut the drawer front from the middle of the board, which would create a drawer front with a perfect continuous grain pattern.
To do this, I first laid out where the drawer front would be, making sure to label all of the parts, and then cut away the top and bottom sections at the table saw.
With the top and bottom strips removed, I could then crosscut the drawer front from the center section at the miter saw.
After that, all that was left to do was glue the parts back together, leaving the gap in the middle for the drawer front. I used Dominos for alignment again here, since alignment was pretty critical, and also made sure to leave a gap on either end of the drawer front for clearance.
The glue up went really smoothly, I just made sure to only apply glue to the areas that needed it and not along the entire length of the strips.
Once the glue dried, I cleaned up the board and then ripped all of the boards for the sides of the cabinet, including the board with the drawer front, to final width at the table saw.
Next, I cut the boards to final length at the miter saw, making sure to keep the drawer front opening centered on that specific board. I also used a stop block to ensure the boards were the same length.
With the boards at their final size, I could lay out the locations for the joinery for the cabinet, and I again went with Dominos but, once again, dowels or pocket screws would work great. The cabinet is just constructed with basic butt joints, so they need a little bit of reinforcement, but you could also use mitered corners, finger joints, dovetails, whatever floats your boat.

After cutting the mortises, I could glue up the sides. This went pretty smoothly, except that one of my clamps was causing one of the sides to bow, which threw off my square when I checked the cabinet for square. I was perplexed when, after trying to pull the cabinet into square by clamping on the diagonal, it still wasn’t square, but I finally figured it out and just moved the clamps.
Next, I cut a rabbet into the bottom edges of the cabinet with my router, to accept the ½” plywood bottom panel. I made this cut in two passes, and it’s a little tricky to balance the router on that second pass, but I prefer this to trying to wrestle this size cabinet on the router table.
After cutting the rabbet, I cut the bottom panel to size based on the size of the rabbeted area, and then rounded the corners to fit using my jigsaw and sander.

Once the panel was cut to size, I attached it with glue and brad nails. Unfortunately, I forgot that the bottom strip was so thin, so my brad nails blew through that area, but luckily that’s not visible in the final piece since the drawer blocks it, and I was able to fill those areas with some Walnut wood filler.
Step 5: Install The Internal Lift Top Mechanism

The next parts to work on for the cabinet were these riser strips, which bring the height up on the lift top mechanism. I wanted this cabinet to be deep enough to hold Blurays and video games horizontally, so I needed an inside depth of about seven inches. The lift top mechanism is 3 ¾” deep, so I needed to add these strips to bring the height up.

I cut the boards to size on the table saw and miter saw and then added pocket holes for fastening them to the inside of the cabinet.
Also, you might be wondering why I used these random Pine boards here, and it’s because I’m trying to use up some of the random lumber on my lumber rack, rather than purchasing new material. I also like using lighter colored woods on the inside of cabinets like this, so that it’s easier to see what’s inside the cabinet.
With the cabinet carcass assembled, I could cut the top to final size, first cleaning up one edge on the jointer and then ripping it to final width at the table saw. I left the top about an inch wider than the cabinet, so that the front edge would overhang and allow you to lift the top easily.

To make this front edge a little more comfortable to grip, I ripped a 45 degree bevel onto that edge. And you can see here how that bevel makes that edge a little easier to hold on to when lifting the top.
Next, I trimmed the top to final length using my track saw. Again, I left a little bit of overhang on each end, about 1/16” this time, and that was mostly to give myself a little wiggle room on aligning the top when installing the lift top hardware.

With the top trimmed to final size, I could work on getting the lift top mechanism installed. Since the riser strips were a little bit wider than the hardware, there was a little interference with the hinge mechanism, so I removed that material with a spokeshave.
Next, I fully extended the mechanism and roughly centered it along the riser strips, making sure it didn’t hit the side of the cabinet. I could then attach the lift to the risers with 2 ½” pocket hole screws.
I could then set the top in place, making sure it was positioned where I wanted it, and then carefully lift the top and clamp it in place before adding some 1 ¼” pocket hole screws.
For some reason, when I first went to close the lid, this hardware was skewing the top a little bit, but I was able to tweak it and get it level.
Also, I noticed the hardware was hitting the inside of the top in a few spots, which was adding resistance to the mechanism, so I just removed those areas with a Forstner bit and chisel.

Step 6: Drawer Installation

The last piece of the cabinet to work on was the drawer, which I kept simple and built with ½” plywood for the sides and ¼” plywood for the bottom.
I assembled the drawer with glue and pin nails and then reinforced the corners and bottom with 1 ¼” screws, making sure to countersink the holes first so they would sit flush with the sides. Also, this is by far my favorite countersink bit, as it has an adjustable depth stop, and I’ll link to it in the video description below.
To mount the drawer, I used these bottom mounted drawer slides, which I actually wish I hadn’t done since I really needed every bit of height on this drawer, but they were cheap and installed easily enough.

To install the other half of the slides inside the cabinet, I added some ⅛” spacers to bring the slides up and attached them with screws.
When I went to install the drawer, I realized I had made a mistake when the slide hardware was wider than the drawer opening. I somehow hadn’t accounted for the fact that the drawer hardware would add width to the drawer, and I was afraid I was going to have to build another drawer.
After staring at the drawer for a few minutes, I realized I could just turn it 90 degrees, since the length of the drawer miraculously worked almost perfectly as the width once I moved the slide hardware. I could then add some spacers to the inside of the risers to reduce the width of the opening and I was good to go. Phew!

With the drawer installed, I could then install the drawer front. I used the playing card trick to space the drawer front evenly, also making sure to align the grain pattern as best as I could. After getting the drawer front evenly spaced, I clamped it in place and added 1” screws from inside the drawer to attach it.
I wrestled with a few different ideas for the pulls but ended up going with a simple hole in the center of the drawer, rather than a traditional pull. Since this drawer will face the sofa, I really didn’t want to be hitting a drawer pull that protruded from the drawer front with my knees, and I think a simple hole actually works really well. I did add a little chamfer to the hole off camera, just to give it a little nicer look.

Step 7: Sand Your Coffee Table Before Applying Finish

Next, I could sand all of the parts up to 180 grit, which always takes longer than I expect. I also chamfered all of the edges of the pieces with my block plane.
Step 8: Apply Finish Top Coat To Your Coffee Table

After sanding came the moment I always look forward to, applying the first coat of finish. I always love the way Walnut comes to life when finish hits it. I sprayed on three coats of a water-based polyurethane, sanding between coats.
Also, I’ve gotta say, I just love spraying finishes. It is so unbelievably fast and I always end up with a much nicer surface than when I try to wipe on or brush on finishes. If you haven’t tried HVLP or are intimidated by it, it’s really simple after you get the hang of it. It took me all of 15 minutes to get the gun setup and I could get three coats applied in an afternoon, since water-based finishes dry so quickly.

Step 9: Construct Table Base Out Of Copper Tubing

With that, the top part of the coffee table was finished, so I could get to work on the base. I decided to try using ¾” copper pipe for the base, which is something I’ve never worked with before, and it went really smoothly.
First, I figured out how all of my fittings and pipe would go together and then started cutting the pieces to length using a pipe cutter. These cutters are cheap, about $15, and are really easy to use. You just tighten the cutter a little bit after each rotation and, before you know it, the piece is cut.
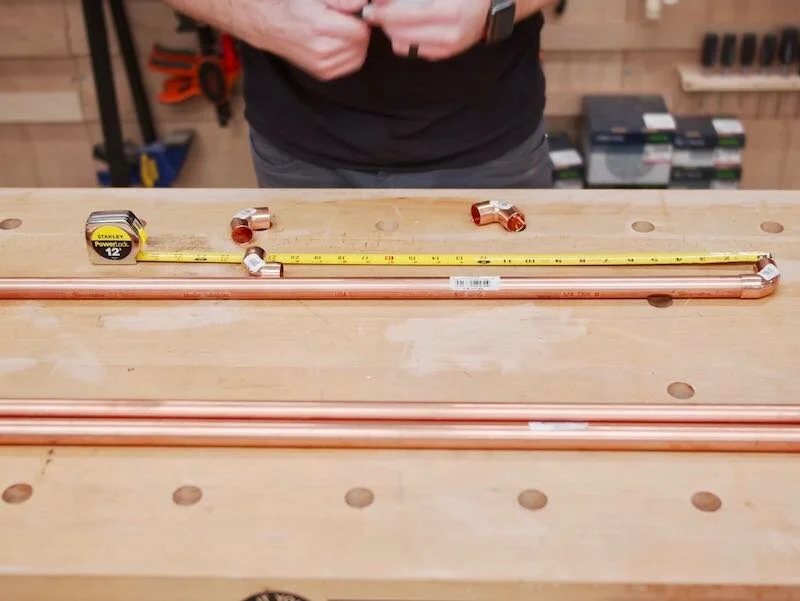
This base has three long stretchers that connect these rectangular ends, so I had to splice in some tees for those stretchers. The nice thing about working with these fittings is that you have a little wiggle room, since the pipe sits in the fitting about ⅞”.
Also, I used four 5 foot sections of pipe for this base and ended up with almost no leftover pieces.
Step 10: Solder All Joint Of Copper Tubing

After getting the base dry fit, I could start soldering all of the joints. Now, this was my first time soldering copper pipe so I am far from an expert, but here’s the process I followed.
First, I scuffed up the ends of the pipe with some sandpaper and also scuffed up the inside of the fittings with the brush that came with the soldering kit I bought.
Next, I added flux to the end of the pipe, as well as the inside of the fitting, and then pressed the pieces together, wiping away any excess flux.
Next, using my Bernzomatic TS8000 torch attached to a MAP gas tank, I heated the joint, making sure to focus the heat on the fitting rather than the pipe, since that will expand the fitting and allow more solder into the joint. Once the joint was hot, I could apply the solder, which is pulled towards the heat and drawn into the joint by capillary action.

If there are any excess drips of solder, you can wipe them away with a damp rag before they cool. That was pretty much it, I just needed to repeat that process a bunch of times.
After soldering, I needed to clean up the base. I started by removing the stickers on the fittings, which I probably should have done prior to soldering.

To clean up the excess solder, I first used a file to remove the bulk of it, which went surprisingly fast, and then further refined the surface with two different grits of synthetic steel wool. The lower grit helped to remove the file marks and smooth out the surface, and then the higher grit got rid of the bigger scratches left by the previous grit.

This whole process actually went a lot faster than I expected and I was left with this super nice, matte sheen on the copper.
To seal the copper and keep it from oxidizing, I sprayed on a few coats of an enamel clear coat, but if you wanted that oxidized look, there are all kinds of copper patinas out there you could try and get some really cool results.

Once the clear coat dried, I could get the base attached to the underside of the cabinet, and I just used some copper pipe hangers for this.
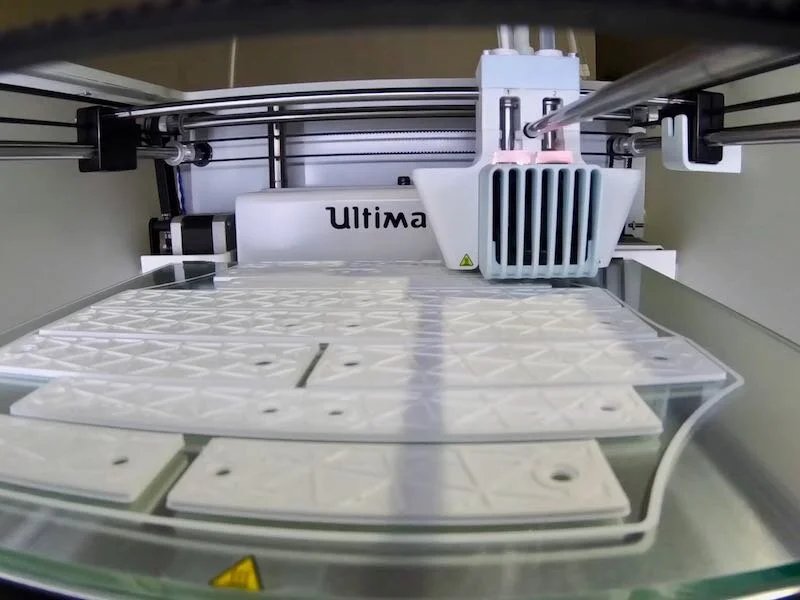
The last thing to add to this coffee table was some organization for the inside of the cabinet and drawer. First, I 3D printed these dividers to hold my PS4 and Nintendo Switch games, as well as my Blu-Rays. I needed to scale the dividers to fit the different cases but that was easy to do in Cura, the software that came with my 3D printer. I’ll have a link to the Thingiverse project for these dividers in the video description, in case you want to print some for yourself.
The dividers just attach with screws, which is really nice as I can change them out if I get more games or if game case sizes change in the future.
To organize the drawer, I added this Rockler Lock-Align system, which really helps keep the controllers from sliding all over the place inside the drawer and is great for organizing all of the little pieces that go with the Switch Joy-Cons.

With that added, I could call this coffee table complete!
