
How To Install A Kitchen Sink In A Camper Van Conversion
We're back with another camper van conversion build video! This time, I'll show you how to install a kitchen sink in a camper van. That's right, The Singletrack Sampler finally has running water in his van!
Note: The links below are Amazon affiliate links.
📦 Parts Used On The Camper Van Kitchen Sink Build :
🛠 Tools Used On The Camper Van Kitchen Sink & Backsplash Build:
📦 Parts Used On The Camper Van Kitchen Cabinet & Backsplash Build :

Camper Van Kitchen Sink, Cabinet & Backsplash Build Process:
Alex has been living in the van for the last year and, overall, things have gone really well. I’m happy to report that everything we built (including the convertible bed) has held up well, which is pretty impressive considering the amount of use everything gets on a day-to-day basis.
That said, over that year, Alex has figured out what his pain points are in the van, and the biggest one by far is the lack of running water. You and I are most likely used to living with running water and take it for granted, but not having running water makes everything from rinsing off vegetables to washing dishes a laborious task.
One of Alex’s biggest annoyances is the process of brushing his teeth, as simple as that might sound. You see, since there is no sink to spit into, he has to open the door to the van, which, during the winter, lets in a ton of cold air.
Well, we’re going to fix those issues in this video, plus address another one of Alex’s biggest limitations, storage.
Step 1 : Gather Your Plumbing Parts For The Sink
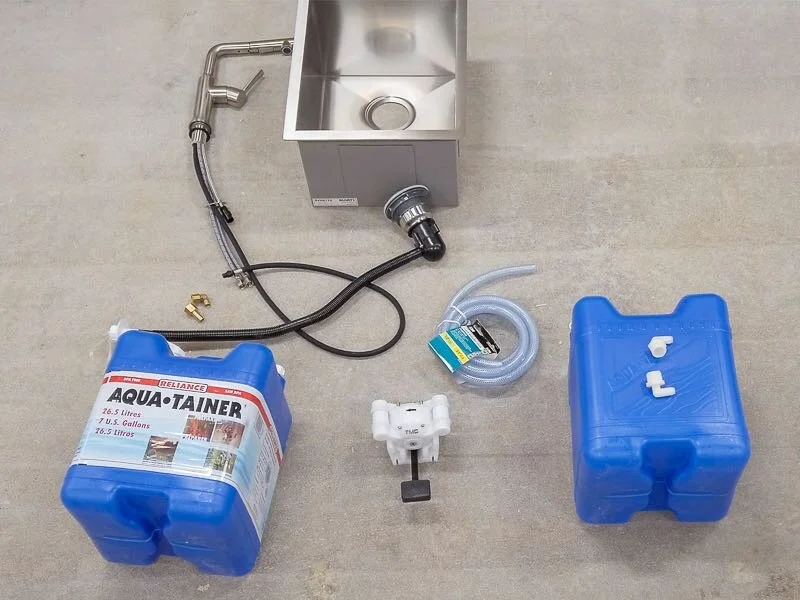
The first step in this project was assembling all of the parts and pieces we needed to complete the water system, which included a sink and faucet, freshwater and greywater tanks, foot pump, tubing, and lots of fittings. We spent a ton of time scouring Amazon and taking measurements in the van, and this is the system we settled on.
Step 2 : Cut Sink Template Out Of Van Countertop

We started with cutting the hole for the sink, and first we needed to remove the drawers from one side of the tool chest, which has been serving perfectly as Alex’s kitchen counter and cabinet.
Once the drawers were removed, we laid out the location of the sink using the template that came with the sink, making sure it was nice and square and that we would have clearance for the jigsaw.
To start the cut, I first drilled a hole through the top and then got to cutting after drilling the starter hole. Since this was an over mount sink, the cut didn’t necessarily have to be super pretty, since the flange on the top of the sink would cover the cut, but I still did my best to follow my lines.
After finishing the cut and vacuuming up the dust, we dropped the sink into place and it fit perfectly, which was a huge relief. We dropped in the faucet temporarily and also test fit Alex’s stove and everything was pretty much perfect.
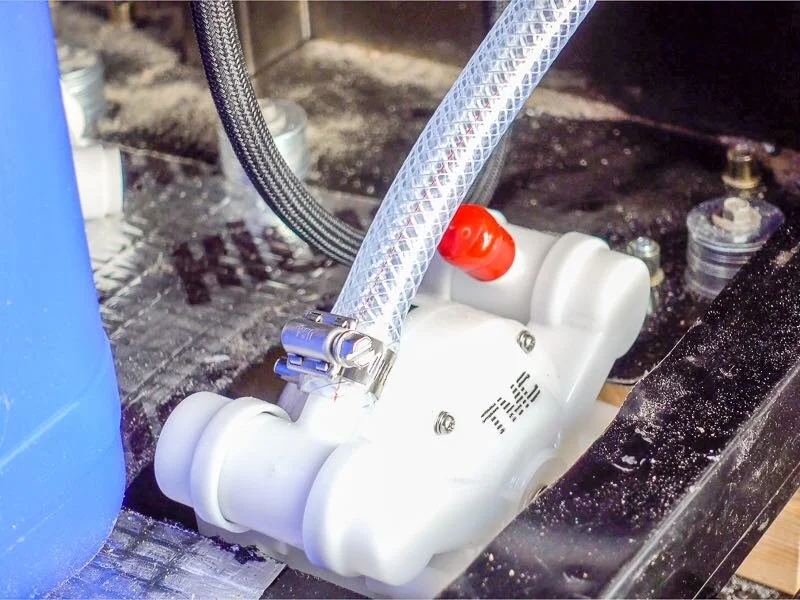
Step 3 : Install The Foot Pump For Running Water In Van

With the sink dry fit, we could move on to the other bit of major surgery on the tool chest, cutting a hole through the bottom for the foot pump.
First, we nailed down the placement of the greywater tank and made sure the sink would drain properly with that placement, and then laid out the location of the foot pump.
By pure luck, the arm on the foot pump extended past the front of the tool chest perfectly with it placed just behind the inside wall of the chest, so we marked out a hole and got to cutting again with the jigsaw. We got the foot pump fit and then I attached it to the floor of the van with screws.
Step 4 : Connect The Tubing And Plumbing Fittings For The Van Sink

With the pump installed, we could move on to the plumbing. First, I connected a few fittings to change the faucet from the standard ⅜” size to fit the ½” nylon tubing.
This required two fittings in our case, but I found a better fitting which would be easier to implement. Also, I made sure to use teflon tape on all of the threaded fittings to prevent any leaks.
We went ahead and drilled a hole on the other side of the tool chest, which is where the tubing will run to the fresh water tank, which is stored outside of the chest.
Back to the plumbing, I got the drain hose attached to the greywater tank with another fitting and a hose clamp and then tucked the tank into place.
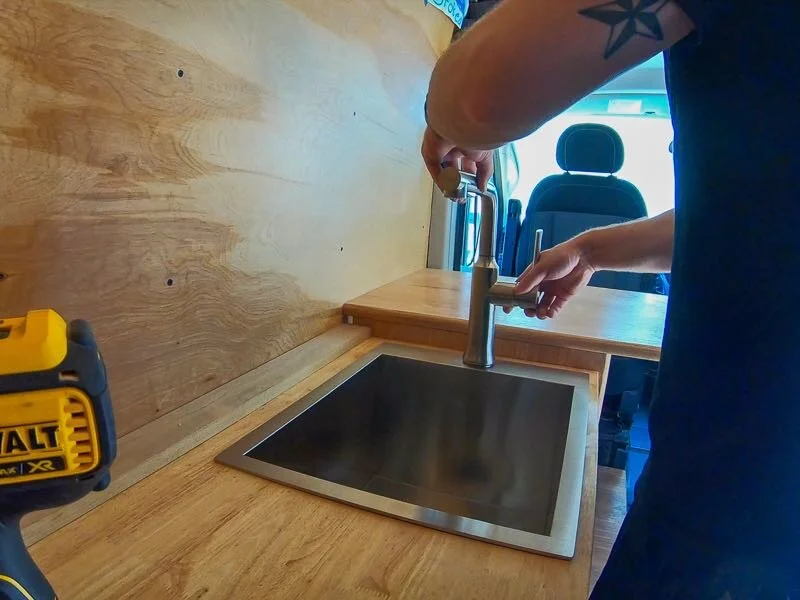
Next, I got the faucet permanently installed, using the hardware that came with the faucet. I also added the counterweight and stop to the spray wand, which helps the line retract when you return the spray wand to its locked position.
Next, I attached the output of the pump to the faucet using ½” nylon tubing, making sure to add hose clamps to help secure the connections. The tubing just slides over these barbed fittings and is held in place with the hose clamps.
With the output side attached, I could attach the input side, again using a hose clamp, and then ran the nylon tubing through the tool chest, out the hole we drilled previously. I measured the length of the tubing I’d need and then cut it to length.
Next, I attached the fittings to connect the tubing to the tank lid and then ran the tubing to the bottom of the tank. Finally, we could connect the tubing to the tank and the system was all connected.
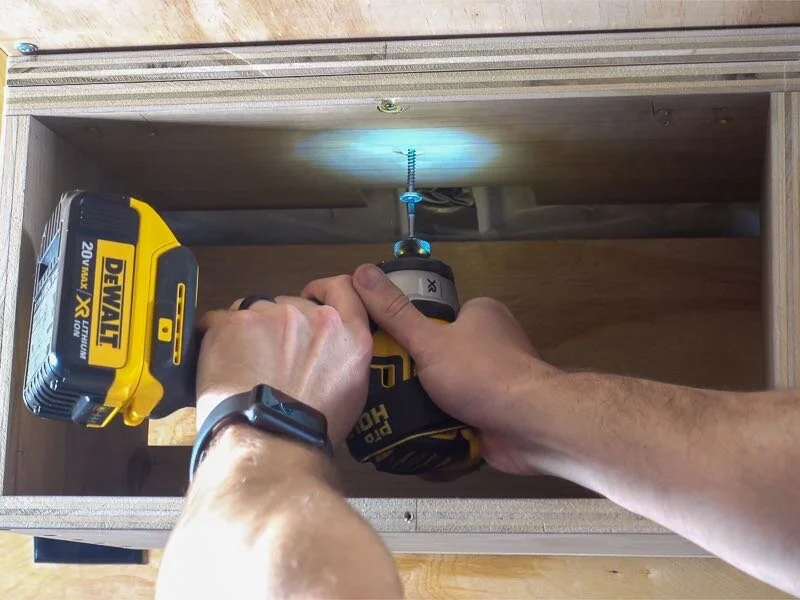
Step 5 : Permanently Attach The Sink In The Van
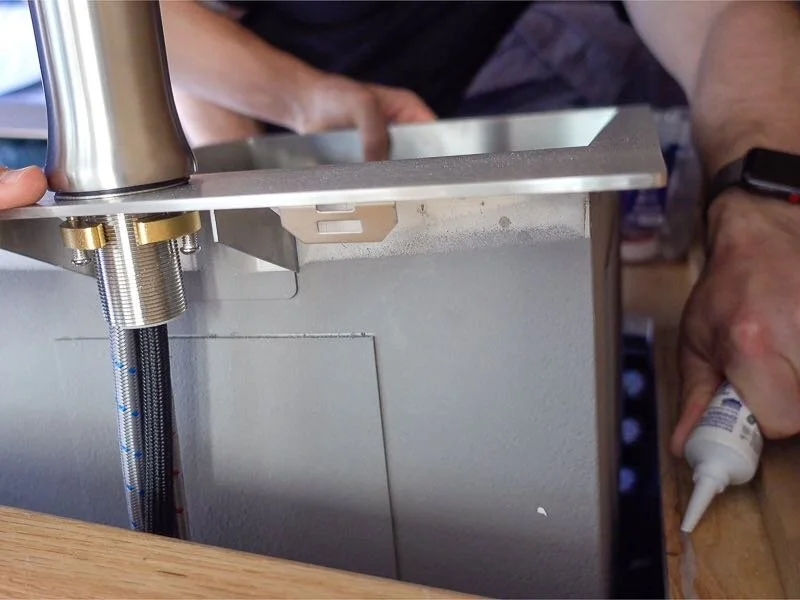
To permanently mount the sink, we ran a heavy bead of silicone around the perimeter of the flange and then dropped the sink into place.
This sink comes with clips to help provide clamping pressure to seat the sink more securely, but I could only access two of the clips since it was so tight in the tool chest. I was able to get a little creative with a clamp and hold the corner I couldn’t add the clip to in place.
We wiped away the excess silicone around the sink, and then also applied a bead of silicone to the trim piece at the back of the cabinet, which we installed in the original van series.
Step 6 : Build And Install Doors In The Lower Cabinet
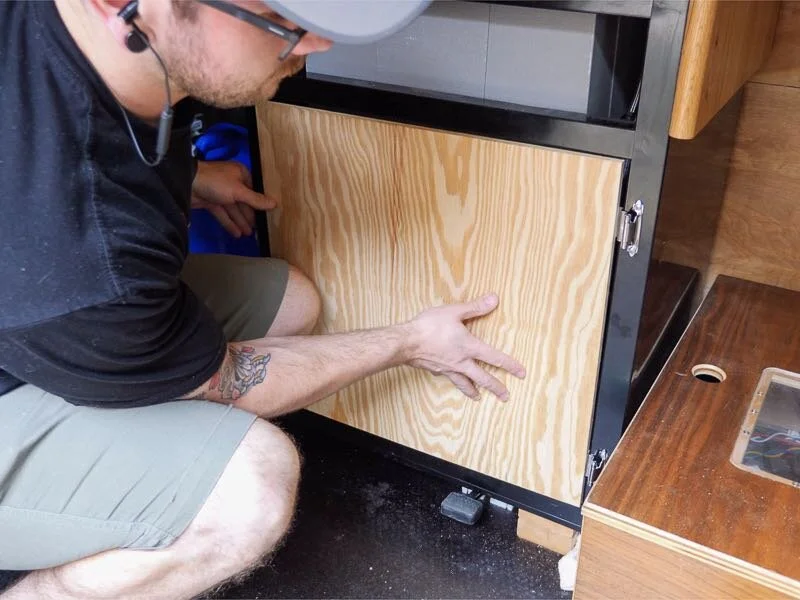
Next, I could get to work on closing the cabinet back up. I used some basic plywood I had leftover from the shop build for this and cut the pieces to size at the table saw and miter saw.
We used some basic self-closing hinges for the lower door and the only difference here from using these hinges on a regular cabinet is I had to use sheet metal screws.
Once the hinges were in place, we could get the door hung, and it was definitely helpful having two sets of hands here. Alex clamped the door to the hinge while I held it in place, and then I added screws to attach the door to the hinges.
After the door was hung, I added a rubber stop. I also went ahead and added the door across where the top drawer used to be, and I used a piano hinge to attach the door here.
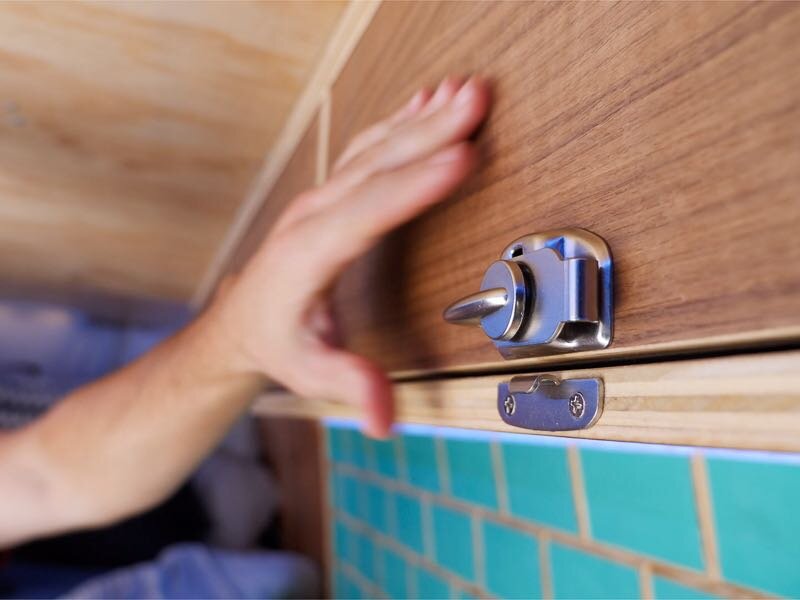
Step 7 : Install Latches In The Lower Van Cabinet
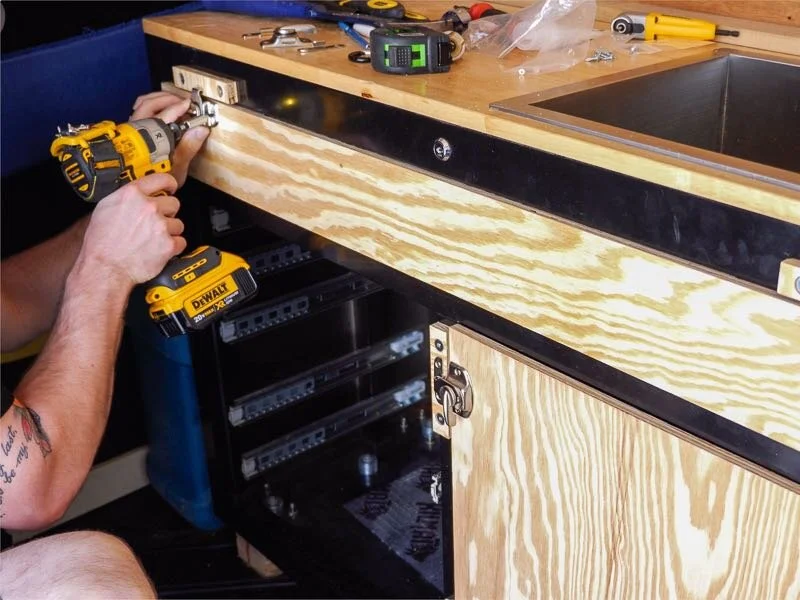
Next, I needed to add some more security to keep the doors shut while Alex is on the road. I first created some mounting plates for the latches, as the latches needed to be mounted in the same plane as the doors.
I attached the plates with large head sheet metal screws. I used these screws throughout this build, as you’ll see, and they were a lifesaver.
For the latches, we found these window sash latches, which have the benefit of pulling the door tight when they’re closed. These ended up working out perfectly and were also pretty cheap. I installed two latches on each door, which provided more than enough holding power, and the doors were done.
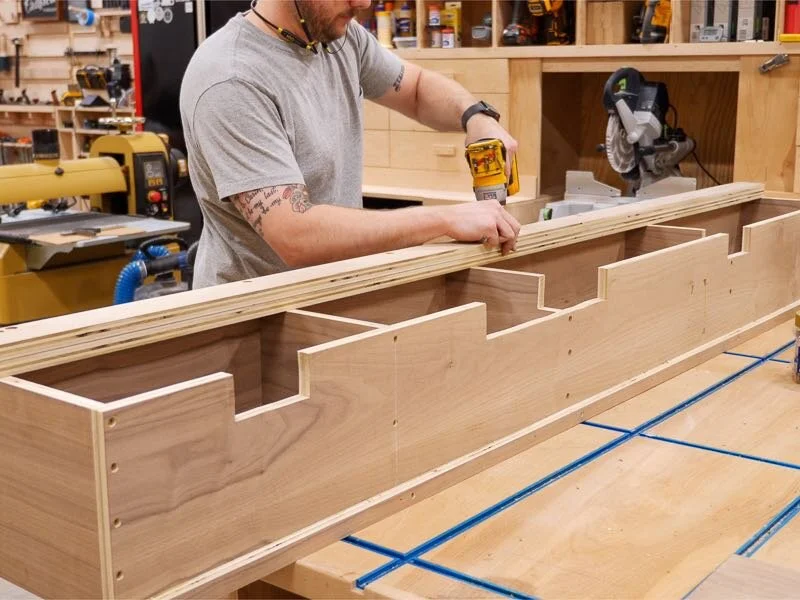
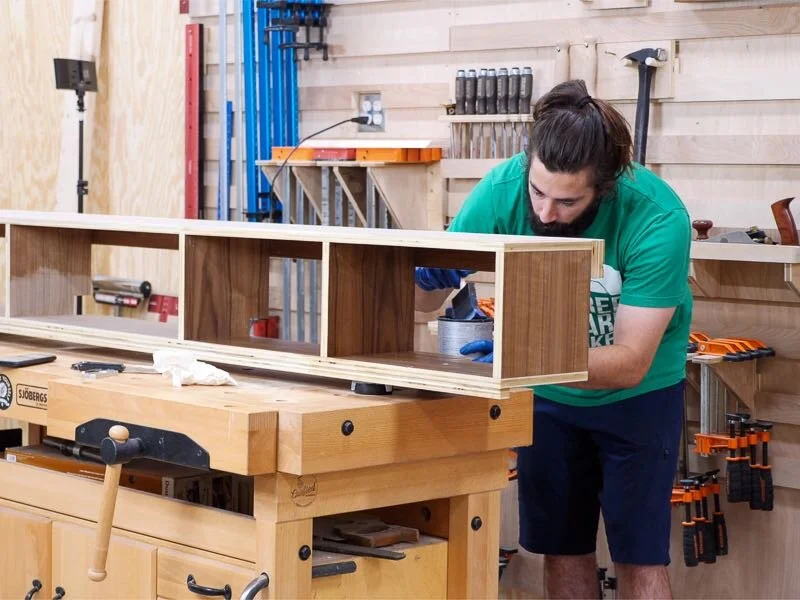
Step 8 : Building The Upper Cabinets For Van Build

With that, the tool chest was pretty much done, so we could get to work on the upper cabinet, which is what makes up for the storage Alex lost in the tool chest.
We decided to go with Walnut veneer plywood here, mainly because there is a lot of Birch and Maple plywood in the van and the Walnut breaks up the color a little bit. We cut the plywood into strips at the table saw, and then I cut the pieces to length at the miter saw.
I kept the cabinet construction super simple and just used screws and glue. I used 1 ¼” screws to attach the sides to the top and bottom and made sure to countersink the holes.
After getting the cabinet exterior assembled, I went back and added the dividers. We built this cabinet around specific plastic totes, so I made sure two of the totes would fit side by side in two of the four cubbies.
I took my time getting the placement of the dividers just right, making sure they were square both front to back and vertically. After I got them aligned and clamped in place, I attached them with more 1 ¼” screws.
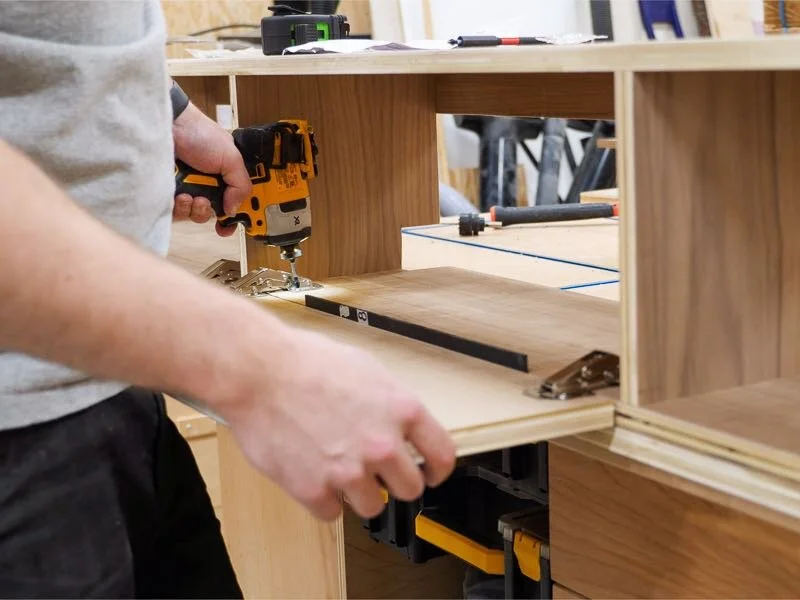
Step 9 : Dry Fitting The Upper Cabinet In The Van
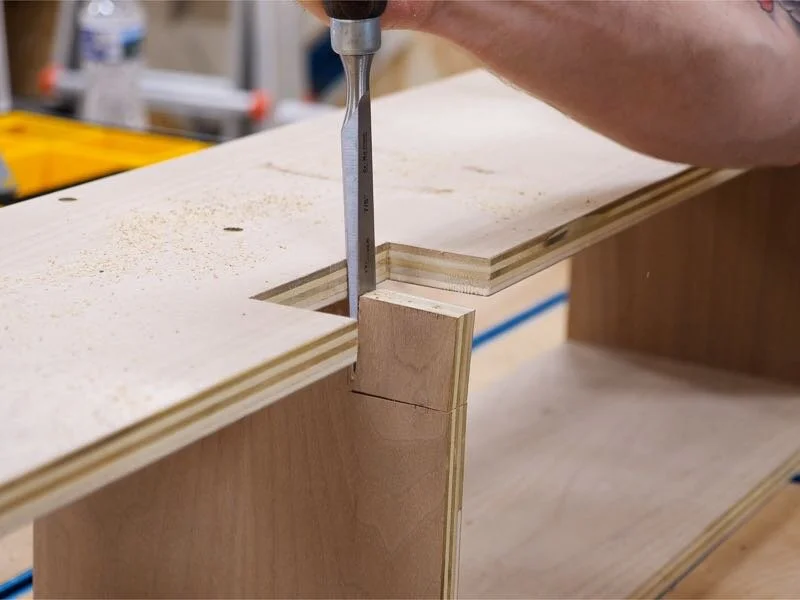
With the cabinet assembled, we could get the cabinet dry fit in the van. The main obstacles to work around were some ribs that ran up the sides of the van. They kept the cabinet from fully seating into the upper corner, which made the cabinet take up more space than needed.
I notched out the areas around these ribs using a combination of my jigsaw, Japanese pull saw, and a chisel. I definitely erred on the side of oversized on these cutouts, since they didn’t really impact any of the storage space available in the cabinet, and after a few dry fits, we eventually got the cabinet fitting pretty well.
Now, as we found out the hard way in the last van build, the walls and ceiling on the van are curved, but luckily we could make up for that curve with a few extra strips of plywood at the front and back edges of the cabinet.
I ripped the strips at the table saw and then attached them to the cabinet with brad nails and screws. I added one strip to the top front edge and two strips to the bottom back edge in total.
Step 10 : Permanently Installing The Upper Cabinet In Van
With those strips added, we could finally get the cabinet attached to the van. I used those Powerhead sheet metal screws again, making sure to pre-drill the holes, and we drove the screws into the areas of the roof and walls where we knew there were ribs behind the paneling.
This ended up being pretty easy, since the panels had visible screws in them, and we knew those screws went into the furring strips which went into the ribs.
Step 11 : Building And Installing Door Hinges In The Upper Cabinets
After confirming the fit, I could get to work on the doors for the cabinet, which I made out of more Walnut veneer plywood. Once again, I cut the doors to size at the table saw and miter saw, and I left an ⅛” gap on all sides of the doors.
For the hinges, we used these spring loaded hinges, which allowed us to have the doors open upwards and stay open, but they were pretty tricky to install.
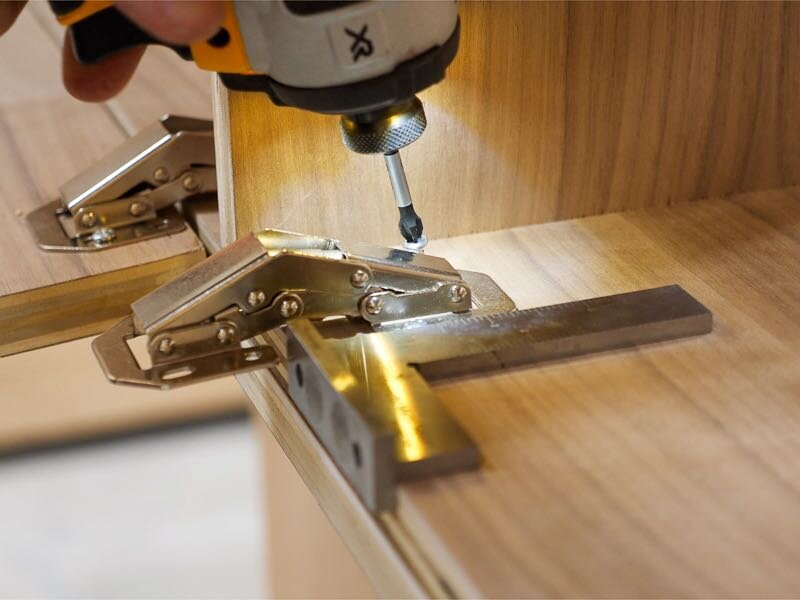
I would definitely recommend installing the hinges on some scrap pieces to figure out your offsets before drilling into your finished cabinet, because otherwise you’ll most likely end up with some extra holes to fill like I did.
To start, I only added two screws on each side of the hinges in the elongated holes, as this allowed for some adjustment after the hinges were installed. After installation, I could use an ⅛” spacer to set the offset on the hinges until I got the door centered in the opening and flush with the front of the cabinet.
I ended up using rubber feet for door stops, as I didn’t want them rattling or making a ton of noise when they shut, but I would recommend these FastCap Euro door stops I used on a previous project, as they’re adjustable.
With all of the doors adjusted and working correctly, I could install the same latches that I installed on the tool chest to keep the doors shut more securely. The biggest thing here was making sure the latches were centered on the doors, but they installed pretty simply.
Step 12 : Finishing The Upper Van Cabinets
With all of the hardware installed, I could remove it all to prep for finish. Super annoying but better to be able to fill your errant holes prior to finishing than afterwards.
I chamfered all of the edges of the cabinet with my block plane and then sanded the entire cabinet up to 180 grit.
Before sanding the doors, I drilled holes for easy opening with a Forstner bit at the drill press. I figured we didn’t want any protruding door pulls and I personally think these holes look cool, work well, and are super simple. After drilling the holes, I sanded the doors up to 180 grit, breaking all the edges, especially on the holes.
While I sanded the doors, Alex got to work applying finish to the cabinet. We used a water based polyurethane and I just love the way Walnut pops when finish is applied.
Step 13 : Cutting The Plywood Subway Tiles For The Van’s Backsplash

With the cabinet permanently installed, I could take some measurements for the faux subway tile backsplash, inspired by my buddy Laura Kampf.
First, I ripped the panel into strips about 4 inches wide, and then I tilted my blade to 45 degrees and set the fence to cut off part of the corner of the strips, still leaving a flat spot on the edge. I also added a featherboard to make sure the strips had even pressure on them, and to help keep my hands away from the blade.
After cutting the angle on the long edges of all of the strips, I cut the tiles to length at the miter saw, setting up a quick stop block with a clamp and scrap piece of wood.
After cutting the tiles to length, I set up the crosscut table on my table saw and snuck up on the cut before setting the stop block. You could also do this at the miter saw.
What you’re looking for is the two angled edges to meet perfectly, like they do here.

Once my stop block was set, I got to work on the tedious task of cutting the angles on both sides of all of the tiles.
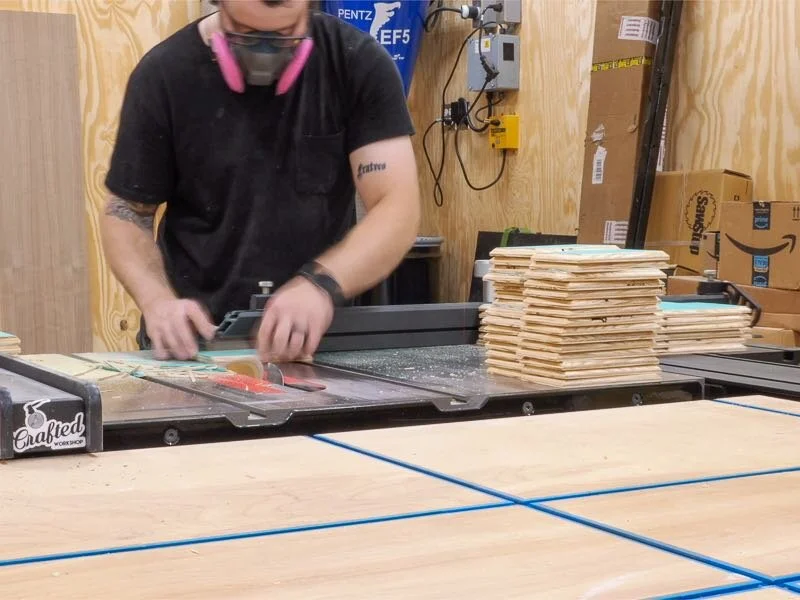
After finally finishing cutting the angles, I went ahead and cut a handful of tiles in half, so that the rows of tiles could be staggered.
Step 14 : Installing The Faux Subway Tile Backsplash In The Camper Van
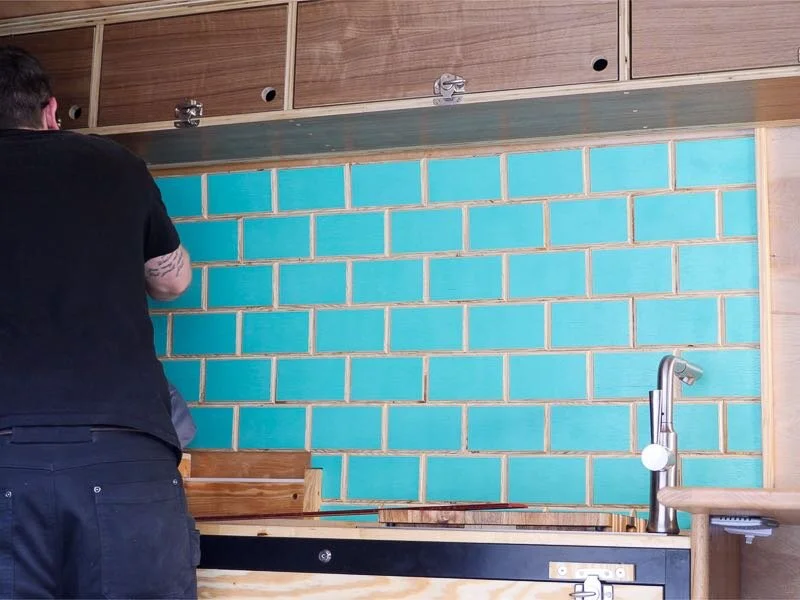
Finally, we could get to installing the tiles. First, I scribed the first tile to fit the desk and sanded it to fit using my spindle sander off camera, and then I marked and cut the last tile in the first row to length, also off camera.
With those two tiles fit, I could get the first row installed using construction adhesive and brad nails. After getting the first row installed, I offset the second row by half a tile and continued getting the tiles installed.
The second row ended short as we needed to be able to clear the bed rails, so the third row was the first full length row. I started with a full tile on the third row, once again to maintain the staggered look, and just kept working my way up the wall until we got to the cabinet. I ended with a full row at the cabinet, which left us room to add the strip lights later.
Finally, I could add some corner trim to cap off the ends of the tile backsplash and the backsplash was complete.
Wrapping Up The Camper Van Kitchen Sink And Backsplash Project
And with that, this portion of the van project was pretty much a wrap. Alex added back the LED strip lights and they look great above the backsplash.
The cabinet provides tons of storage, and Alex used some different types of totes to provide some nice, modular storage in the cabinets.
The faux subway tile backsplash obviously added a ton of visual appeal to the space and also provided a much needed color pop to the interior of the van.
And finally, of course, the sink, which has obviously made the biggest difference in the space. The foot pump works well, but the nice thing about this system is it’d be extremely easy to add an electric pump if Alex wanted in the future, using the same plumbing setup.
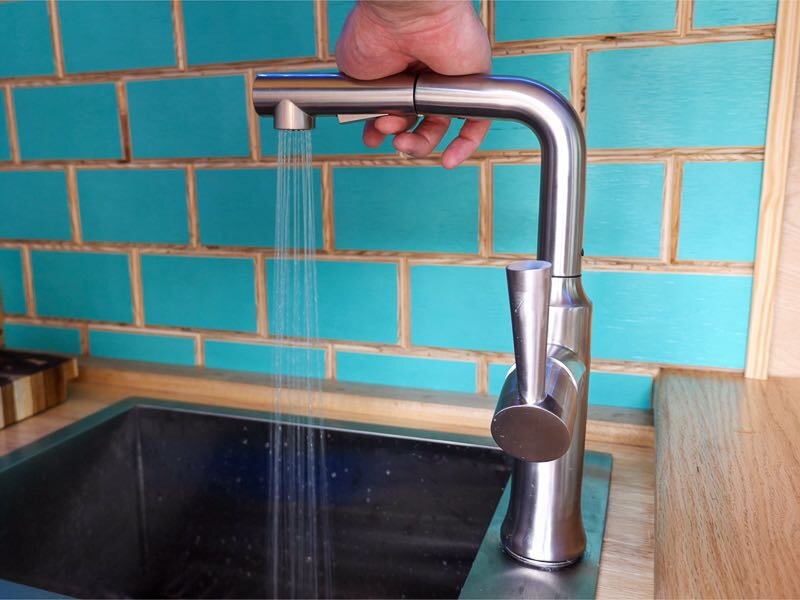
That said, the foot pump provides plenty of flow for washing dishes, rinsing off food, and, of course, brushing your teeth.
I think the real testament is comparing Alex’s previous cooking setup to this one, which feels much more like a normal kitchen. These little comforts are what makes van life more enjoyable and, most importantly, more fun.
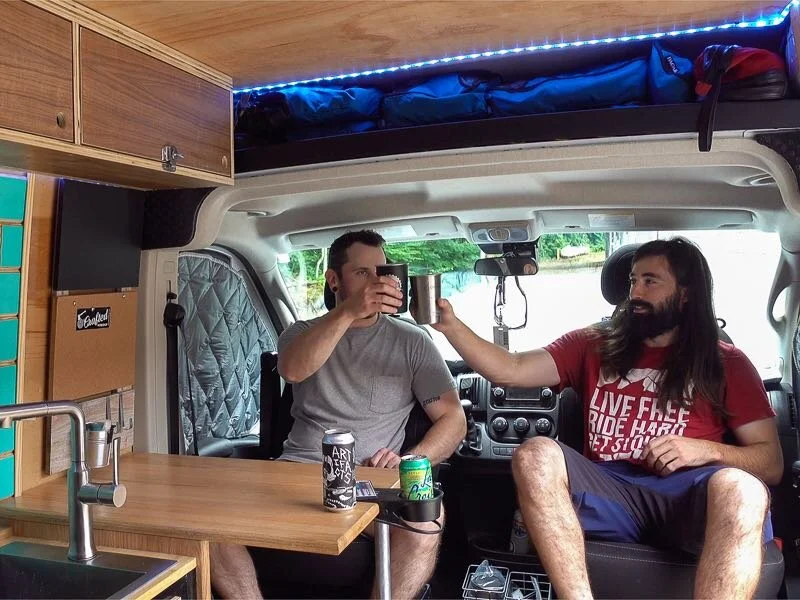
With that, all that was left to do was crack a couple beers, washing out some pint glasses first, and sit back and admire our work.
Thanks for reading this post! Check out more of my previous van build project, while you’re at it. If you’re interested in seeing my more typical woodworking projects, read more of my other woodworking projects. Thanks for reading and, until next time, happy building!