
DIY MOBILE MITER SAW STAND with Wheels // How To Build - Woodworking
Learn how to build this DIY mobile miter saw stand, complete with wheels and an extension wing, and it's way better than a jobsite miter saw stand!
📦 Materials Used On The DIY Mobile Miter Saw Stand (affiliate):
🛠 Tools Used On The DIY Mobile Miter Saw Stand (affiliate):
How To Build A Mobile Miter Saw Stand:
Step 1: Break Down OSB

The first step in building this miter saw stand was to break down the sheet of OSB I was using into more manageable chunks, and having this workbench with a drop down miter saw made this super easy.
After dropping the miter saw down and sliding on the sheet of OSB, I could crosscut the panel using my track saw. This crosscut was at the final length of the miter saw stand, which was 76 ½” in my case.
After crosscutting, I could then rip the larger piece into more pieces, the first of which would make up the bottom panel of the miter saw stand. This OSB, which is leftover subfloor material, has a tongue and groove, so I first ripped the bottom panel oversized and then ripped it to final width, removing the groove at the same time.
Next, I ripped another panel to the same width of 18”, and the top panels, along with the sides of the miter saw stand, would come from this piece.

Finally, I ripped two strips, which would be the stiffener rails, which will help keep the miter saw stand from sagging in the middle under the weight of the miter saw.
Next, I moved back to the track saw and crosscut the two top panels to final length and, once that was done, I could rip the sides, front and back pieces to width.
Step 2: Layout The Design Of The Miter Saw Station
With that, most of the pieces were cut to size, so I could move on to laying everything out. I started by placing the top panels on top of the bottom panel, and then I added my miter saw just to double check that everything was going to fit correctly.
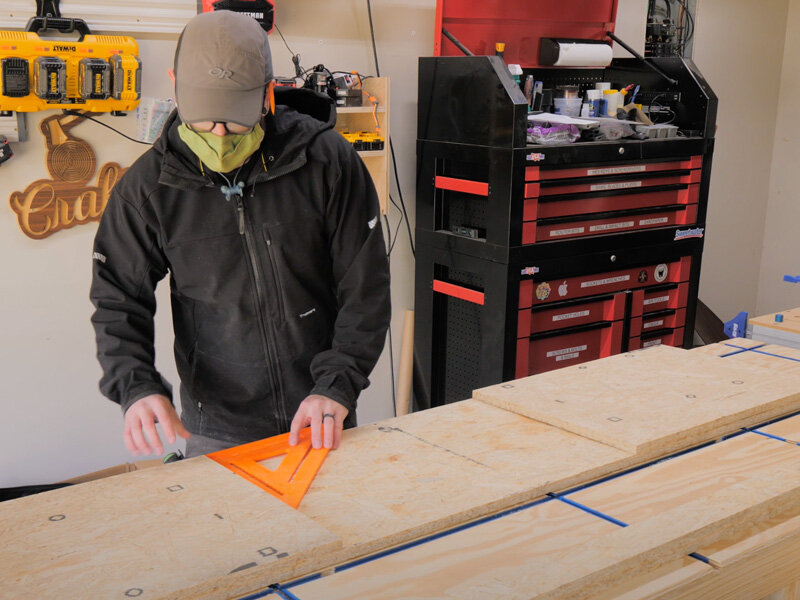
Thankfully, the space between the top panels was a good fit for the saw, but I did need to mark out where the miter saw would contact the top panels when turned to its outermost miter positions.
I marked out these areas with my speed square and then I could get my miter saw on this workbench set back up to make the angled cuts in the top panels.
I made both of these cuts at 45 degrees, even though this DEWALT miter saw will swing to 60 degrees in one direction, and this was just for ease of assembly. I just made the angled cut a little deeper on the right top panel to account for this additional clearance.
Step 3: Cut Parts To Final Size

Next, I got the back pieces cut to final size and then I could start cutting the angled ends on the front and inside side pieces, where they meet up with that angled corner on the top panel.
Rather than trying to measure this, I just marked where the pieces intersected the top and cut to my line. I find that trying to measure beveled pieces like this accurately is really difficult and cutting to a line, especially with the assistance of something like a laser line on the miter saw, is much easier.
After making the cut, I could test the fit and it looked great. Also, I ended up adding one more filler piece between the front and inside side panels, but I waited until later on in the build to do this, since I figured it’d be easier to fit the piece later in the assembly process.
Step 4: Cutting The Openings

I repeated the same process on the left side of the miter saw stand off camera and then, once all of the pieces were cut to their final size, I could move on to cutting the openings in the front, back, and side pieces.
This miter saw stand is based on a design by Ron Paulk, and Ron is pretty famous for the torsion box design with rounded rectangular openings he uses on most of his workbenches and shop projects.
Cutting these openings can be a little tedious, but they really help to both reduce the weight of the structure and also open up the inside for storage.
I had considered using a router with a template bit to make these cuts, but since most of these pieces were a different size, I decided to just manually cut the openings with a hole saw and jigsaw.
All of the side, front, and back pieces had a matching piece, so I was at least able to pair the pieces when drilling the holes, which saved a lot of time on layout.
After laying out the hole locations and taping a pair together, I drilled the four corner holes with a 2” hole saw, which made quick work of this process. Also, I did flip the pairs once I got through one of the pieces, to avoid blowing out the other side.

Once all four holes were drilled, I could mark a straight line connecting the edge of each hole and then cut to this line with the jigsaw. I initially tried cutting through both pieces at one time, but this resulted in an extremely slow cut that ended up with a pretty severe angle, so I switched to cutting one piece at a time, which went much more quickly.
After cutting, I was left with the trademark rounded rectangular opening that these Paulk-style workbenches are known for, and next I just needed to cut this opening on the other five pieces.
Step 5: Drilling Pocket Holes For Assembly

With the openings cut, I could move on to assembly. I decided to use pocket holes to assemble the sides, back, front, and top panels. To avoid confusion when drilling the pocket holes, I marked out where I needed to drill the holes while the pieces were dry fit, and this made things a lot easier.
Next, I got my pocket hole jig set up for ¾” material and then I could start drilling the pocket holes, again drilling holes where I had marked for them.
Step 6: Assembling Mobile Miter Saw Station

Once I drilled all of the pocket holes, I could move on to assembling the pieces, which was simple enough. Before attaching the pieces, I made sure to clamp them together securely, as pocket screws have the tendency to push pieces out of alignment otherwise.
I just worked my way around the perimeter of the sides and then, once those pieces were assembled, I could set that assembly onto one of the top panels to get it attached.
As you can probably see, this piece of OSB had a pretty good bow to it, so I really took my time during assembly here, making sure all of the edges were lined up and well clamped before driving in the screws, and this resulted it a really nice, flat and square finished product.
I repeated the same process on the other side assembly and then I could move back to the bottom panel.
As I mentioned while breaking down the pieces for this stand, the bottom panel has a pair of stiffener rails attached, which help to keep the stand from sagging, since it will only be supported by a pair of saw horses.
I first marked out the location of these rails on the bottom panel, and then I could cut the rails to final length at the miter saw. I also cut a small angle on each end of the rails, which will just allow me to reach into the sides of the stand without running into a sharp corner.

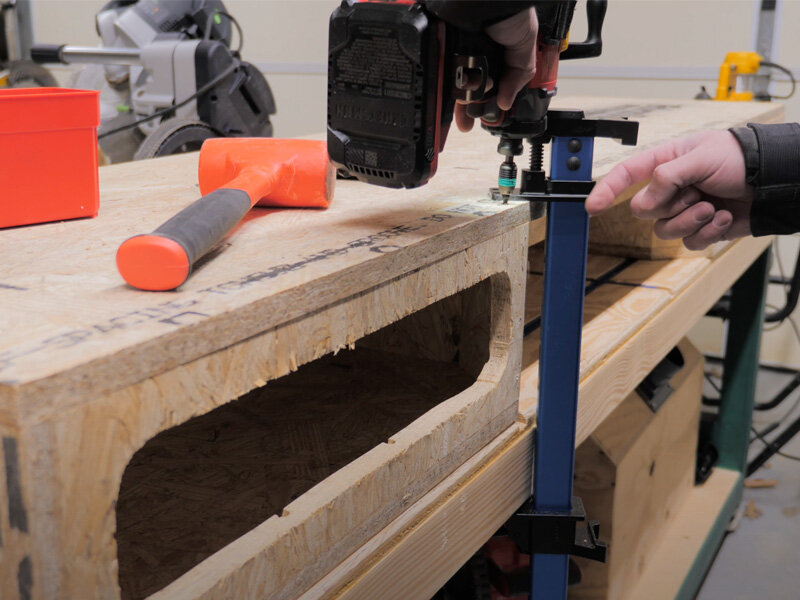
To attach the rails to the bottom panel, I once again called on pocket screws, so next I needed to drill pocket holes along the length of each of the rails.
After drilling the holes, I clamped one of the rails in place then drove in the screws.
One note here, I ended up clamping this assembly to my workbench, which I didn’t realize has a very small sag in it. This sag was then transferred to this miter saw stand because of this. Instead, I would recommend just clamping the rail directly to the bottom panel, as the rail should be straight and will pull the bottom panel straight.
Anyway, I repeated the process for the second rail, and then I could set the top assemblies in place to mark where I needed to notch them around the rails.
This interference between the top assemblies and the rails is the one kind of funky part of this design, but I think having the rails on top of the bottom panel, rather than on the underside, does keep the whole thing more compact and makes it easier to slide the whole unit into the back of a truck or up onto sawhorses.

Anyway, I notched the pieces with my jigsaw, purposely cutting the notches slightly oversized to avoid interference during assembly.
The last piece to fit was the little filler piece, which I cut from one of the offcuts. I attached this piece using a little glue and a few brad nails and, while this piece probably wasn’t completely necessary, it definitely gives everything a more finished look.
Next, I could flip everything over and get the top assemblies attached to the bottom, and I used trim head screws for this. I would have used pocket screws here, but I wouldn’t have had access to drive the screws and, since these screws are on the bottom, they won’t be visible in the finished piece.
Once again, I made sure to take my time here and clamped everything together tightly before adding the screws, and I also predrilled the holes to avoid splitting the OSB. As you can see, the bow was pretty severe in some of these pieces, but clamping them in place before adding the screws solved the issue entirely.
Step 7: Test Fit Miter Saw

Once everything was screwed together, I could flip over the unit and test fit my miter saw, which thankfully fit really well. This saw measures just over 3 ½” from the bottom of the feet to the bed of the saw, which makes for simple work support alignment using a 2x4 on edge.
I just sized my stiffener rails and side panels with this measurement in mind and ended up with the miter saw bed just proud of the sides, which is exactly what I want, so the work piece is always referencing the saw and not the stand.
With the fit confirmed, I removed the saw and got the spacer pieces cut to size using the table saw and miter saw. Also, I left these a little oversized, so that I could use them again if I ever swap to a different saw in the future.
I attached the spacers to the stiffener rails with a few screws, and I would double check where the mounting holes on your saw are before adding screws here because, as luck would have it, one of these screws ended up directly below one of the mounting holes for my saw and I consequently had to remove it.
Step 8: Chamfer Edges

With that, the stand was assembled, so next I cleaned things up a bit by giving the stand a quick sanding, removing all of the printing on the OSB and knocking off any splinters.
As you’ll know if you watch any of my shop project videos, I hate leaving sharp edges on these kinds of projects, as you’ll inevitably catch a knuckle on that edge in the future. Because of this, I decided to chamfer all of the sharp edges and used a Whiteside chamfer bit from Bits and Bits for this.
I chamfered the top and bottom edges of the stand, but most importantly I chamfered the openings in the sides, since I’ll be reaching into those openings when storing items in the stand. Also, I’ve gotta say, I definitely miss the dust collection on my Festool router when using this little trim router, and I was covered in dust after adding these chamfers.
Step 9: Adding Wheels
With that, the stand was pretty much done and it would definitely be useable in its current state, but I decided to try a few kind of quality of line add ons, starting with adding wheels to the stand.
Now, this wheel assembly is something I came up with after roaming the aisles of my local big box store for half an hour, but I think this should work well and all of this hardware came to a grand total of $30, which I think is well worth it to make this stand mobile.
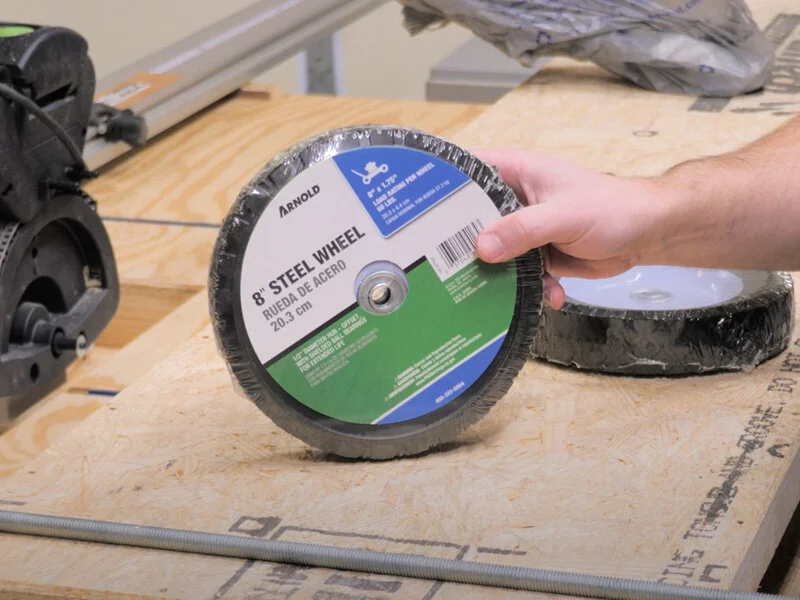
I found these replacement 8” lawnmower wheels, which have integrated bearings and a ½” shaft diameter, and I figured ½” threaded rod would make for the perfect shaft, since I could add nuts to keep the wheels in place.
I added a fender washer on either side of the wheel, with a lock washer and hex nut on the inside and a locknut on the outside, to keep the wheel on securely.
After adding the locknut, I tightened the hex nut on the inside of the wheel until it was just snug, and then I could attach the whole assembly to the underside of the stand.

I purchased these ½” EMT conduit straps for this, but they were pretty loose on the threaded rod and I was afraid this would end up with too much play in the finished connection. That’s when I realized that the strap would fit over the hex nut nice and snug, and this would keep everything securely in place.
I used some large washer head screws to attach the straps, making sure I was driving the screws into the sides of the stand so the connection would be stronger.
Next, I repeated the process on the other end, threading on a hex nut and attaching that end with another conduit strap, and then I added a few more straps to the center of the threaded rod just for good measure.
Before installing the other wheel, I dry fit the parts and marked where I needed to cut the rod, which I did using a reciprocating saw with a metal cutting blade. This left a bit of a burr and, unfortunately, I somehow don’t have a metal file here at the house, so I ruined a piece of sandpaper to clean up the burr.
Finally, I added the wheel and tightened down the locknut, and then I could try out the wheels to see how they worked. To my surprise, they actually worked really well, although I think I’m going to adjust the positioning of the wheels and add a block to the end of the stand so I can stand the unit up vertically without it tipping over.
Step 10: Install The Miter Saw

With that done, I could finally get the miter saw installed, which was as simple as marking hole locations, pre-drilling holes, and attaching the saw with some washer head screws.
Now, I don’t plan to remove and re-install this saw regularly, but you could certainly use threaded inserts and bolts here instead, if that’s something you’re planning on.
After reinstalling the saw, I once again double checked the fit and everything looked great. One awesome feature of this design is the full nine inches of support in front of the fence, which will make cutting wider boards no problem.
Step 11: Adding An Extension Wing To The Miter Saw Station For Longer Material

The last thing I wanted to add to this miter saw stand was an extension wing, which will help support longer material. I used the offcut from the same sheet of OSB for the bottom of the wing, but I used a strip of OSB roofing material for the back, which really just serves to keep the wing from sagging.
After ripping the back strip to width and cutting it to length, I could attach it to the base, first tacking it in place with brad nails and then adding more trim head screws.
To support the extension wing at the edge of the stand, I first whipped up a quick little support block using more of the offcuts, but this wasn’t an ideal solution. I replaced this with a thicker block, which allows me to attach the extension wing further from the end, which would better resist chipping out the end of the wing.
To attach the wing to the support block, I first countersunk and drilled a pair of holes through the wing into the support block and then installed threaded inserts in the support block. Finally, I threaded the machine screws through the wing into the threaded inserts, and the wing was securely attached, with the other end supported by a roller stand.
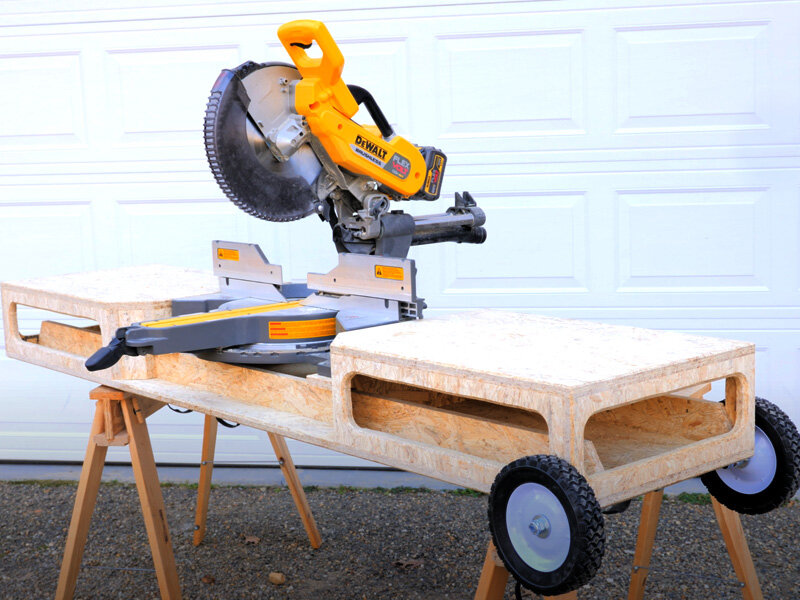
With that, the miter saw stand was officially done, for now at least, so I could roll it out into the driveway and get it set up on some sawhorses.
