
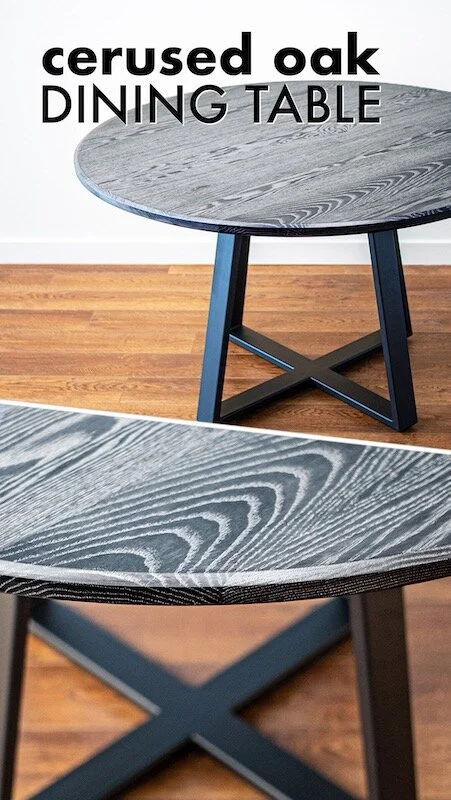
How To Build A CERUSED OAK Round Dining Table
Learn how to build this round oak dining table with a welded steel base and cerused (or limed) finish! This table is sized to seat four and would fit perfectly in any modern kitchen.
Note: The links below are affiliate links
🛠 Tools Used On The Round Dining Table:
📦 Materials Used On The Round Dining Table:
Pin it!
Process For Building A Dining Room Table:
Step 1: Milling Oak For Dining Table
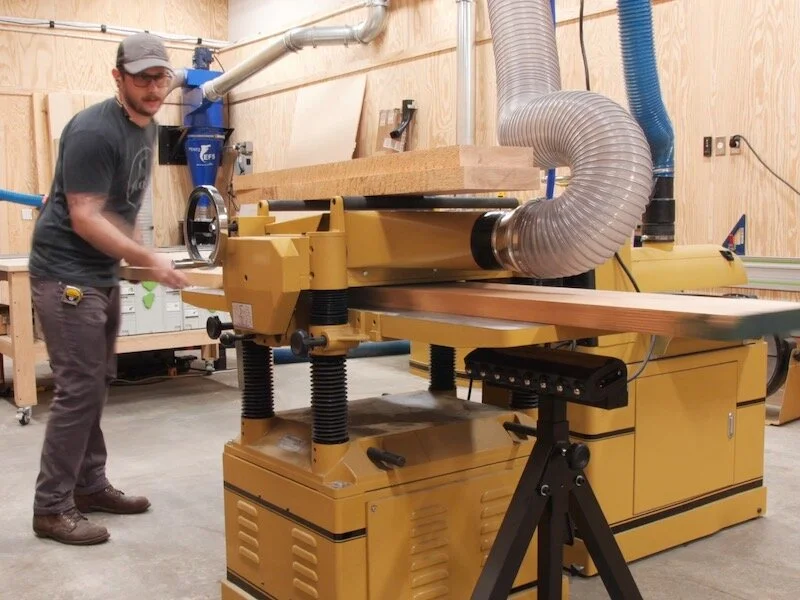
I started this project like I do any other project that involves rough lumber, by milling the boards square and flat, starting at the jointer. Some of these Red Oak boards, which I picked up from my local lumber dealer Asheville Hardware, were super wide, at over 10 inches, but luckily my monstrous 12” jointer could handle them no problem.
I flattened one face and then squared up one edge to that face, making sure to mark which face I had towards to jointer fence when squaring up the edge. That way, I could joint the opposite edge after trimming the boards to final width, canceling out any error from the jointer fence.
After getting one face and edge flat, I took the boards over to the planer to bring the other face into parallel.
I trimmed the boards to final width at the table saw, also trimming off a few problem areas while I was at it. I was going for an overall table diameter of 50” and made sure to give myself plenty of extra width.
Finally, I touched up the edges I cut at the table saw at the jointer. I referenced the marks I made earlier and made sure to orient the boards so the opposite faces were against the jointer fence, which again cancels out any error in the jointer fence’s squareness.
Here’s a basic illustration of this concept, to help explain what I’m talking about. If you joint your boards in this way, it doesn’t matter if your jointer fence is slightly out of square, as the boards will still end up perfectly flat when gluing up your table top.

After getting the boards milled up, I laid them out in the orientation I thought looked best and then figured out how large of a circle I could get out of the top. I ended up with a diameter just over 50”, which is a great size for a round dining table for four people.
Step 2: Glueing Up Oak Dining Table
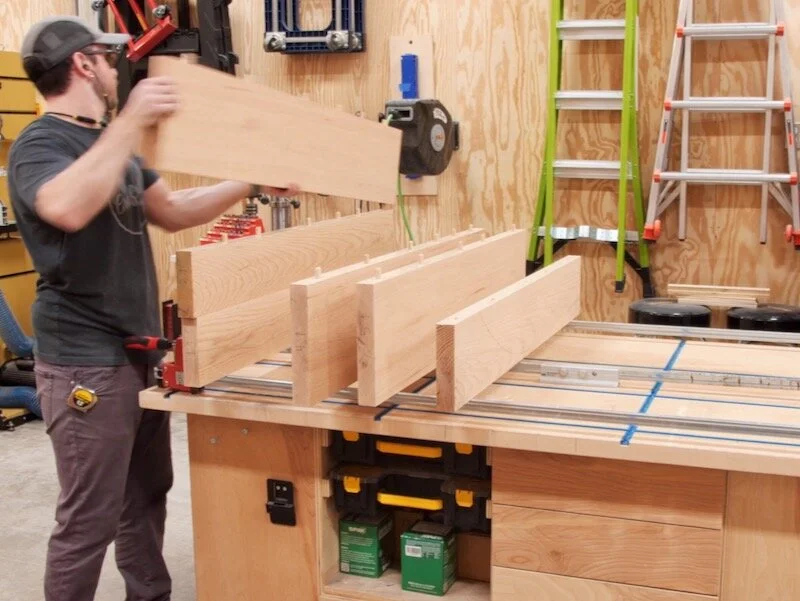
Next, I laid out locations for Dominos, making sure to place them in areas I wouldn’t cut through when cutting out the circle. I definitely didn’t want exposed Dominos on the edges of my table top.
And, as always, if you don’t have a Domino, dowels or biscuits also work great for alignment.
After cutting the Domino mortises, I could glue up the top, and I think this is the widest table top I’ve ever glued up. I had to pull out my longest clamps and also add extension adapters to a few clamps to get enough clamping force.
Once the glue dried, I removed the clamps and then scraped off any dried glue, both from the table top and my assembly table. This is the main reason to finish your assembly table or workbench, as you can see that glue will just pop right off of the finished surface.
Before cutting out the circle, I went ahead and gave the bottom of the table top a good sanding to get rid of any ridges between the boards, as the router jig could get hung up on these.
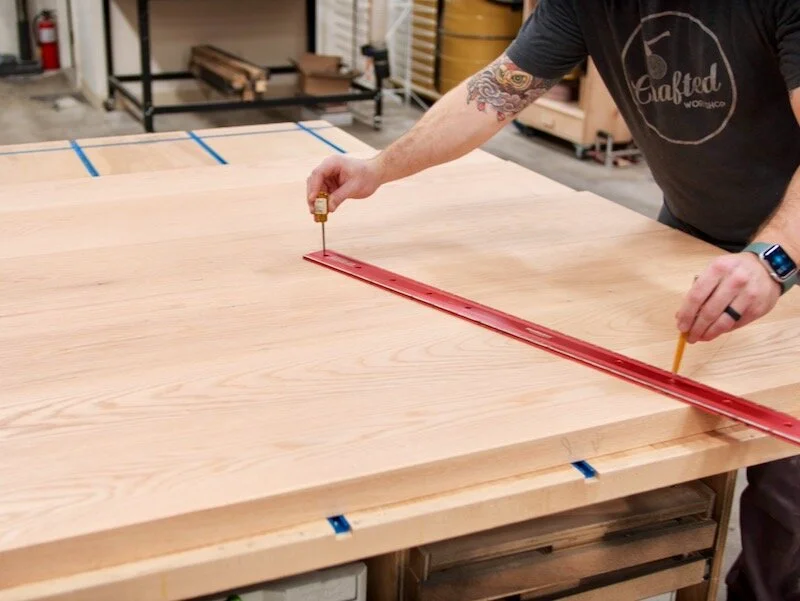
Step 3: Circular Dining Table Shape Cut With Router Jig

Speaking of the router jig, I had to whip up a quick jig, even though I know I’ve built one of these in the past and I’m pretty sure I’ve owned the Rockler circle cutting jig as well. I think they both got lost in the move, so I had to build another one.
That said, I’d definitely recommend the Rockler jig if you’re cutting circular pieces frequently, and you can also cut ellipses with their jig as well.
After whipping up the jig, I marked the center point on the bottom of the table top and attached the jig with a screw and washer. The washer helps to keep the screw from backing out if you run your router counterclockwise, although I went clockwise here.
With the jig attached, all that was left was to route in the circle shape. I used a spiral bit here, which left me with a super clean finish, although it was a little short and left a tiny ridge where the shaft of the bit contacted the wood on the final pass.
I made the cut in multiple passes, taking about ¼” per pass, and made sure to vacuum out any compacted dust in the groove between passes to help keep the bit cool.
Also, technically, I’m climb cutting here, since I’m running the router clockwise, although it is surrounded by wood for most of the cut. Making a climb cut meant the router could get a little grabby, but as long as I took it slow, the climb cutting left me with an even better surface finish, especially on the end grain.
After finishing the cut, I sanded the edge a bit, although again it didn’t need a ton of sanding because the surface finish was so good, and then I could add an edge profile in the form of a huge chamfer.
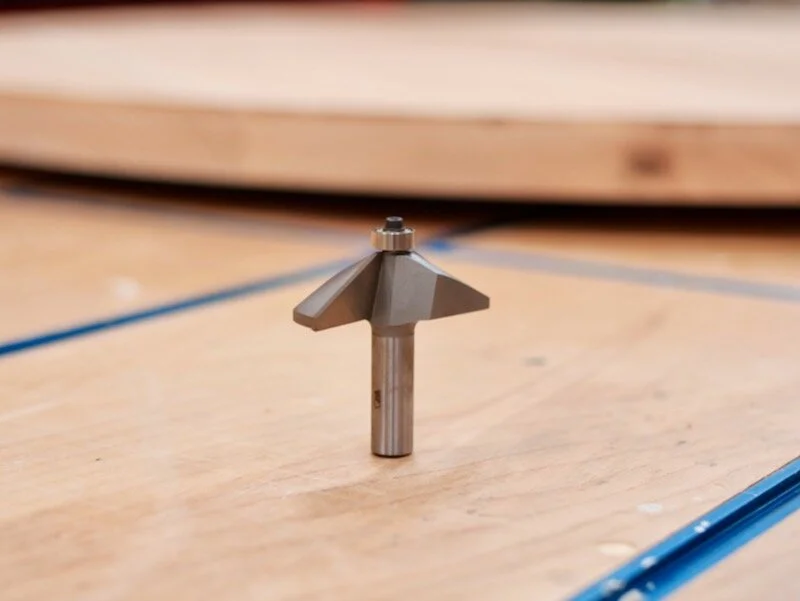
I just picked up this beast of a 60 degree chamfer bit and it was exactly what I wanted on this table. Adding a chamfer like this, especially to the bottom edge, really lightens the visual weight of the top and I personally love the look.
Unfortunately, I somehow lost the footage of me actually routing the chamfer, but you’ve seen me do that in the past. You can see the final look here, with the lighter chamfer on the top edge and the super heavy chamfer on the bottom edge. I really love this look and am definitely glad to have this bit in my arsenal.
Step 4: Cerused Oak Finish On Dining Table

Anyway, after routing and then sanding the top up to 180 grit, I could get some finish applied to the table top. I decided to go with something a little different this time and tried a "cerused" finish, as I’ve seen it called.
Basically, this is a stained finish with a contrasting color added to fill the grain. This technique works particularly well on woods with an open grain structure, like Oak and Ash.
I started by staining the top black, and I used my trusty India Ink here. That said, I’m not sure if I’d use it again, as I forgot that it actually has shellac added to it. I’m not sure if that will effect the bond of the contrasting grain fill, which was in the form of Rubio Monocoat in my case. I’d recommend an alcohol-based stain instead, and I’ll link to one here.
Anyway, after staining the top black and letting it dry, I mixed up a batch of Rubio Monocoat in their Silver Grey color. I used the Accelerator to help speed up the cure time, which I’d definitely recommend unless you want to wait three weeks to use your table.
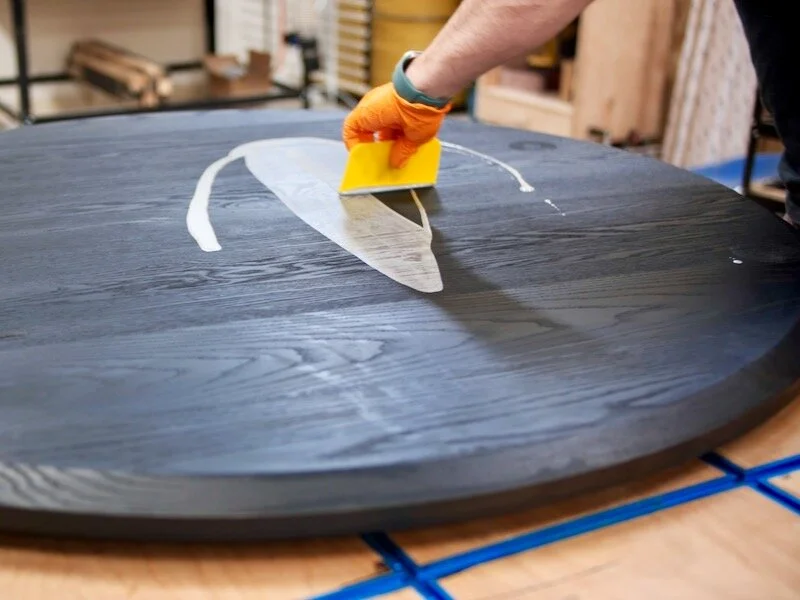
I applied the Rubio with a plastic spreader, which is the ideal tool for this task since it doesn’t absorb any of the extremely expensive finish.
After spreading the finish with the plastic spreader, I came back and worked it in with a small piece of white synthetic steel wool, which helps to work the finish into the grain but is also great for adding the finish to the edges.
Once the finish was on, I let it sit for a few minutes to react with the wood, and then wiped off all of the excess. This is the real key to using Rubio, and you want the table to feel dry to the touch after you’re done wiping.
I went over the surface numerous times until I was left with a pretty much clean paper towel after wiping the surface. I also buffed in the finish a bit with a synthetic steel wool pad on my random orbit sander, but I’m not sure this did a whole lot.
On the top, I worked in smaller sections, as the finish started to get a little too thick when trying to apply it to the entire bottom side at once. Applying the finish in sections made it a lot easier to wipe off the excess and left me with a cleaner finish.

I actually came back and added a second coat to the top after letting it cure for a few days, and I wanted to make sure all of the grain was really filled, and this left me with a great looking top.
With that, the top was essentially done, so I could move on to the table base, which I decided to make out of steel.
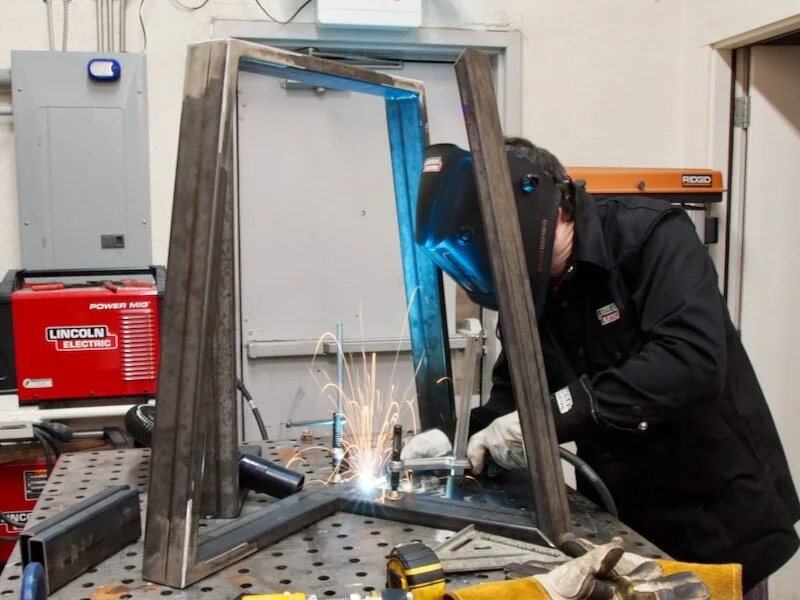
Step 5: Welding Metal Dining Table Base

The base design consists of two isosceles trapezoids, joined in the center at 90 degrees. To create this base, I decided to first create one of the trapezoids out of solid pieces, and then create the second trapezoid out of smaller pieces cut to match the size of the first trapezoid.
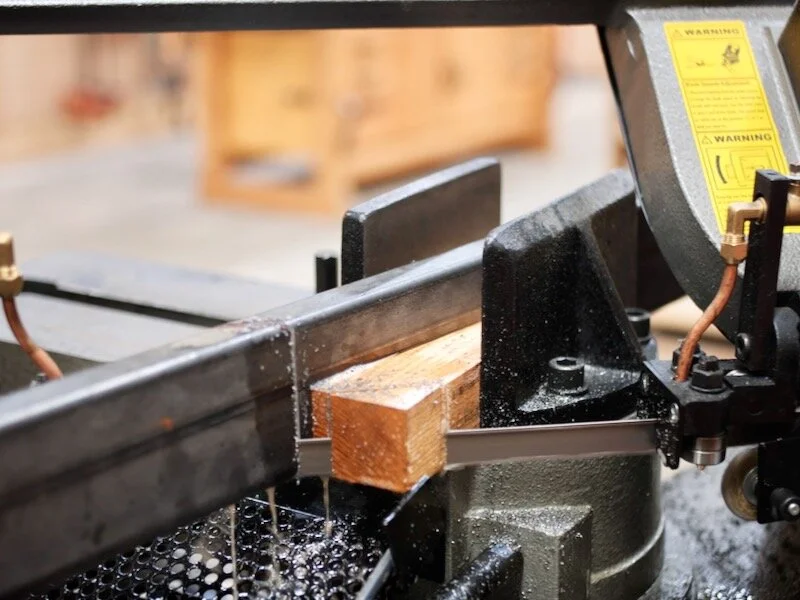
I cut the table base pieces to size from 1 inch by 3 inch rectangular tubing, and I once again had to get creative to cut the steeper angles on my metal cutting bandsaw.
The bandsaw could cut the 40 degree bevels just fine, but the cutting angle maxes out at 45 degrees, and, of course, I needed to cut 50 degree bevels on the ends of some of the pieces.
To cut these pieces, I created a pair of 10 degree wedges, which I could use to clamp the workpiece in the bandsaw’s vise. This added 10 degrees brought the angle I was actually cutting from 40 degrees up to 50 degrees, so I could leave the angle setting on the bandsaw the same throughout the cutting.
Another challenge I have when cutting steel like this is marking accurate layout lines. Most steel marking tools, such as Sharpies, paint pens, and even the Silver Streak metal pencil I tried, are all too blunt for marking very accurately.
On this project, I used my scratch awl to actually scratch in the lines, and this left me with an extremely precise line that was also really easy to see, especially if I marked the area with Sharpie first.
I cut the legs and the pieces for the first trapezoid to size, and then I needed to come up with a way to clamp them while I welded them together.
I decided to whip up a pair of clamping jigs from the offcuts from the table top. One jig needed to have an 80 degree angle, which I made off camera, and another needed a 100 degree angle, which I’m making here.
I marked the angle with my speed square, rough cut to my line at the bandsaw, and then cleaned up the cut at the jointer.
Finally, I drilled a few through holes, where I could add some clamps, using a Forstner bit at the drill press, and the jig was done.
In retrospect, I probably would have cut these on my X-Carve CNC, to make them even more precise, but this worked well enough.
With my clamping solved, I could bevel the edges of the pieces to prep them for welding. I absolutely love using my belt grinder for this, as I can get extremely precise bevels, but an angle grinder works as well.
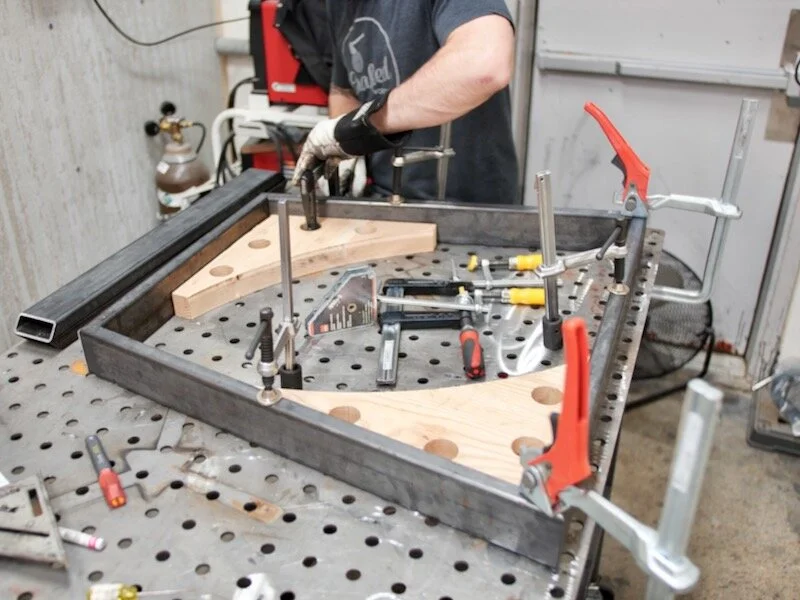
Once the pieces were prepped, I could get them clamped in place using my clamping jigs. As you can see, they made it super simple to get the pieces aligned, and then I could clamp them to the welding table to make sure they stayed flat.
I got my welder, the Lincoln Electric Power MIG 210 MP, dialed in for welding ⅛” thick material, which is as easy as selecting a few menu options, and then I could get to welding.
I tacked the pieces together, and I made sure to only tack three of the sides initially, so that I could still have one flat reference face to clamp to the welding table while I tacked the other corner in place.
Speaking of which, next I tacked the other corner in place and then I could add the top stretcher. I had left it a little oversized, so I cut it to fit and then tacked it in place.
With everything tacked in place, I confirmed that the top and bottom stretchers were parallel, and then I ran full welds on all four corners.
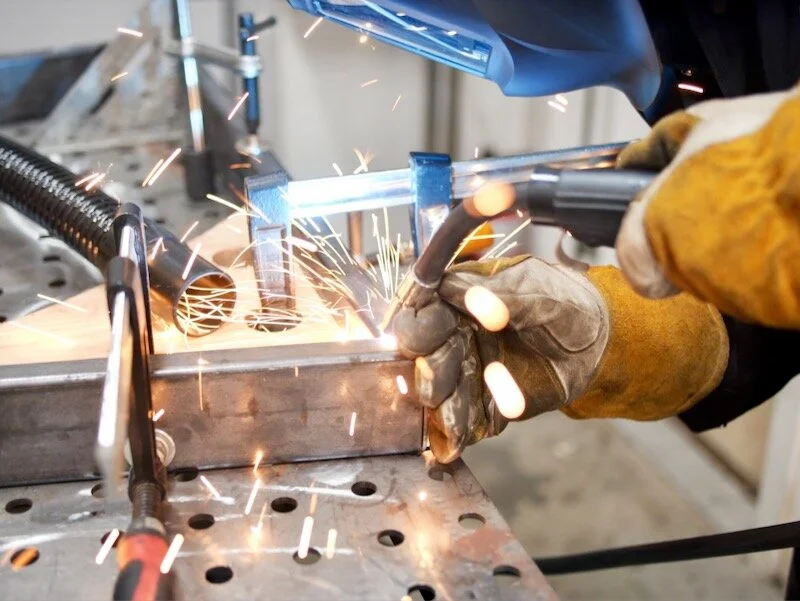
I wasn’t too concerned with aesthetics on the outside welds, since I knew those would be ground down, but I tried to make the inside corners look as nice as I could.
Also, I should mention that, if you’re interested in welding, Lincoln Electric is running a sale on the Power MIG 210 MP now through the end of March, with a $376 rebate bringing the price down to $1,099. This is a killer deal on this welder and it’s honestly the easiest welder I’ve ever used. I’ll have a link in the video description below in case you want to check it out.

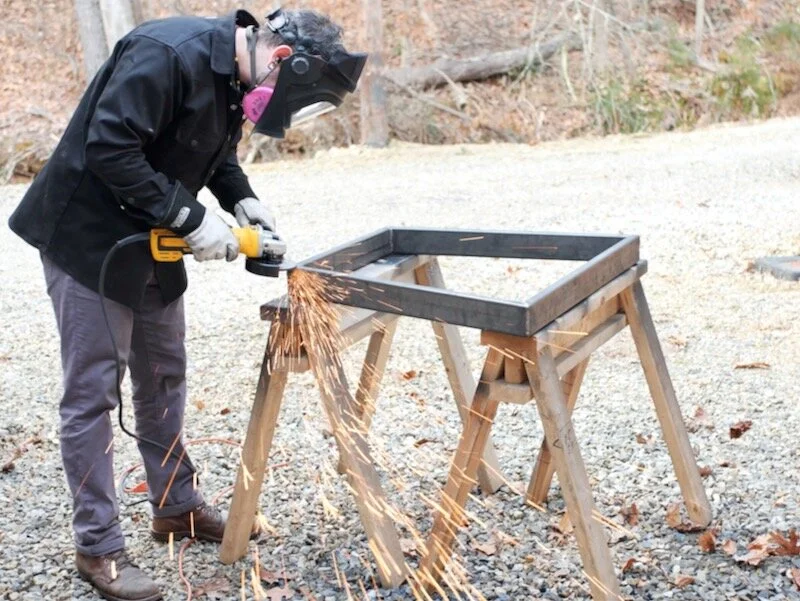
Anyway, after welding the first trapezoid, I decided to go ahead and grind down the welds before adding the other trapezoid, since I figured it’d be easier to get at the welds.
Unfortunately, it was actually snowing the day I decided to build this base and grinding outside was definitely not much fun, but I really don’t like grinding like this in my shop if I can help it. It gets metal dust everywhere, not to mention the fact that sparks don’t really mix well with sawdust.
After grinding, I got the pieces for the second trapezoid cut to size at the bandsaw and then I could start tacking those assemblies together.
Once again, my corner clamping jigs came in handy, and I think I’m going to make up a handful of these on the CNC for future welding projects.
Next, I could get the first trapezoid and the part of the second trapezoid clamped down to the welding table, making sure the second trapezoid was centered and square both vertically and horizontally, and then I tacked it into place.
I repeated the process for the second half, tacking it in place, and then I flipped over the base to add the last two stretcher pieces.
As you can see, something was a little off somewhere, so I needed to clamp down the legs slightly to close up some small gaps, but it ended up being fine.
My main goal was to have the top of the base perfectly flat, since the table top would be attached there, and I was going to be adding leveling feet to the base anyway, so the bottom didn’t need to be absolutely perfect.
After tacking everything together, I ran full welds on all of the joints, and then I could get all of the welds ground down. I started with a grinding wheel to remove the bulk of the beads, and then blended everything in with a flap disc. Finally, I used a clean and strip disc to remove any small bits of splatter and get everything cleaned up for paint.
Before paint, I needed to add some mounting holes to the top of the base, where I’ll add the bolts to attach the base to the table top.
I marked the hole locations, center punched them, and then drilled them out. I made two of the holes oversized, which will allow for wood movement along the table top’s width.
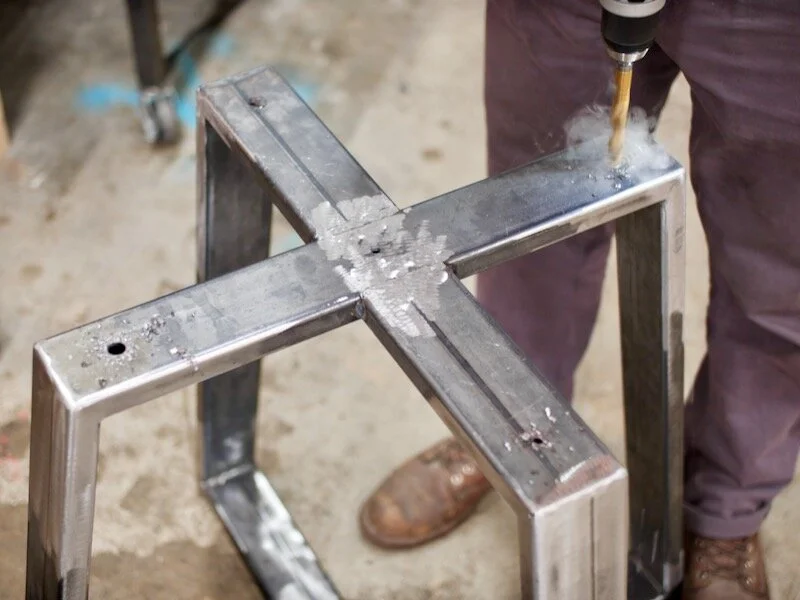
I found some basic leveling feet online which had a ¼-20 thread and used one of these combination drill-and-tap bits to create the tapped holes. I personally love these bits, as they save a ton of time when tapping holes in steel.
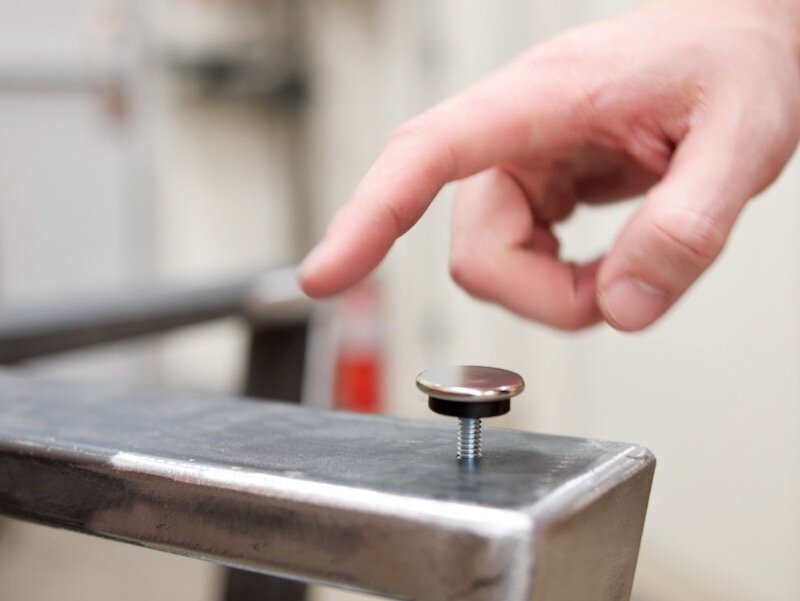
The bit will even countersink the holes, but it was too long to do this on this rectangular tubing.
Also, as you can see, the threaded section on the leveling feet was too long to allow the feet to be flush with the base, so I shortened them off camera with my portaband.
Step 6: Finishing Dining Table Base
With that, the base was ready to finish, so I degreased it off camera with acetone and then sprayed on some self-etching primer followed by some flat black spray paint. That said, I haven’t been that happy with my spray paint finishes and would really like to find a place locally that could powder coat my metal pieces to make them a little more durable.
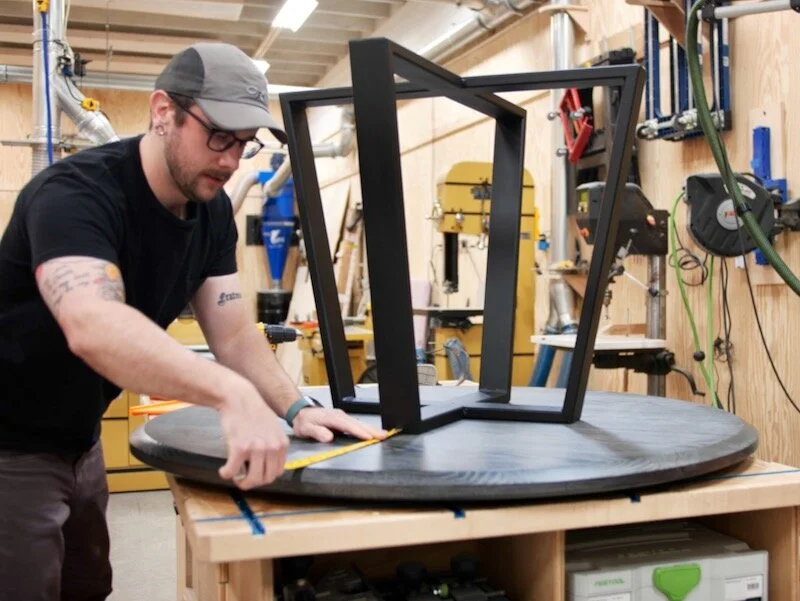
After letting the paint dry, I got the base centered on the underside of the table top and marked out where I needed to add holes for the mounting bolts.
My favorite method for attaching bases like this is to actually tap holes directly into the wood, as it’s super quick, simple, and incredibly strong. I used this wood-specific thread tap to create the tapped holes, and then I could attach the base to the top with a few ¼-20 bolts.
With that, all that was left to do was add the leveling feet, add some felt pads to keep the feet from damaging my floors, and then the table was finished.
