
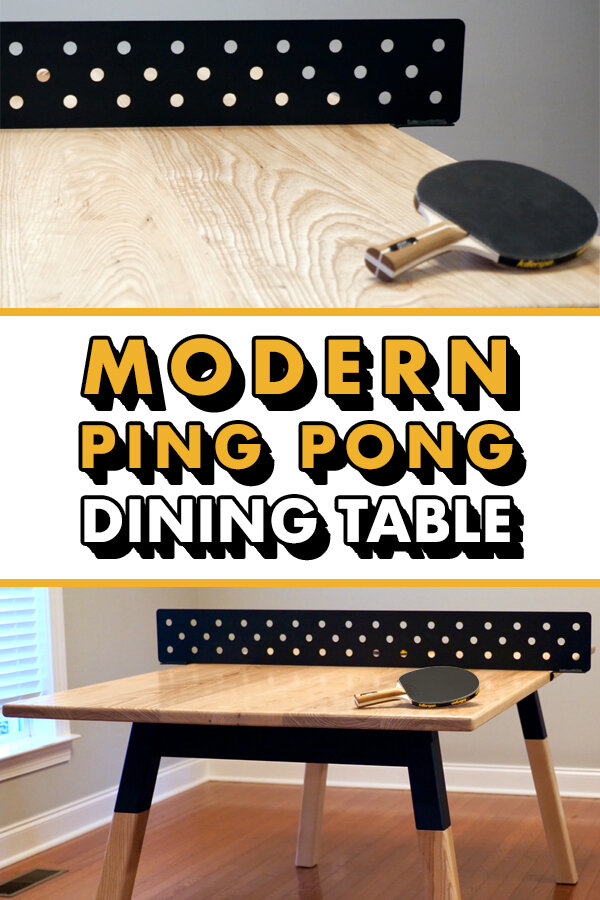
Building A Modern PING PONG TABLE (It's Also A Dining Table)
Learn how to build a modern ping pong table and dining table! This scaled down table tennis table is perfect for smaller spaces and comfortably seats six.
Note: The links below are affiliate links
🛠 Tools Used On The Modern Ping Pong Table:
Magnetic Screw Holder (for my impact driver)
Low Angle Jack Plane (less expensive)
📦 Materials Used On The Modern Ping Pong Table:
Pin it!
Process For Building A Ping Pong Dining Table:
Step 1: Choosing And Preparing Materials To Build Ping Pong Dining Table

I started the ping pong table project by working on the wooden pieces. I decided to use Ash, as it’s one of the least expensive hardwoods in my area, and I also really like the way it looks.
I picked up a pile of 6/4 and 10/4 Ash from my buddies at Asheville Hardware, my local lumber dealer, and I really lucked out with these thicker pieces, as they were perfect for the table legs.
I started by rough cutting the legs to size at the bandsaw, and I was actually able to cut the legs so that I ended up with rift sawn boards. Rift sawn lumber has the growth rings running diagonally across the end grain, and this grain orientation makes the boards extremely dimensionally stable, making them perfect for table legs.
Step 2: Milling Lumber For Ping Pong Dining Table

After rough cutting the legs, I milled them square, starting at the jointer. I flattened one face then rotated the board 90 degrees and squared up the adjacent face.

Finally, I brought the other two faces into parallel with the two previously flattened faces at the planer. I wanted a final leg dimension of 2 ½” square, so I was able to mill both faces before changing the bed height on the planer.
With the legs milled to size, I moved onto working on the 6/4 boards I used for the table top. Luckily, these boards came in 12 foot lengths, which made them perfect for this six foot long table top. I had the guys at Asheville Hardware cut the boards in half so I could get them back to the shop a little easier, and then I flattened one face and one edge on the jointer.
My 12” Powermatic jointer really came in handy here, as some of these boards were around nine inches wide. I would have had to rip the boards to width, down to less than eight inches, with my previous jointer.
That said, if you don’t have a jointer, you could either have your local lumber dealer mill the lumber for you, you could buy it pre-milled, or you could use something like a planer sled to flatten your boards.
Anyway, after jointing, I planed the boards to final thickness at the planer, then I could rip the boards to width at the table saw.
I was going for a final table top width of 40 inches, which would result in the same length to width ratio as a full sized ping pong table. This seems to be the key in making a playable scaled-down ping pong table, and I modeled these dimensions after a commercially available small scale ping pong table.
After ripping the boards to width at the table saw, I made one final light pass at the jointer to clean up those cut edges to prep for glue up.
Step 3: Gluing Up Wooden Table Top

As usual, when glueing up tops like this, I like to add something to help with alignment. I used Dominos here, but biscuits or dowels would also work well. I find that having something like this really makes the glue up a lot less stressful, as the boards stay aligned much easier.

This was especially important here, as I also didn’t have a lot of extra length to play with on the top, so I needed the boards to stay aligned horizontally as well as vertically.
After cutting the Domino mortises, I glued up the top, which ended up being a little more stressful than I expected since my assembly table was just a hair smaller than I needed. This meant the clamps were hanging off the edge of the table, making them flop around. I got it worked out, but it was a little more annoying than I expected.
Once the glue dried, I removed the clamps and scrapped off any excess glue squeeze out, then I could work on cleaning up the table top. First, I used a card scraper to really clean up the joints between the boards, removing any of the more stubborn glue squeeze out in the process.

Since this table top was going to be a table tennis playing surface in addition to a dining surface, I wanted to make sure it was dead flat, so I pulled out my low angle jack plane and went to work on a few problem areas. This isn’t something I’d typically be too concerned about with a normal table top, because as long as everything is smooth, the top just needs to be relatively flat.
Unfortunately, I am not the most skilled hand plane user, and this showed through on the top after I was finished planing through some spots of tearout. The grain direction was all over the place on this table top, so it was kind of hard to avoid. Overall though, the planing really helped get things nice and flat and this also provided some much needed hand plane practice.
Step 4: Checking Moisture Levels In Lumber

Next, I did something I should have done earlier in this process: check the moisture content of the wood.
Now, I trust that the guys at Asheville Hardware aren’t going to sell me wood that isn’t properly dried, but it’s still a good idea to double check your moisture levels to avoid headaches in the future, especially if you’re buying lumber from less than reputable sources.
I used my Orion 950 moisture meter from Wagner Meters, who is the sponsor of this week’s video, to check my levels, and I’m really liking having this tool in my arsenal. The Orion 950 is Wagner’s top of the line pinless moisture meter in their Orion line, and it has some really cool features unique to Wagner moisture meters.
One of these is the EMC, or Equilibrium Moisture Content, calculation, which will tell you the moisture level your particular piece of wood will get to in a given environment, rather than having to just guess based on a standardized number.
The Orion 950 is also Bluetooth enabled and can work with Wagner’s app to help log your moisture readings.
Last, Wagner’s meters are backed by a 7 year warranty and are built to last a lifetime.
Luckily, my moisture levels were good to go, so I could get the table top cut to size.
Step 5: Cutting Table Top To Final Size

I moved the top over to the table saw with my trusty Rockler Material Mate, which has become one of my favorite accessories in this new shop. I’m able to unload sheets of plywood by myself, going through two interior doors, with ease. It also made getting the table top up onto the table saw much easier.
Anyway, I ripped the table top to its final width of 40 inches, and then brought it back to my assembly table to trim it to length with the track saw.
I started by cleaning up and squaring up one end and then I marked out the length and cut the other end. After cutting, I noticed some decent checking in the end of one of the boards, so I decided to trim off another ½”, which got rid of pretty much all of that checking.
As you can see from the offcuts, this part would have been prone to opening up in the future, and I think it’s best to just nip those kinds of problems in the bud now, even if it means losing ½” of length.
With that, the table top was at its final size, so I could move on to working on the steel base.
Step 6: Milling Steel Parts For Our Ping Pong Dining Table Base
This base design was inspired by Jory Brigham, one of my favorite furniture makers. He uses this sleeved leg style on a lot of his pieces and I’ve always loved the look. I figured this would be the perfect project to try it on, and I decided to make it extra challenging on myself by having the table legs splay in two directions instead of just one.
To achieve this compound miter cut, I thought I would be able to just cut the first angle on all of the pieces and then rotate them to cut the adjacent angle, but this resulted in the blade deflecting and left me with an uneven piece.

After thinking about it, I decided to simplify things and just cut a 10 degree wedge out of some scrap plywood, which I could place between the piece of steel tubing and the bed of the bandsaw during the cut. This allowed me to cut both angles in one pass and left me with a perfect cut.
Unfortunately, I had burned through my first bit of steel tubing figuring this out, so I ran back to the store to grab some more larger tubing and cut those pieces to their final length.
This was also my first time using this new Jet metal cutting bandsaw and, unfortunately, I didn’t realize I needed to dilute the coolant, and not doing so caused it to foam up tremendously. Of course, I had filled the reservoir almost full prior to diluting, and it ended up overflowing once I diluted it properly, getting coolant all over my shop floor.
Anyway, after some coolant cleanup, I had all four leg pieces cut to size and they were looking pretty much perfect.

The next parts to work on were the steel plates, which will be used to mount the legs to the underside of the table top, as well as stretchers between the legs.
I bought this offcut from my local steel yard here in Asheville, Mountain Steel, and needed to rip it to size. Luckily, my plasma cutter made quick work of this, but a cutoff wheel and an angle grinder could do the same job. I used a piece of aluminum tubing as a straight edge and was able to cut the pieces to width super quickly.

After cutting, I made sure to knock off any dross left from the cutting process with a chipping hammer. I had been just grinding this dross off with an angle grinder previously, but I learned from my buddy JD at Apex Welding that dross really chews through abrasives since it’s super hard and it’s easier to just knock it off.
Anyway, I ripped the three sections to width using the plasma cutter and then cut them to length at the bandsaw. The plates that mount to the table top had square ends, but the stretcher pieces needed to have matching 10 degree angles cut on the ends, so they’d meet up correctly with the legs.
With that, all of the metal base parts were cut to size, so I could do some grinding to prep them for welding. I beveled edges, removed any remaining dross, and just cleaned things up, since it’s a lot easier to do when the parts aren’t welded together.

The last thing I wanted to do before welding was drill the mounting holes into the steel plate, since it’d be a lot easier to do at the drill press. I marked out the hole locations, center punched them, and then drilled the holes. The centermost holes were sized to just fit the ¼-20 bolts I used to mount the base, but I went back and drilled the outer holes much larger to allow room for wood movement.
Step 7: Welding Table Base

Finally, it was time to do some welding. I set up the legs and the apron, as I figured welding those pieces together first would make it easier to weld them to the mounting plate. I used some scrap pieces of plywood as spacers below the apron, to get it centered on the legs, and used a level to make sure everything was in line.
Also, this was my first welding project since getting these amazing clamps from my friends at Fireball Tool, and I honestly don’t know why it took me so long to get some of these. They have made this welding table so much more useable, and getting my assemblies clamped up was a breeze.
After getting everything clamped in place, I could start tacking everything together, which went smoothly with the pieces all immobilized. This was actually my first time welding in almost a year, and I was going for aesthetics over sheer strength on these first few beads, so don’t mind the welds being slightly cold.
I repeated the process at the other leg, and then I could flip the whole thing over once it had cooled down a bit to run beads on the other side.
As you can see, I used my Power MIG 210 MP from Lincoln Electric on this project, and it makes welding so dang easy, especially after being weld-free for almost a year.

This was also my first time using their Miniflex fume extractor, and it was definitely better than opening the door and running a fan considering how cold it was outside. This thing has some serious power, and I actually had to move it a little further away in spots since it was sucking up the shielding gas and causing some porosity.
Anyway, once the second set of beads had cooled down, I removed the clamps and got the legs centered on the bottom of the mounting plate. I then tacked the legs in place, to hold them temporarily, and then clamped the mounting plate to the table to make sure it stayed nice and flat while I welded.
After that, I just worked my way around the base, running beads a few inches long and moving from one end to the other to avoid building up too much heat. I certainly didn’t want the mounting plate warping on me, as that would translate to the table top.
Step 8: Mounting Leg Assemblies To Bottom Of Ping Pong Dining Table

Once the leg structures were welded up and had a chance to cool down, I could get them mounted to the bottom of the table top. I decided to recess the bases so that there wouldn’t be any sharp edges on the underside of the table, and I started by marking out the locations of the bases.
I also couldn’t help clamping one of the leg pieces onto the metal legs to get an idea of how the finished table was going to look, and I was getting pretty excited at that point.
I decided to whip up a quick template for cutting the recesses for the mounting plates, and I made this from a few pieces of scrap plywood and some CA glue.

To mount the template, I decided to make things super simple and just used a few 1” brad nails, considering this was the underside of the table and I was out of double sided tape.
I installed a template bit in my router and then set the depth using a piece of plywood and the base itself for reference, and then I got to routing. Now, this was a little bit tricky, since the router was overhanging quite a bit during most of the routing process.
I actually ended up remembering that this particular router has a little support foot that allows you to route with an overhang like this, but I just kind of winged it on this first recess, and this left me with a less than perfect recess.
That doesn’t really matter much since it will never be seen, but I knocked down any stray pieces with a block plane before dropping the base into place anyway.

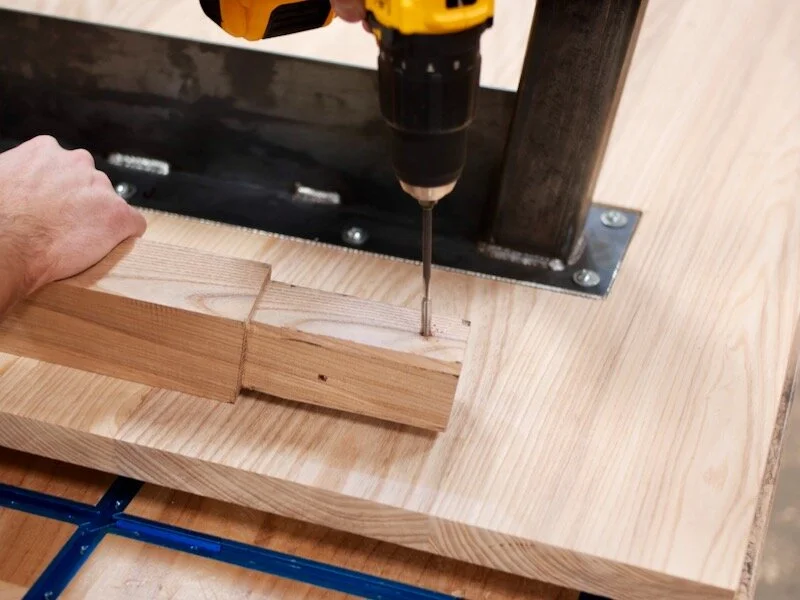
To mount the base to the top, I called upon my favorite mounting method, tapped holes directly into the wood. I marked out the hole locations, center punched them, and then pre-drilled the holes, making sure to mark my depth with painter’s tape so I didn’t drill through the top.
To tap the holes, I used my Wood Whisperer Thread Taps, which I’ve used a ton in the past. They create threaded holes extremely quickly, and the resulting holes are incredibly strong and hold up better than typical wood screws would when the bolts are added and removed frequently.
Once the holes were tapped, I started the bolts by hand to make sure I didn’t cross thread them and then drove them all the way in with my impact driver.
I repeated the whole process on the other base and then I could move back to the wooden legs and start getting them fit into the metal tubing.
Step 9: Milling Tenons On Beefy Ping Pong Dining Table Legs

To do this, I needed to cut tenons on the ends of the legs, and I started by cutting a short “test” tenon on one of the legs, to make sure my process was going to work correctly. I first cut a matching compound miter on one end of the leg, to give myself a visual reference point to match the angles at the other end of the tenon, and then I drew out where I needed to end the tenon using a t-bevel set to 10 degrees.
Next, I set my miter gauge to 10 degrees, set my dado stack to 3/16” high, and then made my first pass. I snuck up on my line and just tried to get as close as I could without cutting away the line.
I rotated the board forward 90 degrees and made another pass on the adjacent face, again sneaking up on the line, and then I needed to rotate the miter gauge to 10 degrees in the opposite direction to cut the other two faces.
Finally, I cleared away the waste and then test fit the leg, knocking off the corners of the tenon first off camera, and luckily it fit really well.
I repeated the process on the rest of the legs, making the final tenons about six inches long. This provided a huge contact area between the wood and steel and made for some seriously beefy legs.

One thing I didn’t mess with much but which would have made the fit even tighter would have been using a standard width flat ground table saw blade and tilting the blade when cutting the shoulder on the tenon. This would have made the angle of the shoulder match the angle at the end of the tubing even better.
Because I didn’t tilt the blade, I had to do a little bit of extra finer work with a shoulder plane, but I don’t have a standard flat ground blade so I didn’t have much of a choice.
Anyway, once the tenons were cut, I needed to knock off the corners so they’d fit inside the curved corners of the tubing. There are plenty of ways to go about this, including rasps and sanding, but the quickest method I found was a spokeshave.
Spokeshaves can remove the bulk of the material super quick, and then I just needed to knock down the last bit of the edge, where the spokeshave couldn’t reach, with a chisel. You don’t need to be particularly precise here, as you’re really just providing clearance for the tenon to fit into the steel tubing.
I also took this opportunity to tidy up the shoulder a bit where needed, with my shoulder plane. I was able to just visually match the angle I needed and could work back to my line quickly.
With all of that done, I could check the fit and, once it was good, I labeled each leg to make sure I added it back to the same location.
I repeated the process on the rest of the legs and, once they were fit, the table was really starting to take shape. This was by far the trickiest part of this project and I was really happy with how everything came together in the end.
Step10: Mounting Wooden Legs To Metal Table Base

Next, I needed to attach the wooden legs to the steel base. I decided to use two bolts per leg to do this, rather than the epoxy I was originally planning to use, as having the legs removable would make finishing and then moving the table much easier.
I marked hole locations on each leg using a speed square, center punched them, and then drilled the holes. After drilling the holes, I transferred the hole locations to the legs and then pre-drilled the holes at the drill press. You could certainly drill the holes by hand, but I figured having the holes as square as possible would be best.
Finally, I tapped the holes, using the same thread tap as before.
With that, I could install the legs in the steel base, and I was extremely happy with how tight everything fit and how secure the legs felt. Also, don’t worry, these bolts were just temporary and I ended up getting black flat head bolts and countersunk the holes so they blended in with the base better.
Now that the legs were in their final orientation, I could get them cut to length. I had a bit of trouble trying to come up with a good method for this, but, after some thought, I decided that my trusty line laser would work well.
I first leveled the table top, to ensure the final table was level, and then set the line laser at 30” above the table top, which is the standard height for a ping pong table.
Next, I marked lines where the laser landed on the legs, using the t-bevel as my guide, and then transferred the lines around all four sides of the legs, again using the t-bevel.

With the lines marked out, I could easily cut the legs to length using my miter saw, which I had again set to cut a compound angle.
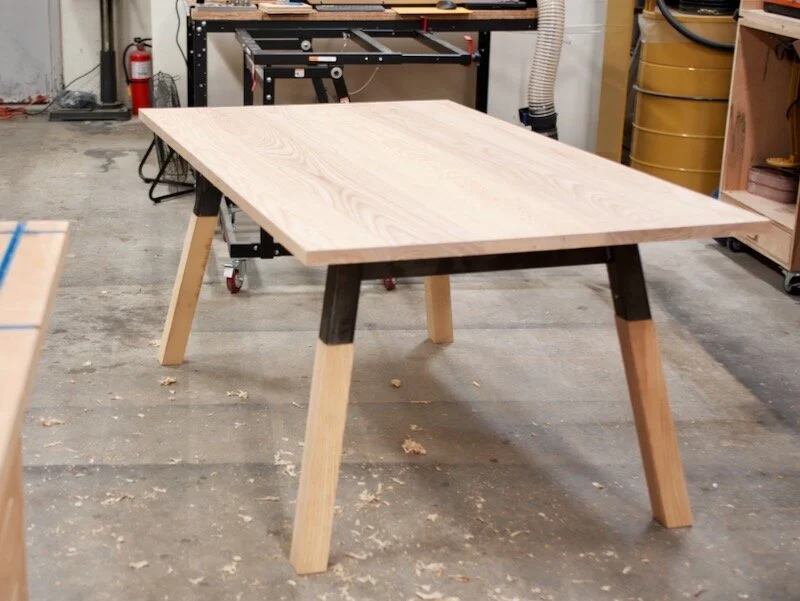
Once the legs were cut to length, I reinstalled them and chamfered the edges of the bottom of the legs, which helps avoid tearout, before flipping the table over to see how it was going to look when it was finished. I loved the way the table was looking, and it was also sitting pretty flat, although my shop floor is far from flat so that wasn’t a great judge.
The last bit of shaping to do on the legs was to add a roundover to match the roundover on the steel tubing. After doing some research, evidently the radius of the corner on steel tubing is equal to roughly double its wall thickness. In my case, I was using 3/16” thick tubing, so I needed to use a ⅜” roundover bit. This ended up working out perfectly and left me with a super clean transition from steel to wood.
Step 11: Constructing The Ping Pong Net

With that, the table was pretty much done, so I could move on to working on what really makes this a ping pong table : the net. I modeled my net design after a few steel nets I had seen online and modeled it up in SketchUp. I had originally thought to just drill the holes in a piece of steel plate, but I thought that maybe I could have the piece cut locally instead, since that would end up looking nicer.
I ended up finding a place near me called Laser Precision Cutting and they were able to cut the piece on their laser cutter with less than a day turnaround, for $75. I’m excited to have found a place like this local to me, as it really unlocks a lot of possibilities for metal work in the future.
Anyway, after having the net cut, I came to the realization that the corners on this net, which will overhang the ends of the table top, would be particularly dangerous for my little dude, since this is right about at forehead height for him. Much to my dismay, I came to the conclusion that I needed to roundover the corners of the perfectly cut net by hand.
I used a washer to mark out the corner radius, using a Sharpie and scratch awl to mark the line, and then tried my best to grind to the line using my belt grinder. I had a 40 grit belt on at first, which chewed through the steel way too quickly and I went past my line.

I retraced the line with a larger washer, swapped to a higher grit belt, and tried again, but I ended up putting too much pressure on the belt and broke it. Finally, I swapped to a grit in between the two and was able to get pretty darn close to my line.
After grinding the four corners, I touched them up with a file to get them perfect and I’m actually really happy with the way they turned out.

With the net itself dealt with, I needed to fabricate the brackets which I’d use to mount the net to the table. I decided to make them from some rectangular steel tubing, as I figured it’d be easier than trying to bend flat bar to size.
I cut the bracket pieces to length at the bandsaw, marked out some layout lines for the length of the bracket, and then cut them to size at the portaband.
Finally, I cleaned them up with my belt grinder, making sure to knock off any sharp edges.
Before welding the brackets to the net, I went ahead and drilled a pair of holes into each bracket, which I’d use to mount the net to the sides of the table top.
After drilling the holes, I could get the brackets welded to the net. I did a little grinding off camera to prep for welding and then clamped the net in place, once again using a piece of plywood as a spacer. I couldn’t really easily clamp the bracket itself, so I just held it in place while I tacked it, which worked fine.
After tacking one side, I flipped the net over and ran a full bead on the other side, then repeated the process, running a full bead over the original tacks.
I attached the second bracket at the other end of the net, making sure the spacing between the brackets matched the width of my table top.
While the welds cooled down, I laid out the net location on the table top, which obviously needs to be centered along the length.

After laying out the location, I set the net in place, using some magnetic squares to keep it square to the table top, and then marked the hole locations.
Once again, I drilled and tapped the holes, using a scrap block of plywood to ensure I was drilling the holes square to the top, and then I could test fit the net, which luckily fit really well. It was slightly out of square vertically, but a few taps with the mallet bent it into place.
One thing I somehow didn’t consider here was wood movement, and it’s true that this design doesn’t take that into account. That said, I honestly think it will be fine and, if anything, the brackets will just dent the sides of the table slightly. We’ll see how it goes, but you might want to build in some wiggle room on your design and take up the extra space with a few washers.
Step 12: Sanding Dining Table Before Finish Is Applied

With that, the net was ready to go, so I could do the final finish prep on the table top. I started by giving the top a good sanding up to 120 grit, to really smooth everything out.
I decided to embrace the rounded look of the net and legs and added a radius to the corners, which will both protect my little man’s forehead but also fits the look. I marked out the radius using the same washer, roughed it in with a rasp, and then cleaned it up with my random orbit sander.
I also added the same roundover from the legs to the edges of the table top, and I made sure to do this after adding the radius to the corners so it flowed nicely around the corners.
After that, I sanded the top and roundovers up to 180 grit off camera, and also gave the same finish prep treatment to the legs, sanding them up to 180 grit, and then I could apply finish.
Step 13: Applying Finish With HVLP System

For the wooden parts, I went with my standard water based polyurethane, which is a “water white” finish, meaning it doesn’t add any of yellowness to the Ash. I applied three coats in total, sanding with 320 grit before the final coat.
For the legs and net, I went with a spray paint finish, but first I degreased all of the pieces with acetone. I also did a little more grinding with a flap disc off camera, to remove any bits of splatter that were stuck to the pieces.

After degreasing, I sprayed on a coat of primer and then added a few coats of matte black paint.
With that, the table was ready to be loaded up and moved over to the house for final assembly and then, most importantly, play testing. I think this is a super fun sized table for ping pong, as it’s small enough to keep things a little difficult, but it also still fits in a normally sized room.
After some vigorous play testing, I could finally call this project complete.
