
50 Year Old Workshop Renovation Part 2 : Fixing Framing Problems!
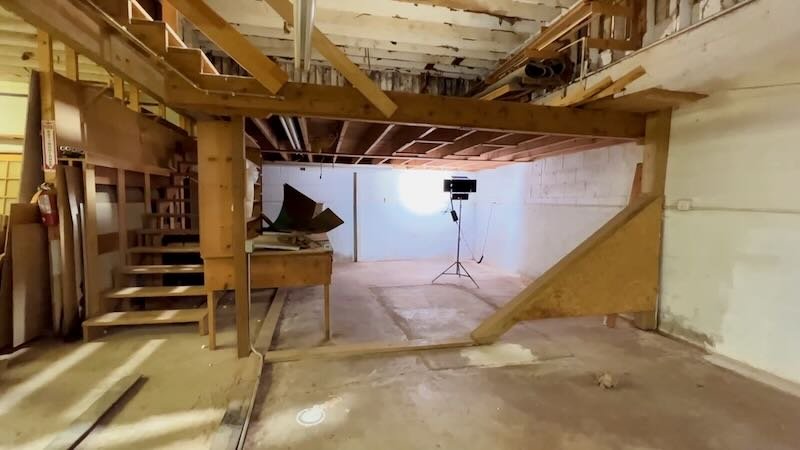
I'm renovating a 50 year old workshop to transform it into my dream woodworking shop. Welcome to part 2, where I cover demoing the floor framing in the attic area to fix some structural issues!
🛠 Tools Used :
Materials Used :
Fixing Structural Issues in an Old Workshop
Mezzanine Removal
The Perkins Crew started rolling in a few minutes later and it had been awhile since I had seen Ray and Jason AKA the RayJay Builder Buddies so it was good to see these guys.
Once Erik rolled in, we got right to work clearing out the mezzanine and attic area so we could start the demo work and, as you can probably see, this was some insanely dusty work. This building was a cabinet shop at one point in its life and the amount of dust packed into every nook and cranny in here is insane.
Once the two areas were cleared out, we got to work pulling the plywood off of this area in the attic and the goal was to reuse as much of this material as possible, considering the insane cost of building materials currently.

Unfortunately, the pieces around the perimeter of this area were sandwiched between the wall framing above and floor joists below, so we had to run a circular saw around the area to cut the boards free, but once that was done, the demo really started moving along. It never ceases to amaze me how quickly work gets done with a full crew of people who know what they’re doing like the Perkins crew.

Adding Temporary Bracing Before Removing Materials
Since we were going to be removing this entire framed area, we need to add some temporary bracing to this side wall, as this floor system was giving this wall a lot of support. To do this, Erik and Jaime added some diagonal braces and, again, this was just to hold things in place while we kept demoing.

Relocating Support Posts Connecting Girders to the Steel I-Beam
Next, we needed to relocate the support posts that connected the girders, which support the roof trusses, to the steel I-beam in the lower level of the building. These posts had been bearing on this existing floor structure, so we needed to add new longer posts before removing the floor.
Jaime started by hacking out an opening in the floor, so the new post could span the distance between the girder and the I-beam, and then we went digging for material for the new posts.
After scrounging through the wood pile left by the previous owner, we found these triple ply Oak posts which were perfect for this application. We also went ahead and wedged in a few temporary posts to relieve some of the pressure from the existing posts so we could remove them more easily.
Once that was done, we could get the first post cut to fit, and you might notice that we also set up a line laser to see if this girder had sagged at all over the years, which it had. To remedy this, we cut our new post longer so the girder would end up straighter after the old posts and temporary supports were removed.
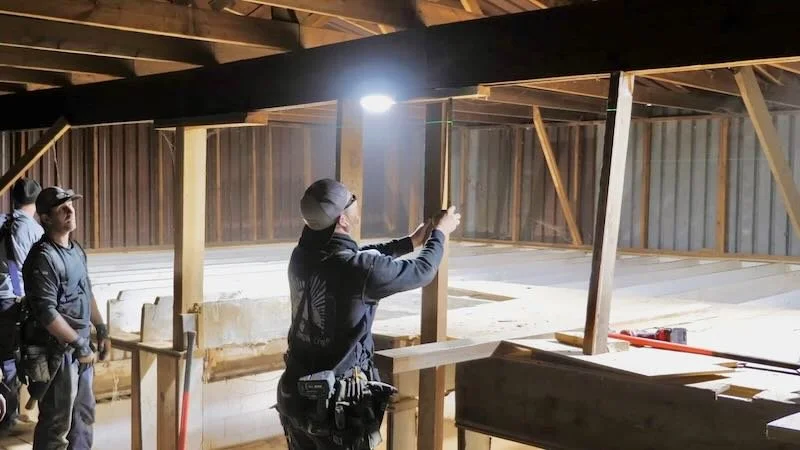
As you can see, as we tapped our temporary support out of the way, the girder dropped down onto the new post and then we could get the post attached to the girder with a few screws.
After sighting the girder along the length of the building, we also noticed it was bowed out in this area as well, so Erik grabbed a sledge and knocked it back into place, and this also got our new post plumbed up nicely.
Straightening Out Trusses and Attaching Them to the Girder
We also got some of these trusses straightened out while we were at it, and it turned out that these trusses weren’t connected to the girder in any way, which is kind of crazy considering this building has been standing since the 70s.
After straightening each truss, we toescrewed them to the girder so they wouldn’t twist out of alignment again. I’m going to go back later and get all the trusses straightened out and back on layout and I’ll add rat runs to help keep them straight over time.
We repeated the same process to install the other post and then got the rest of the plywood removed, grabbing a couple of cool slow-mo dust shots for good measure along the way…
Tie Together Walls to Dramatically Improve Strength
Once all the plywood was removed, we needed to get the wall framing dealt with. Basically, we had two wall sections, one above the previously existing floor and one below, and we needed to span those two sections with some kind of framing to tie them together.
The solution the Perkins Brothers came up with was to add an inner piece spanning the two existing rim joists, which would bring the material flush with the studs in the upper wall section, and then we could tie the two sections together with one long stud.

To do this, Jaime first got to work notching out the areas for this new framing since, once again, we were having to work around this existing framing prior to removing it.
Once that was done, we could get the first piece cut to length and nailed into place, tying the two rim joists together.
Finally, to tie it all together, we could add the longer piece, connecting the two wall sections and stiffening this whole wall.
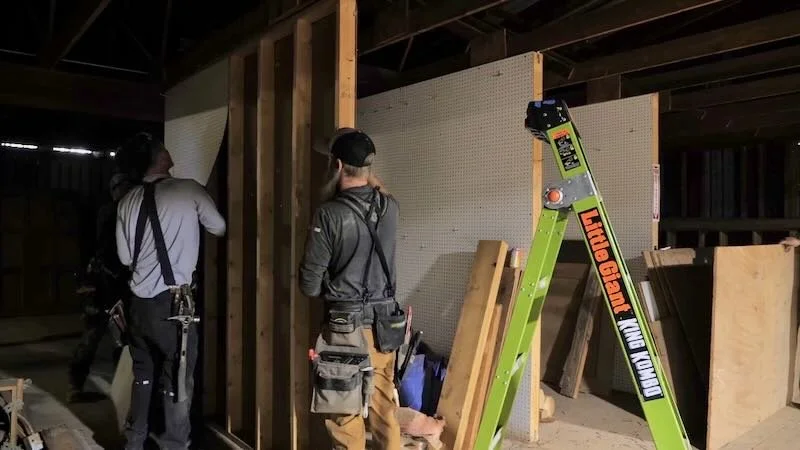
From there, we continued getting these sections framed but unfortunately we were running low on material, so we had to get a little creative to find the material we needed. Luckily, there were these pegboard walls built out in this attic space which I had no plans for, so we got them disassembled and used the 2x4 material to finish out this wall framing.
Also, as we finished the wall framing, we could go ahead and start taking down the joists since the walls were now braced. Luckily, this was a pretty simple process with this beast of a CRAFTSMAN pry bar and we just slid the joists out of our way temporarily as we went.
Also, in addition to the crazy dust, we also had a quite few cobwebs to deal with, and I’m glad Jaime was working up there instead of me.
Reinstalling Joists and Reusing Materials
Once we got a handful of the joists removed, we could start getting them reinstalled back at their original height, and Erik crowned the boards as we went, with the crown facing up.
As far as layout, we didn’t really have much of one, as we were mainly referencing off of the existing joists, which we were butting these joists up against. Our main goal was to get the joists straight and keep the spacing consistent, and this ended up working out fine.
We also went ahead and removed the plywood from the mezzanine as we went, as this was much easier than trying to do it after all the joists were dropped down and in our way.
From there, we really got into a rhythm and the joists started moving super quick.
We wrapped up day one by getting the last of the joists removed and then I could take a step back to admire our work.

Stabilize Walls and Prep For Plywood Reinstallation
I honestly can’t believe we got all of this done in one day and I was super excited to see what we could knock out on day 2.
I started day 2 by getting some of the larger trash cleared out of the attic while I still had an opening in this floor and, as you can see, the previous owner had left a ton of junk up here for me to deal with.
Once that was done, we went ahead and addressed another one of the structural issues here in the attic.
To help with this, we added another vertical piece of framing which spanned across where the previous floor had been located, and this helped in this spot, but then we discovered yet another area of flex in the building.

Once again, the rat runs I’ll be adding later will help with this, but I’ll also be adding some diagonal bracing to the gable ends, tying them back to the trusses, which will help a ton as well.
Anyway, back to the floor, the first thing we did was add a few layout boards which locked the joists into place, and this allowed us to get these joists straightened using our trusty laser eye prior to installing the plywood.

We also went ahead and added that last missing floor joist, and we had to scab together two shorter floor joists for this, as I couldn’t find these 20 foot long 2x12s locally.
Reinstalling Plywood Decking
Now that all of the joists were in, we could start the process of getting the plywood decking reinstalled and we started by snapping a reference line for the sheets.
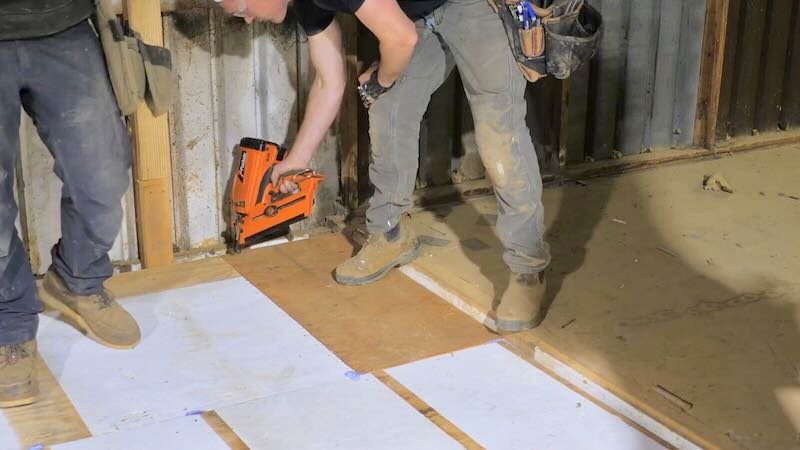
The panels on this first row needed to be notched around the posts we had installed previously, and we got our cut station set up, using some foam board as our cutting surface.
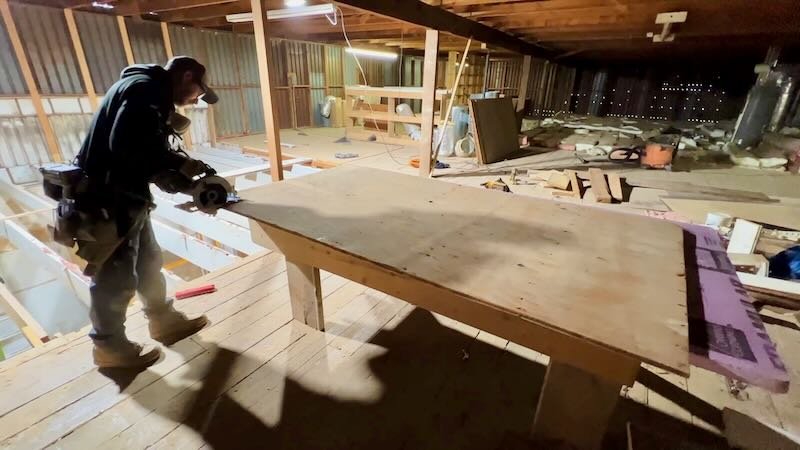
We added some Advantech subfloor adhesive to help this plywood stick permanently to these joists and attached the panels with 2 3/8” ring shank framing nails.
The installation was a little slow going, as it was basically a scavenger hunt trying to find a piece the right length to fit the span we needed so we could save on material.
Eventually, though, we got to the last piece and the sheathing was done.
Remove Attic Trap Doors
Next on the list, since we were already working in the attic, was getting these trap doors removed and framed back in. As you might remember, the previous owner used these doors as attic access but they’re super dangerous and I want to insulate this entire floor anyway, so these needed to go.
Of course, the hinges on the doors were installed with an insane number of nails, so they were a little difficult to remove but, eventually, we got the first door off.
Erik and Jaime worked on breaking the first door down into more manageable chunks while I got the second door opened and then we got the second door removed and cut up before the real fun, dropping the door pieces down to the first floor.

Also, did I mention that it was dusty in there?
Frame In Attic Opening
Next, we removed any other extra framing bits and then we could get joists added back to this giant hole in the floor, and these were the floor joists we removed from the mezzanine, so more reclaimed material was able to be used.

Also, I’ll be going back and adding joist hangers here since these joists aren’t bearing on the block wall or I-beam like the others.
Finally, we could scrounge together the last pieces of the 3/4” plywood to deck this area and, with that, we could call this part of the shop series a wrap.