WORKSHOP RENOVATION 10 : Painting, Shop Storage & French Cleat Wall
In this episode of the Crafted Workshop renovation, I spray paint on the plywood walls in the shop and start getting the shop organized with some shop storage projects! Lumber racks, pallet racks, and French cleat walls, oh my!
🛠 Tools Used:
📦 Materials Used :
With the mold remediation and paint prep work done, I could finally move on to painting the plywood walls.
I started by masking off the floors around the shop. First, I vacuumed where I’d be taping the masking material down, otherwise the tape wouldn’t have stuck due to all the dust.
I used my 3M Handmasker to put down the paper masking, and I’m not sure why it took me so long to finally get one of these things. It makes the masking process go so much more quickly and it’s really easy to get the masking applied accurately.

I started with a more expensive masking tape but ended up switching to a cheaper tape, 3M’s 2020 tape, and this stuff worked well and was about half the price.
After using the hand masker, I came back and added a row of builder’s paper to give a little more protection against overspray.
The last thing to mask off was the mini split units and this was really where the hand masker shined. I waited to mask these off until last so I could have AC while I worked.
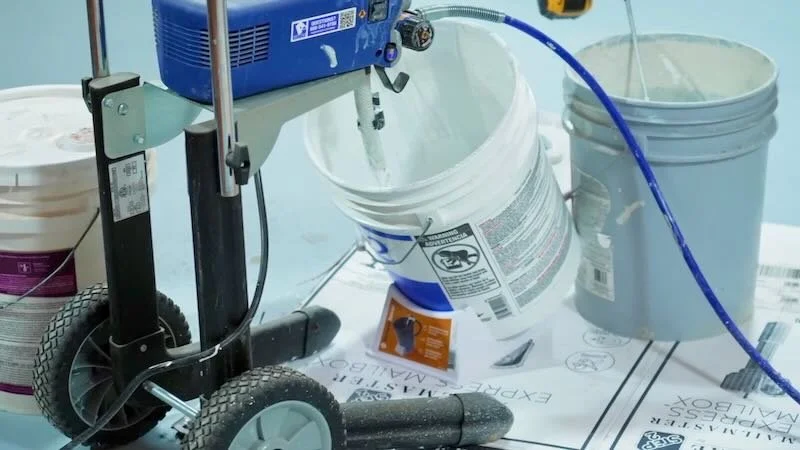
With everything masked off, I could get my paint sprayer set up, and I used a Graco Magnum X7 airless sprayer here. I started with a coat of primer and got the sprayer set up with my primer for this project, Valspar PVA primer.

This stuff is insanely cheap, around $60 for 5 gallons, and I was really impressed by the coverage.
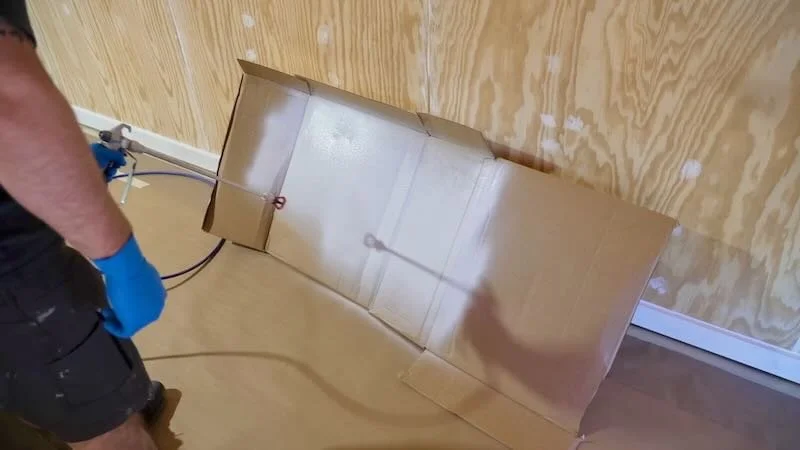
After getting the sprayer and gun loaded, I dialed in the spray pattern on a piece of cardboard, and I was using a 515 spray tip here.
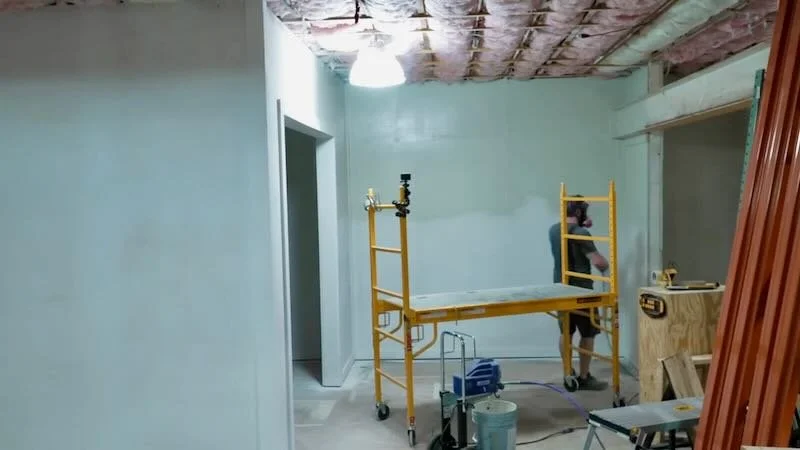
With everything looking good, I got my scaffolding moved into place, put on my respirator, and got to spraying.
When spraying, I tried to keep my gun perpendicular to the wall and overlapped each pass about 50%. This 515 tip has a 10 inch wide fan and I was able to get good coverage fairly quickly.
I probably could have gone with a 517 tip here to get a little more coverage more quickly, but the 515 tip worked fine.
I continued on down the right wall of the shop, making sure to hit all of the walls and trim with a good coat of primer and, as you can see, things were looking really good.
I burned through the first 5 gallon bucket of primer once I got into the CNC room and switched over to some Kilz 2 primer, which I had leftover and wanted to use up.
One accessory I’d highly recommend when spraying is this little SprayerSaver bucket stand. This genius device tilts your bucket of paint to make sure your sprayer can suck up every last drop, and it’s so nice not having to fight your sprayer running out of paint.
I continued spraying, finishing up the CNC room and then I moved out to the work platform area to finish up the first coat.
I switched over to another bucket once I drained the Kilz, using up some primer that was left behind by the previous owner, and in total, I sprayed about 10 gallons of primer for this first coat.
Just for a reference, this first coat took about two hours to spray and I got it sprayed by lunch time.
In between coats, I dropped the spray gun into a bucket of clean water to keep the paint from crusting over, and I took a long lunch to give the paint a few hours to dry.
I switched over to paint for the second coat, using another fairly inexpensive paint, this Valspar 2000 in Repose Gray, one of my go to colors for neutral walls.
This was mostly just more of the same, although I changed my spray pattern, going up and down rather than side to side, and this was just to make sure I was getting even coverage.
This second coat didn’t take nearly as much paint since the plywood was pretty well sealed at that point, and I used one 5 gallon bucket of paint on this coat. The painting also went a lot more quickly, and I started spraying at 1:30 and was done by 2:45.
I also got this cool GoPro Timelapse of this entire coat of paint, and I thought this was a pretty cool angle, with the GoPro on the back corner of my scaffolding.
I sprayed the top row, covering roughly 20-30 feet at a time, then I’d hop down and spray the bottom row, overlapping between the two rows.
This up and down spray pattern was a lot more taxing on my back and I definitely felt it once I was done with this second coat.
I wrapped up this second coat painting the cabinet that was already here, and this thing is really well built and in great shape, so I figured I’d keep it and just give it a little facelift.
With that, the second coat was done and the walls were looking great.
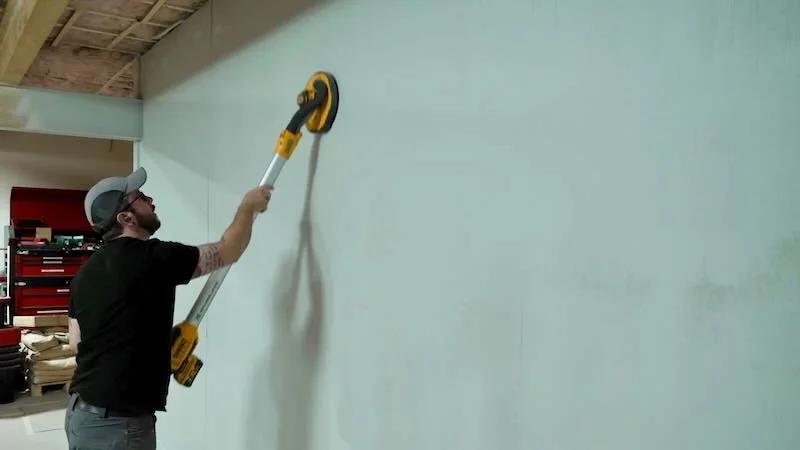
After letting the paint dry overnight, I came back to some fairly rough walls. This was because the water based primer and paint I used raised the grain on the plywood, which is something I knew was going to happen.
This particular sprayer can’t spray solvent based finishes, like oil or shellac based primers, since it has a brushed motor, which generates sparks, and obviously sparks and solvent fumes don’t mix nicely.
I could have rolled on a shellac or oil based primer to avoid this, but I felt like spraying the primer sped things up enough to where I was OK with sanding back the raised grain.
To do the sanding, I used my DEWALT drywall sander, and this worked perfect for quickly knocking down the raised grain. I did have to change my sanding pads fairly often, as this latex paint tended to gum things up, but I was able to sand all of these walls in less than an hour.
Once the walls were sanded, I got set up for the third and final coat, spraying more of the Valspar 2000 paint. Just like the second coat, I went through pretty much the entire 5 gallon bucket with just a tiny bit of paint leftover.
With the painting done, all that was left to do was clean up the sprayer, which was pretty simple. I sprayed the paint left in the spray lines back into the paint bucket and then ran water through the sprayer to clean the pump and the lines.
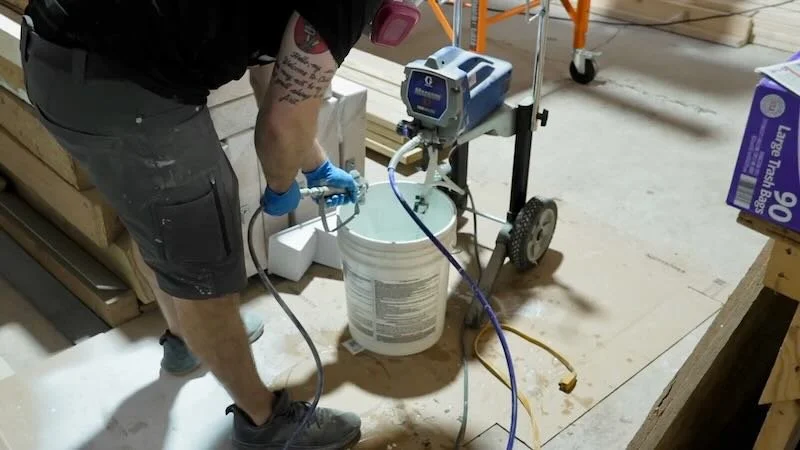
I changed my water and repeated the process and, with that, the gun was good to go. I didn’t add pump armor since I’ll be doing more spraying in a few days.
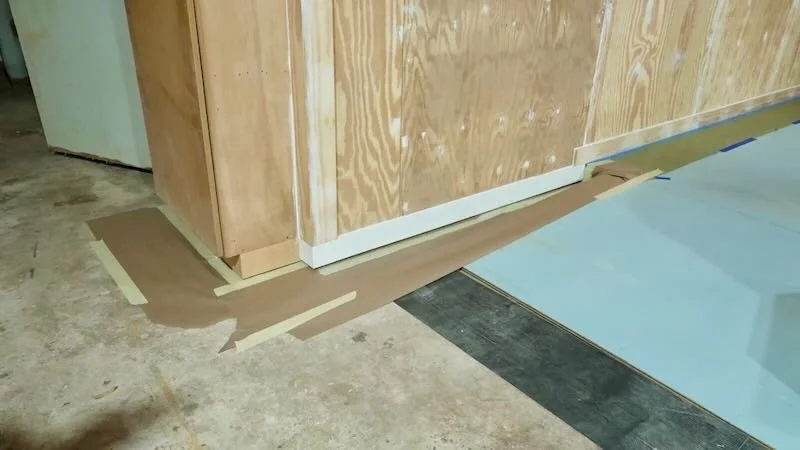
I left the paint to dry over the weekend and could start getting things cleaned up the following week by removing all of the masking material.
Unfortunately, even with all of this masking, I still managed to get some overspray on the floor, but thankfully it’s not a huge deal since this shop floor has seen better days anyway.
With that cleaned up, I wanted to finally start getting a few things organized, now that the walls were painted.
First on the list was my lumber rack, and I started by ripping some 2x4s down into 2x2s, to use as mounting guides for the brackets.
I set up a laser line for my first row about 2 feet off the floor and nailed the 2x2s in place in line with the laser.

I wanted to be able to store 16 foot long boards, so I needed to piece together each row with 2 lengths of 2x2.
I’m using the same Fastcap metal brackets I used in my last shop. You can see how the bracket is designed to work with a 2x2 to make wall mounting go super quick.
Next, I moved my line laser up about 18 inches for my next row and continued mounting more 2x2s.
From there, I just continued up the wall, stopping about two feet below the ceiling joists.
With the 2x2s in place, I could start mounting the brackets, and I used 3” screws to secure them to the studs.
I once again called on my line laser to help with vertical alignment, and I spaced the brackets 32 inches apart, or every other stud, except for the very last column of brackets, which needed to be 16 inches apart to support 16 foot boards.
The cool thing about this bracket layout is I can store 8, 10, 12 and 16 foot boards securely and I was able to get a much longer rack by increasing the spacing between the brackets.
The brackets install with 3 screws each and are incredibly strong once mounted.
As you can see, I can easily hang from the brackets, so they should have no trouble holding my lumber.
With the brackets mounted, I could finally get the rack loaded up and it was so nice to be able to get the leftover framing lumber we brought from the old shop up off the floor.
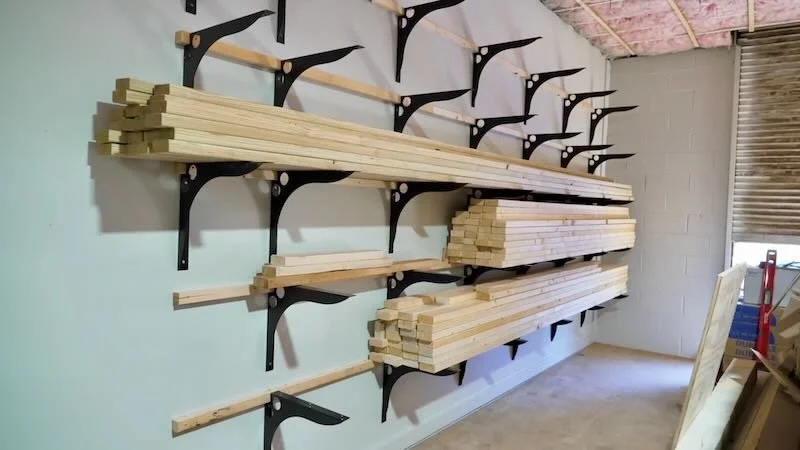
As you can see, I’ve got 10 foot, 12 foot, and 16 foot boards on here and they’re all nicely supported.
The next storage system to get set up was my brand new pallet rack from Global Industrial. My plan is to stock up on plywood, hopefully when the prices go down some, and have 1/4 inch, 1/2 inch, and 3/4 plywood ready to go so I can quickly load the sheets onto the CNC.
I had a fairly close call with one of the uprights falling right behind me and thankfully I walked away from this unscathed, and this could have been a lot worse.
I was having trouble getting the rack assembled and, after trying for way longer than I’d like to admit, I finally realized I hadn’t accounted for the steel I-beam when laying out this space for the rack and the rack and I-beam were interfering.
Thankfully, the fix was simple and I could just cut a few inches off of the top of one of the uprights.
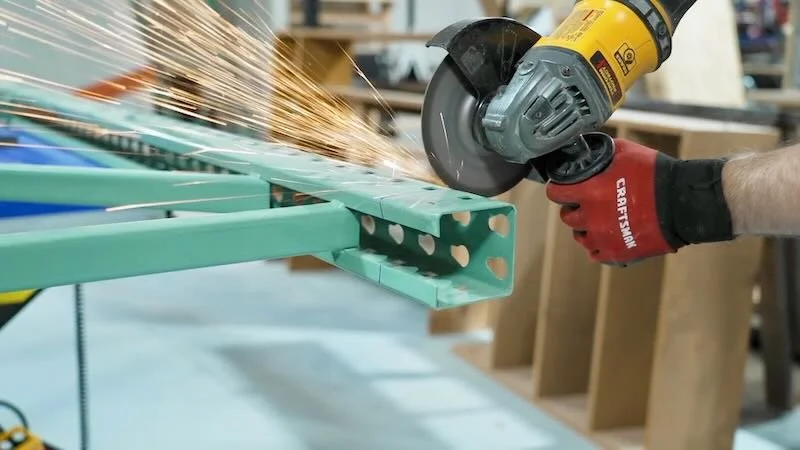
My angle grinder made pretty quick work of this and I had the uprights cut down in a few minutes.
I ran into another issue when trying to reassemble the rack and it turned out the measurement between the beam and floor at the wall vs further from the wall was quite a bit different due to the janky slab, so I had to cut a little more off of one end of the uprights.
Thankfully, this fixed it and the pallet rack slid right into place and fit like a glove.
I added the second shelf about 30 inches above the first and this should be low enough to still easily pull plywood off the top shelf.
Next, I wanted to move some pallets under the first shelf, but first I needed to shuffle things out of the way. I figured I could go ahead and move some of my workbenches into place on the work platform, starting with my Sjobergs workbench.
This thing is insanely heavy but, thankfully, these Rockler workbench casters make it really easy to move around.
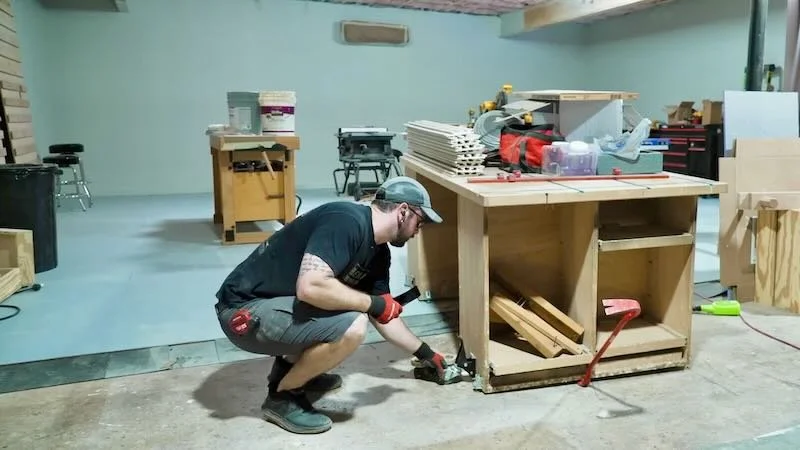
Next up was my assembly table, which might be even heavier than the workbench. For some reason, I tried to use these little dollies to move the table, rather than just moving the Rockler casters over, and this obviously didn’t work as expected.
I finally wised up and attached the casters and, as expected, this made moving the assembly table much easier.
I also managed to lower the table directly onto my toe when dropping the casters down, so that was fun.
Anyway, with those out of the way, I could use my Global Industrial electric pallet jack to move the pallets of concrete and lumber under the pallet rack and man was it satisfying to tuck these out of the way so easily.
The last thing to do to get the pallet rack ready for plywood storage was to cut some cross support pieces, to span the gap between the shelf supports. I just used some scrap 2x4s here, cutting them to fit. These won’t be supporting much weight, they’ll really just keep the plywood from sagging in the middle.
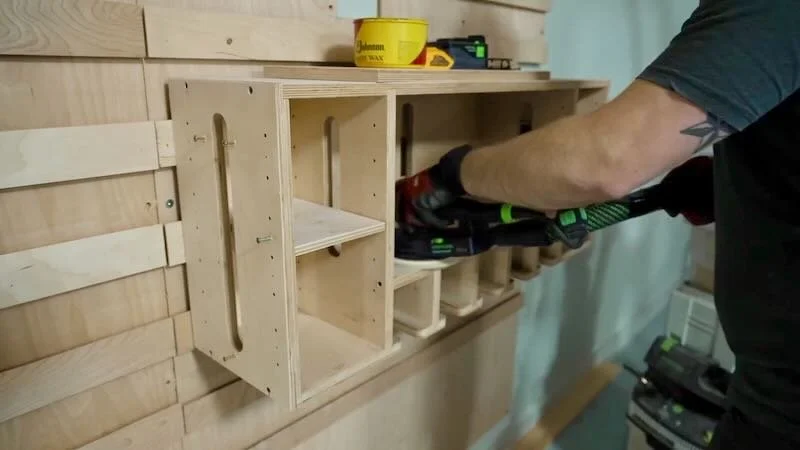
Next on the shop storage list was setting up my plywood offcut rack, and I did an entire video on the build process of this rack.
I started by shimming the rack to get it leveled, and then I screwed it to the wall, making sure to drive the screws into studs.
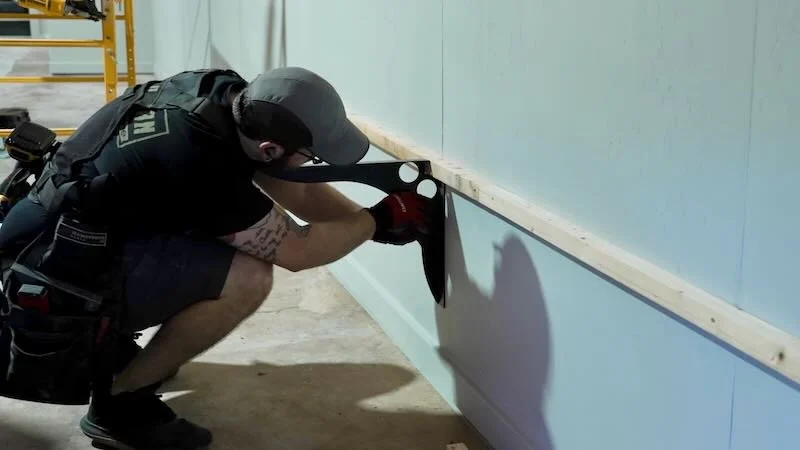
I used an oscillating multi tool to trim off the excess shims, and I should mention that I cut these shims out of treated lumber.
With that done, I could get the rack loaded down with all of the various plywood odds and ends that have been cluttering up the spray room since I moved out of my old shop.
I also went ahead and labeled the edges of the larger sheets to indicate whether they were full sheets or ripped down pieces, since it’s hard to tell when looking at the edges.
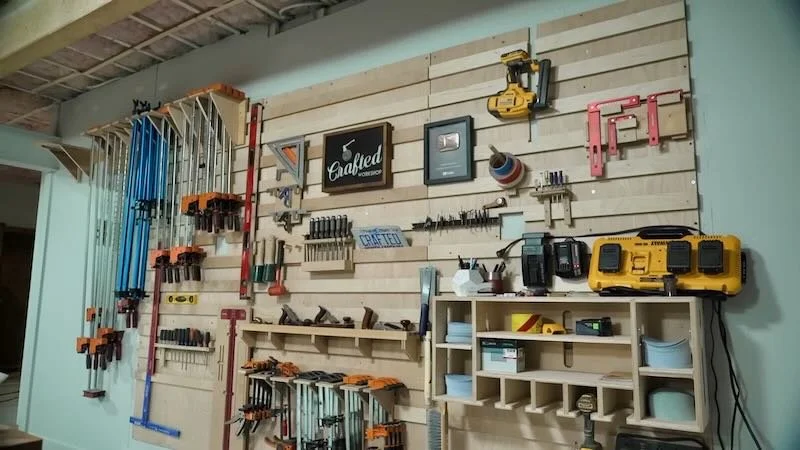
Last but certainly not least on the list was getting my French cleat wall hung up. I’ve been using this French cleat wall for years now and love not only its storage utility but also how it looks as a filming background.
I also have an entire video on making these French cleat panels and tool holders, if you’re interested in seeing how these were built.
I started by hanging the leftmost panel, screwing it to the wall with 2 1/2” screws, making sure to hit the studs where possible.
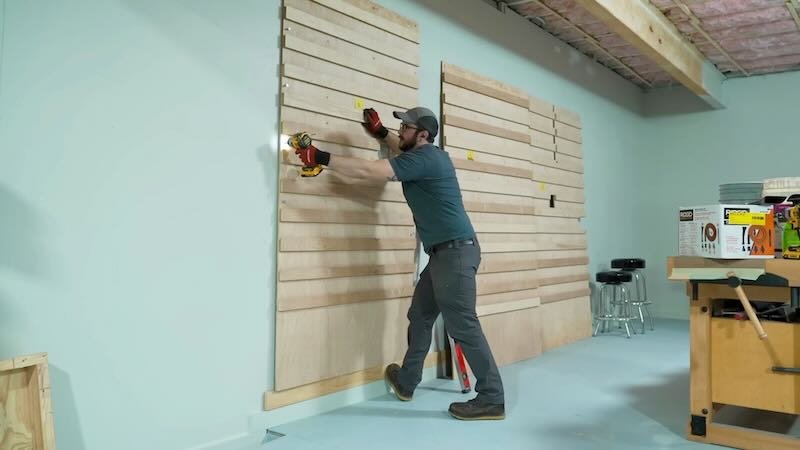
I repeated the process for the next two panels, probably going a little overboard with the screws, and then I also hit the panels with a random orbit sander to remove any of the staining from the mold that had built up on the panels previously.
The mold was killed, which I covered in the last video, and I vacuumed the bulk mold off of the surface of the panels before sanding.
The last thing I wanted to do prior to hanging my tools on the wall was to knock down the sharp edges on the cleats, as it’s really easy to catch a knuckle on these when grabbing a tool.
I used a block plane for this and was also able to smooth out some of the areas where the rows didn’t quite line up between panels.
Once that was done, I could start getting things hung back on the wall, starting with my drill charging station. This charging station was made by Andy Glass and I absolutely love it.
I also realized just how filthy the thing had become, with tons of black overspray dust from when I painted the tiny house kitchen cabinets back at the old shop.
Thankfully, a quick sanding took care of this and now I’ll finally have a home for my drills and impact drivers in this new shop.
Next, it was time to go through the box of tool holders I had built and these were also pretty filthy.
I gave them each a quick vacuum as I unpacked them and then got them mounted on the wall, using a screenshot from a video at my old shop as a cheat sheet to help me put everything back the way it was.
I also went ahead and added one more French cleat to the left of the panels to hang some of my longer clamps and my most used ladder. With that, the French cleat wall was done for the time being.