
Milling CUSTOM TRIM and PLYWOOD WALL Prep in the Not So Tiny House
In this video, I'll show you how I milled custom Maple trim for the plywood walls in the Not So Tiny house, plus how I prepped the plywood for installation in the next video!
🛠 Tools Used On The Custom Trim (affiliate):
📦 Materials Used On The Custom Trim (affiliate):
Now that the bathroom was finally behind me, I could move on to getting the plywood wall installation underway, but first I needed to mill up some custom trim for the plywood walls. The architect on this tiny house project, Rick Kazebee, had spec’d this trim detail in the initial renderings and this trim would serve two purposes.
First, it would make it a lot easier to get the vaulted ceiling and wall panels to meet cleanly, since the trim would cover any inconsistencies in those areas. Second, the trim would house an LED light strip which would function as a wash or accent light in the two bedrooms as well as the main living and kitchen space.

To make the trim, I started by picking up some rough 4/4 Soft Maple, which matches well with the pre-finished Birch plywood I used for the walls.
After getting the Maple unloaded into my shop, I got the pieces ripped into roughly 3 1/2” wide strips, and I used the bandsaw for this. Maple always seems to have a lot of tension, I’m not really sure why, and ripping it on the bandsaw was a lot safer than the table saw because of this. I also saved a little material this way since the kerf of the bandsaw blade is narrower than the table saw.

Outfeed support was obviously a must here and I absolutely love this super beefy outfeed roller from Rockler for this kind of work, as it’s heavy enough to stay in place rather than tip over like the cheaper rollers I’ve used in the past.
As you can see, these boards were pretty warped and bowed and jointing them would have removed way too much stock, so instead I just skip planed the boards, flipping the boards after each pass to slowly get them flatter and flatter. Skip planing works well for this kind of thing, since these boards didn’t need to be perfectly flat, and it also conserved a lot more material.

After skip planing, I jointed one edge, since these edges were pretty rough off of the bandsaw, and this was a little tricky considering the sheer length of these pieces, with the longest pieces clocking in at just over 12 feet long.

I eventually got one edge cleaned up on each piece and then I could rip the pieces to final width at the table saw. I ended up with a final width just under 3 inches, which was fine for this application.
As a final step after ripping on the table saw, I ran the pieces through the planer on edge just to remove any saw marks, and this saved me a lot of sanding later on.

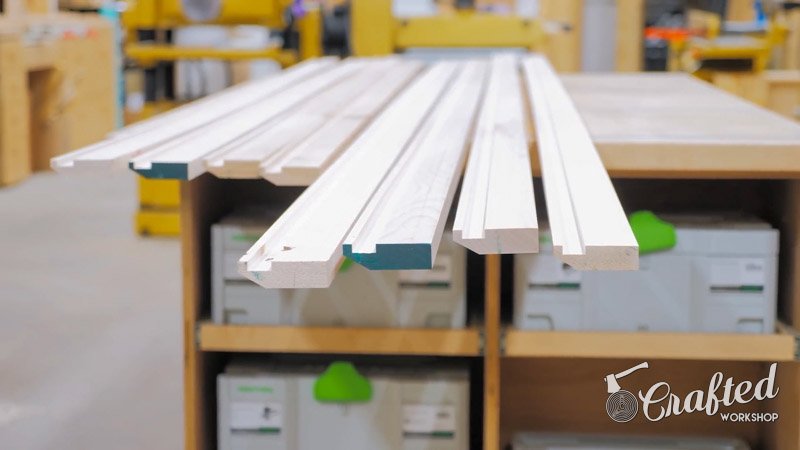
With the pieces milled to final dimension, I moved to the router table to turn these boards into trim. The first thing I needed to add was a groove for the LED strips, and this honestly probably wasn’t even strictly necessary in retrospect, since these trim pieces are mounted high enough where you wouldn’t see the LED strips regardless.

Either way, I did end up routing a 3/4” wide by 1/4” deep groove on the top face of the trim pieces, and to get the fence position and bit height set, I used this handy Rockler Router Bit Center and Depth Gauge, which has become indispensable in my router table workflow.

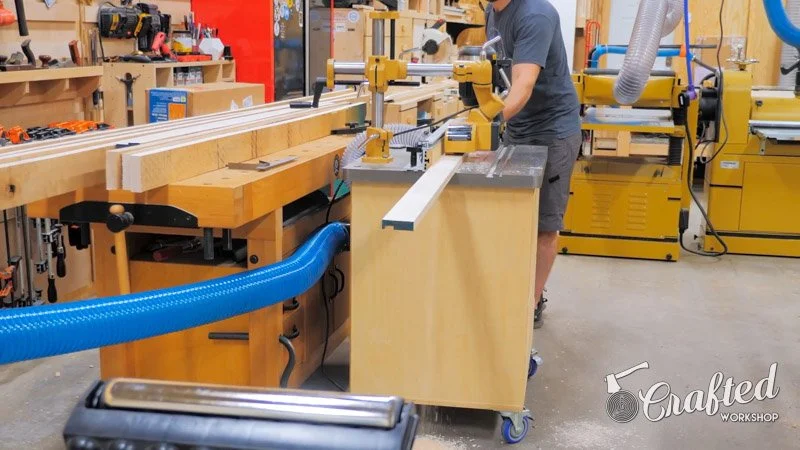
After getting the bit height and fence position set, I moved my power feeder into place, and this tool really made this whole thing possible, as I can’t imagine trying to manually feed 12 foot long pieces of trim through a router table unless you had a second set of hands.

That said, getting this power feeder set up just right can be a little tricky, and, as you’ll see, I had the roller speed set way too high, causing this to happen…
Basically, the forces at play were enough to cause the fence to shift, making the bit run off course, but thankfully I caught it quickly and shut everything down, so the trim piece was salvageable. I swapped the gears on the power feeder, which slowed it down significantly, reset my fence position, and tried again, and had much better luck from then on.
Also, as you’ll know if you’ve cut grooves or dados on the router table, they create a ridiculous amount of dust, even with good router table dust collection. Rockler has yet another handy accessory for this, the Router Table Dado Dust Chute, and I will definitely be getting mine set up after seeing the dust pile created here.
I got the groove milled on all eight trim pieces and then swapped over to this monster of a 60 degree chamfer bit to add a little bevel to the bottom edge of the trim. I cut this chamfer in two passes, removing most of the material on the first pass and then raising the bit ever so slightly for a finishing pass.
The final profile on the trim pieces looked like this and I was really satisfied with how well this went overall.
Next, I needed to address how I was going to mount these trim pieces, and I decided to go with pocket holes. In my rush to get these pieces prepped for finish, I of course drilled a pocket hole on the show face of the trim but, again, thankfully this part was able to be removed so the trim could be salvaged.

I drilled pocket holes roughly every foot, starting about 4 inches in from the end of the board, and my Kreg Foreman really made quick work of this task. Also, once again, infeed and outfeed support were pretty critical here and I think I’ll be building the Foreman into my miter saw station once I move to my new shop so it’ll have even more support.

Next, I needed to figure out how I was going to join the two pieces of trim which would make up the pieces for the main room, since they needed to be a total of 18 feet long, which I definitely couldn’t get out of one board. I could have certainly gone with a scarf joint, but I figured something a little stronger would be better here.
My solution was to first cut mortises for Dominos on either end of the two boards which needed to be joined, followed by another pocket hole. Next, I could screw the two pieces together temporarily and go ahead and sand any inconsistencies flush while they were assembled before taking them apart again.

This way, when I go to install the pieces in the house, I can add some glue to this connection and they should come together nice and flush, or at least that’s my plan.
After getting the joinery cut for the two trim pieces, I got all of the trim pieces sanded up to 180 grit, making sure to clean up any pencil lines or tool marks on the pieces. I really like using these Rockler Bench Cookies with the T-Track Risers for this type of work, as having the pieces elevated off of the bench allowed me to sand all of the edges easily.

This was still a solid hour of sanding, but at least my pieces were well supported during the process.
With that done, it was time to get the pieces finished, and I once again called upon my go-to clear coat these days, TotalBoat Halycon Clear. Halycon is a water-based polyurethane, meaning it dries super quick, but it’s also incredibly durable. It also sprays really well after thinning it about 20% with water.

I applied two coats of the gloss to build a good thickness quickly and then used Halycon Matte for the final coat, which matches the sheen on the pre-finished plywood pretty well.
With that, the trim was pretty much done, so I could turn my attention to prepping the plywood for installation, which was a project in and of itself.
To get the plywood prepped, I needed to rip each of the 50 sheets in half, and this was another detail spec’d by my architect. By ripping the panels in half, we not only accentuated the reveal detail between the plywood panels, since this created more of those reveals, but these half sheets were also much easier to handle when installing the panels.

Before getting to ripping, I swapped to a higher tooth count blade on my table saw to minimize tearout and I also installed this extremely useful Leg Up accessory, which is designed to assist in getting a full sheet of plywood safely up onto the table saw when you’re working by yourself.
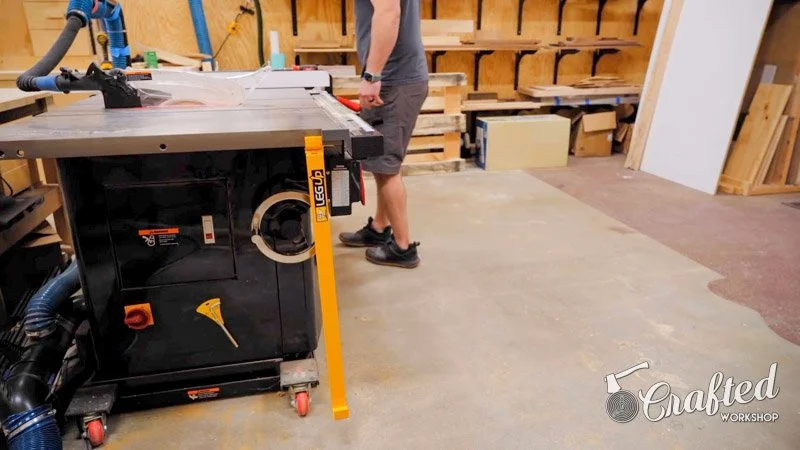
Now, it did take me a second to get the hang of it, as you can see, but this thing definitely saved my back when ripping these 50 sheets by myself.
After ripping the panels in half, I set the fence on my table saw to the final panel width, which was 23 7/8” in my case, which would translate to an 1/8” reveal between all of the panels.
Thankfully, this plywood was oversized by 1/2” in both length and width, so I was really able to clean up the factory edges on this second pass on the panels, cutting off about 1/4” from each factory edge.
This pre-finished 1/2” Birch plywood cost me $60 per sheet or $3,400 for 50 sheets delivered to my shop, and it took over two months to finally come in due to all of the crazy supply chain issues in the world right now.
Unfortunately, when the plywood finally showed up, a bunch of the panels didn’t look anything like I expected, and more than a few of the panels had some major color variations.
I was in kind of a bind, because I didn’t really have time to wait around for more material from a different supplier, so instead I decided to sort through the pieces as I cut them on the table saw and group all of the darker pieces together for installation in one room in the tiny house so things would at least be consistent, and thankfully this worked out.

Anyway, after all the ripping was done, I needed to get my drilling jig made. This jig allowed me to quickly pre-drill for the screw holes in the panels, ensuring that all of the screw holes in the plywood panels would line up.
I worked out all of my hole spacing in SketchUp, and let me tell you, having an accurate model of the tiny house has been so useful throughout this process, and that also allowed me to accurately order the plywood I needed for this part of the project.
I laid out the hole locations on this piece of 1/2” plywood and then drilled the holes at the drill press, setting the fence so the holes were centered a consistent 3/8” from the edge of the jig. These holes were sized to fit an 1/8” self-centering drill bit, and using this type of bit ensured the jig wouldn’t be destroyed like it typically would, with the drill bit wearing out the holes over time. Considering I would be using this jig to drill over a thousand holes in these plywood panels, I’m really glad I went this route.

After drilling the holes, I added a quick countersink so the bit would seat into the hole more easily, and I’m loving these countersink bits I picked up for this kind of work where a typical countersink bit would be undersized. I’ll link to the specific set I use in the video description in case you’re interested.

I wanted the jig to quickly be able to reference off of the top end and the edges of the panels, so I added a handful of locating blocks to the edge of the jig, and I centered the plywood strip on the blocks so the jig could be flipped to be used on either edge of the panels.

With that, my drilling jig was done, so I could load up and get everything moved over to the house. To cut down on the clutter in the tiny house, I only brought over one room’s worth of plywood at a time, which worked out really well since space was at a premium in the tiny house during this installation process.
I’ll be going over the process of getting the plywood hung on the walls and all of the little details I had to think through in next week’s video, so stay tuned for that, but you can see in this shot where this custom trim was installed, between where the ceiling panels and wall panels met. I’ll show the process of installing the LED strips in next week’s video, but I really love the look of these strips firing up at the ceiling, it’s a super cool effect.