
How To Install DIY Hardwood Flooring with Tips for Beginners!
Learn how to install solid hardwood flooring with a few simple tools! Hardwood floors are durable, beautiful, and a great DIY project.
Note: Below are affiliate links
📦 Materials Used On The Hardwood Flooring Installation:
🛠 Tools Used On The Hardwood Flooring Installation:

Hardwood Flooring Process:
Step 1: Clear Space and Remove Trim

Our bonus room had become what was basically a storage room since moving into our house back in February. This room hasn’t had much of an identity, since it wasn’t really a bedroom and because I didn’t really need it to be an office, so it became a dumping ground for stuff.
I decided that enough was enough and that I needed to revamp our bonus room. I’ve got plans for some awesome built-in cabinetry, including two Murphy beds, a closet/dresser combo, filing cabinet, and a desk, so stay tuned for those videos.
All that being said, I wanted to start the work in the bonus room by replacing the carpet with hardwood flooring, since it would have been next to impossible to do that once all of the cabinetry was in.
I also wanted to replace all of the baseboards and window and door casings with more modern looking 1x4 and 1x6 trim, so I started by removing the existing trim after cleaning everything out of the room.
Removing the trim was pretty simple, I just scored the caulk line with a utility knife and then used this tool called the Trim Puller to pry off the trim. The key here is to avoid putting too much pressure on the drywall, as it’s pretty easy to dent it or even punch right through, which I did in one spot.
Step 2: Carpet Removal and Clearing Floor
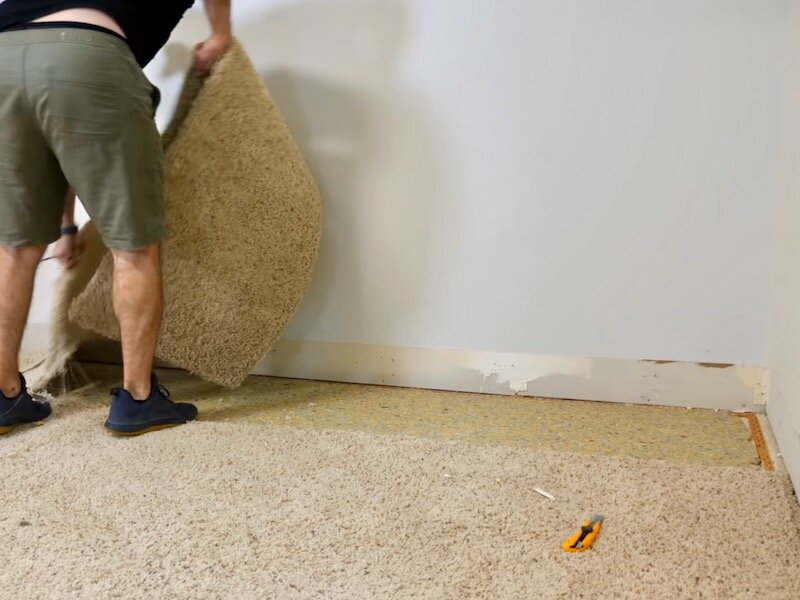
Once the trim was out, I could start removing the carpet. I like to remove carpet in smaller sections, so that it’s easier to move around once it’s pulled up. I just cut the sections with a utility knife and then pulled up the carpet from the corners, which is where the carpet is attached to the tack strips.
After removing the carpet, I came back and removed the carpet pad, which was attached with staples. Luckily, whoever installed this carpet didn’t go nuts with the staples, and the pad would typically leave little chunks behind where it was stapled, which gave me a good visual reference of where the staples were located when it came time to remove them.
Speaking of which, next I went ahead and removed all of the carpet pad staples. I’ve found diagonal pliers are just about the quickest way to remove these while making sure you’ve thoroughly removed all of the staples. Again, I was lucky in that the carpet installers only added staples around the perimeter of the room and along the seams of the carpet pad.
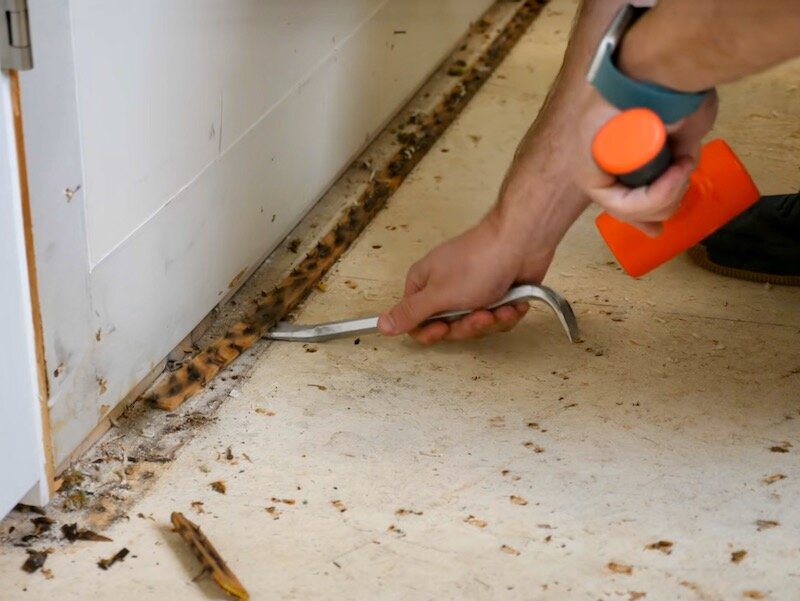
Once the staples were up, I could work on removing the tack strips. I’ve found that a pry bar removes these quickly, and the key is to just barely pry up each nail that fastens the tack strip to the subfloor. If you pry up too much, the tack strip will break into a bunch of pieces and will be a mess to clean up.
Also, be really careful when working around these tack strips, as they are insanely sharp and covered in pointy bits. I like to roll up the tack strips in the carpet pad after removing them, which makes them easier to dispose of safely.
Once the tack strips were up, all that was left to do was go around and check for any staples I might have missed, as well as any raised subfloor nails. When I came across these, I just pounded them back down with a hammer. You could add some deck screws to these areas, or any areas where you have squeaking, for a bit of extra hold, but my subfloor was pretty well attached so I didn’t need to do that.
After that, I could vacuum up any dust and debris to finish prepping the subfloor. Vacuuming also gives you one final chance to find any remaining staples, as the vacuum will usually get hung up on any raised sections.
Step 3: Installing Vapor Barrier Below Hardwood Floor

With the subfloor prepped, I could move on to installing a vapor barrier, which is a requirement when working with solid hardwood flooring. A vapor barrier helps to prevent too much moisture from contacting the flooring, which will cause rapid expansion and subsequently cupping.
I used a plastic vapor barrier, as this bonus room is above our unconditioned garage and will be exposed to more moisture because of that, but most flooring installers use something like red rosin paper or felt paper.
This plastic vapor barrier had an adhesive strip built in, so I could attach the strips to each other rather than having to use a ton of staples to attach it to the flooring. I did start and end each row by stapling the vapor barrier to the subfloor using a hammer tacker and I made sure the vapor barrier extended across the entire subfloor and through the doorway transition.
Step 4: Sorting Hardwood Flooring Before Installing
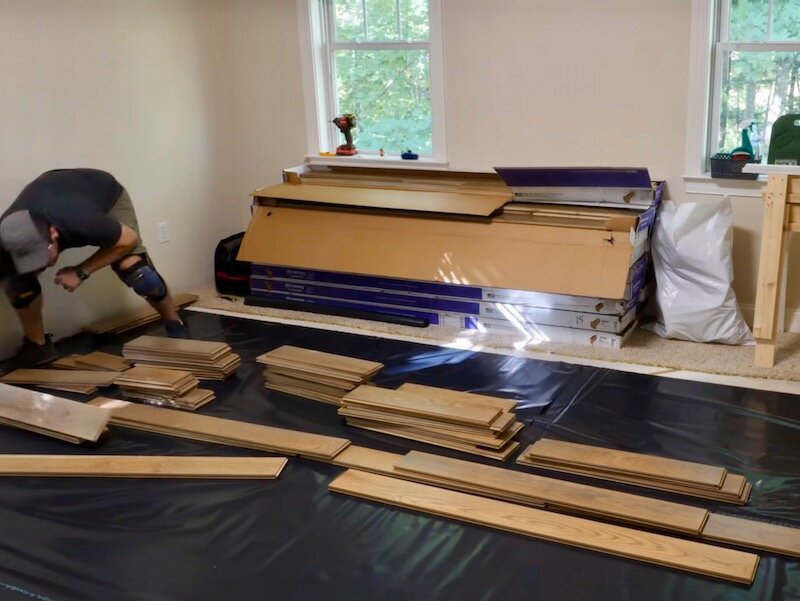
With the vapor barrier down, I could starting getting the flooring installed. I started by removing pieces of the flooring from a few different boxes, mixing them up so there wouldn’t be any obvious color differences from the different boxes.
This particular flooring, which is a ¾” solid Oak hardwood from Armstrong Flooring, has a randomized color that they call Prime Sable, so this wasn’t a huge necessity for me.
I have actually had this particular flooring since before we moved into this house, as I was planning to finish our attic in our old house, so this flooring has been sitting in this room for about eight months. That said, if you’ve purchased new flooring, you’ll want to give it a few weeks to acclimate to the environment. It’s also a good idea to go ahead and remove the flooring from its boxes during that time, as that will speed up the acclimation process.

I actually own a Wagner Orion 950 moisture meter, so I went ahead and checked a few pieces of the flooring just to confirm its moisture level was good, and the pieces I checked were at or below the Equilibrium Moisture Content of the room, meaning that they were well acclimated to the environment.
Finally, after all of this work, it was time to get the first row installed. I started by marking a point ½” from each end of the wall and snapping a chalk line. That ½” gap will allow the wood flooring to expand and contract seasonally without being constrained, which would lead to issues later on.
The reason I snapped a chalk line rather than using a ½” spacer is because most walls are not perfectly straight, so it’s a good idea to do this unless you are absolutely sure your wall is straight. Case in point, while my line was ½” from the wall at each end, it ended up about ¾” from the wall towards the center of the room.’
Step 5: Leveling Floor Before Hardwood Installation

With the reference line in place, I could start laying out my first row, and that’s where I ran into trouble.
I found a dip in the subfloor that slopped downwards towards the wall, I was able to actually use three layers of shingles with varying widths to feather in the transition to the wall. I used one full-width piece, one half-width piece, and one quarter-width piece and this ended up working along the entire length of the wall.
Step 6: Install Hardwood Flooring

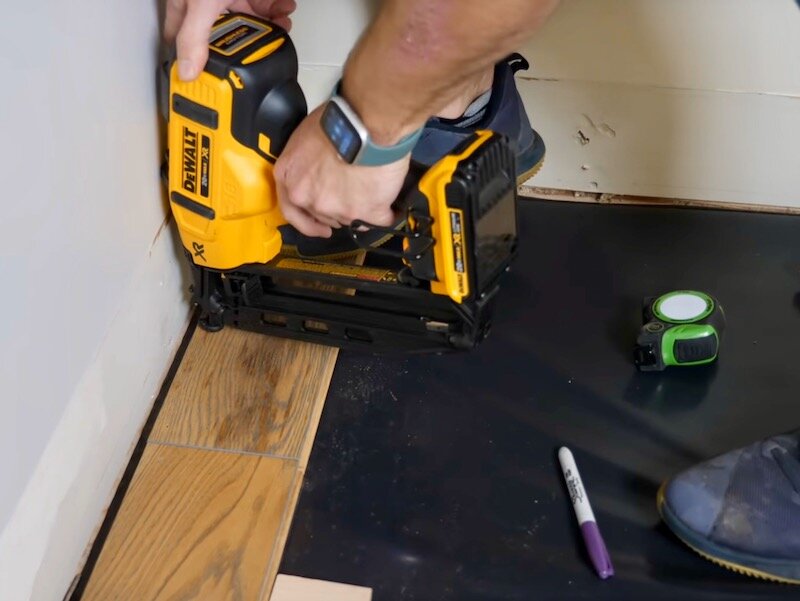
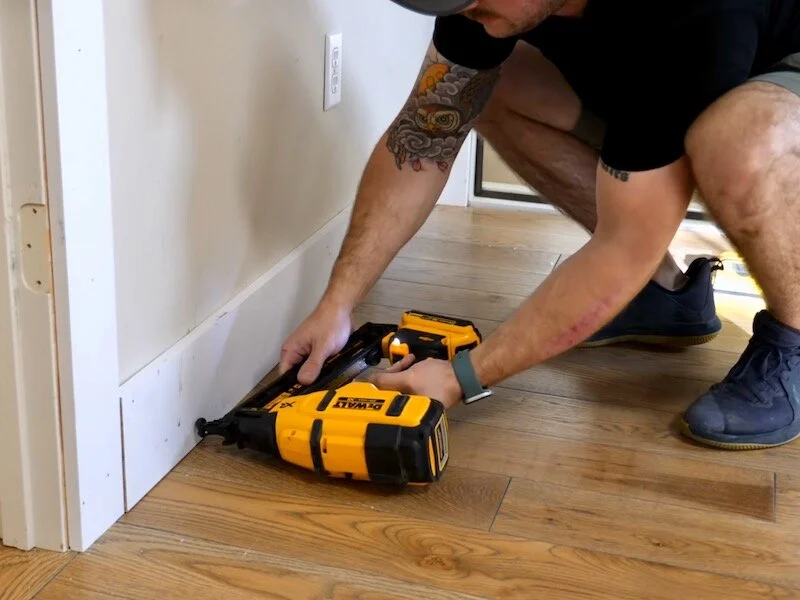
With the shingles in place, I could finally get to installing the first row. I used my chalk line as my reference point and face nailed the first board in place using a cordless finish nailer. If you don’t have a powered nailer, you could use a hammer to drive in finish nails, but you’d want to pre-drill the holes to avoid splitting the flooring.
I repeated the process for the second board in the first row, also nailing through the edge of the tongue to secure the board to the subfloor from both edges. By the way, I figure that I should mention that the pile of electronics I’m working around here is our home internet. Unfortunately, I couldn’t just kill our internet for a few days, so I had to work around this mess during the install process.
Anyway, I repeated the process for the third board in the row and then I could install the final board. I needed to cut the board to length to fit, and the way I like to mark the length on these boards is to use a spacer against the wall, a scrap piece of ½” plywood in this case, flip the board around 180 degrees, then mark where the face of the previous board meets up with the board I needed to cut.
This marks the exact location without having to do any actual measuring. I find it’s much faster and less accident prone than measuring.
To make the cut, I used a miter saw, although a circular saw or even a jigsaw would work fine here. These cuts don’t need to be insanely precise, as they’ll be covered by the trim.
After cutting the board to length, I could nail it down and finish the first row. I did go back and use a nail set to set any nails that didn’t drive in fully, especially in the tongue, since the next row would need to match up tightly against the first row.
To start the next row, I used one of the shorter pieces of hardwood, as you want to stagger the seams when installing hardwood flooring, both for aesthetics as well as strength, and I used a flooring mallet to make sure the plank was nice and tight against the first row.
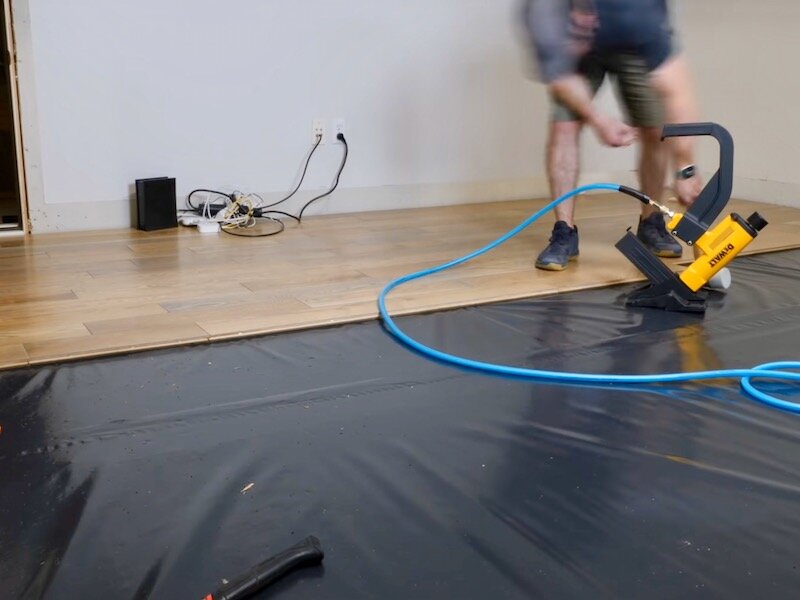
Step 7: Using A Flooring Stapler To Adhere Hardwood Flooring

With the plank in place, I could finally pull out the real star of this show, the pneumatic flooring stapler. This beauty drives 2” staples through the tongue of the flooring, securing it tightly to the subfloor.
To actuate the stapler, you hit it with this mallet that’s included with the stapler, and that force from hitting the stapler also helps to close up any gaps between the planks.
I added staples every 6-8” and also made sure to stay clear of the ends of the planks to avoid splitting the tongue.
From there, it was really just rinse and repeat, but I’d also like to point out this flooring mallet before moving on. The metal end of the mallet has this wedge shape, which prevents it from damaging the face of pre-finished flooring like the flooring I’m installing.
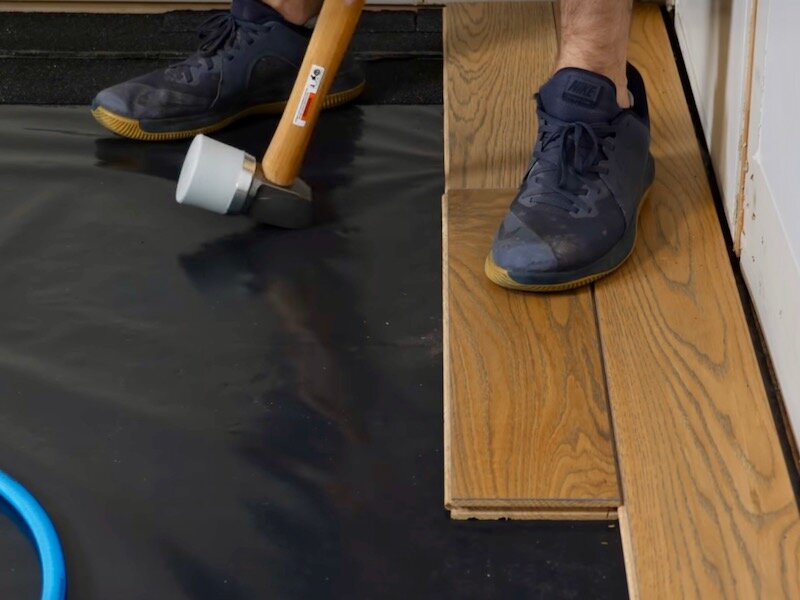
You will likely need to tap the flooring into place due to the subfloor being uneven or the flooring itself being bowed, and this mallet will be your best friend during installation. Also, get ready to have a monster blister from hitting this mallet thousands of times over the course of the installation.
Step 8: Transition

After getting the flooring installed up to the doorway, I could start working on the transition. I wanted a flush transition rather than having to use t-molding, as I’ll be installing the same flooring in this adjoining hallway in the future.
The first step was to undercut the door jamb to allow the flooring to run below it, and I like to use a pull saw to do this. I used an offcut of the flooring as my spacer and just made sure the saw was flush with the flooring as I cut through the jamb. I actually find this method to be just as quick as an oscillating tool and it’s much quieter.
Once the jamb was undercut, I could slide the piece of flooring I was going to use as the transition into place. As you can see, this will result in not only a perfectly flush transition but, in my opinion, a great looking transition.

I temporarily placed the transition piece and then fastened the first board in the next row, to act as a hard stop for one end of the transition. Once that board was fastened, I could square up the transition strip, making sure it was also even across the doorway. I used a large square for this, as I really wanted a nice, tight install here.
Once I had the transition strip where I wanted it, I nailed it into place through the tongue. I didn’t use the flooring stapler here as I was worried it would move the board around too much.
Step 9: Back to Installing Hardwood Flooring Planks
With the transition strip in place, I could get back to adding rows, which was once again more of the same.
One thing I really liked about this particular flooring was the random lengths it came in. This made it really easy to practically eliminate waste, as I could usually find a piece that fit almost perfectly at the end of each row. It also made staggering the seams between the planks simple, and I could also avoid H-joints very easily.
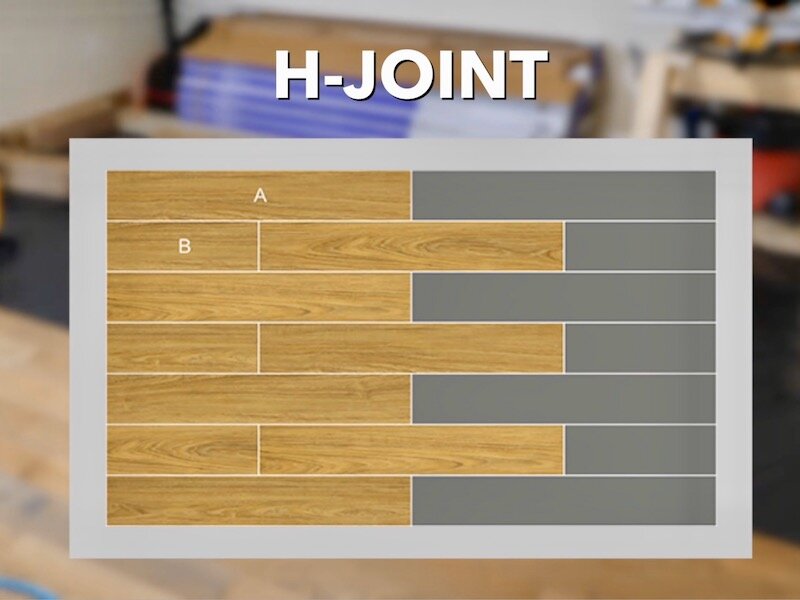
If your flooring comes in standard lengths, you’d want to focus more on avoiding these types of joints. H-joints happen when you install row after row of flooring with the seams lining up in every other row. This is not only aesthetically kind of off, it also impacts the integrity of the flooring.
Stair stepping is another thing you should generally avoid, and it is more of an aesthetic thing, but in my opinion, flooring should be installed with no discernible pattern where possible as it’s less distracting visually.

Anyway, I kept installing flooring until I got to the area I had been storing the hardwood during the install, and had to take a break to move the hardwood, remove the carpet and trim, and add the vapor barrier to that area before moving on.
Once that was done, I continued adding rows and eventually, when I got to the fourth row from the wall, I started to run into the wall with the mallet when hitting the stapler.
After installing that row, I had to switch back to using my finish nailer instead, which still went fairly quickly. The one issue with using the finish nailer here rather than the flooring stapler was that I was having a hard time closing up the gaps between the planks entirely.
There is evidently a tool for this, called a flooring jack, but I was unfortunately unaware of this tool at the time. I can definitely see where one of these tools, which pushes between the wall and the flooring, would come in handy and plan to pick one up before installing the flooring in my hallway.
Anyway, once I got to the very last row, I needed to cut the planks to width to have the correct expansion gap between the boards and the wall. I went ahead and laid out the pieces for the entire row and then numbered each piece, also writing the width I needed to cut each board to on the backs of the planks.
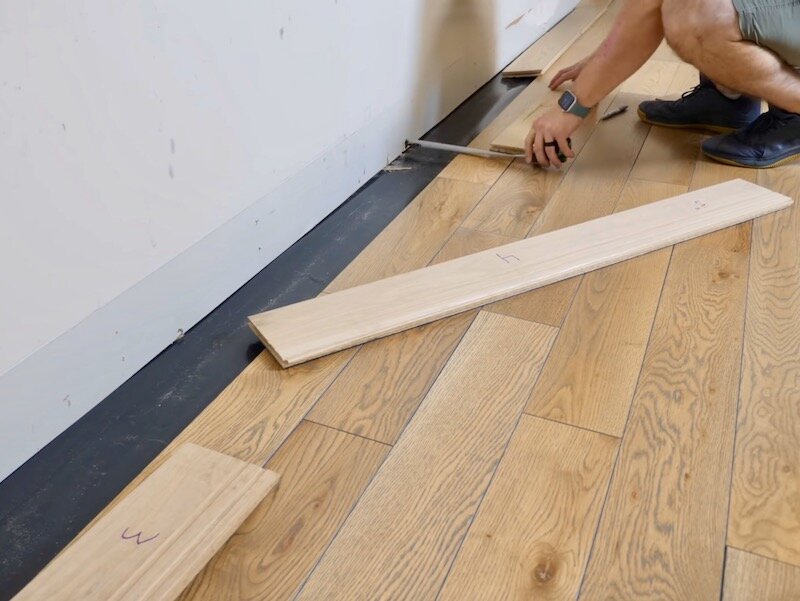
The gap between the second to last row and the wall varied about ½” between each end, so I did need to cut the boards to differing widths.
Also, as you might be able to see, I had set aside boards with damaged tongues to use on this last row, as I knew I would most likely need to rip the last row to width anyway.
Luckily, I ended up with almost a full row for my last row, but if your last row is extremely narrow, less than 1”, you might need to glue it to the previous row, depending on your manufacturer’s instructions.
Anyway, I ripped all of the boards to width at the table saw, adjusting the fence based on the measurement I had written on the back of the boards. If you don’t have a table saw, you could use a circular saw or jigsaw to make this cut.
To install the last row, I used a pry bar to help get the board set in place before face nailing it. I could not find my flooring pull bar, which I’ve used in previous flooring installs, but that would have certainly came in handy here.
I made sure to get the flooring as tight as I could and, honestly, I still ended up with some small gaps but nothing major.
With that, the flooring was finished, so all that was left to do was reinstall the trim. I started with the 1x4 door casing and needed to first remove the hinges and strike plate from the door, as well as scrape off any residual caulk.
Step10: Reinstall Trim Around Doorways and Floor

I went over the process of installing door casing during my shop build series, and I’ll link to that video if you want more details, but the basic process is to cut the vertical casing pieces ¼” longer than the distance between the door jamb and the floor. This will result in a ¼” reveal for the horizontal casing piece.
After cutting the vertical pieces to length, I tacked them in place with one nail so that I could still make adjustments, and then cut the horizontal piece to length.
Once I verified the fit, I nailed it in place, using shims where necessary so that the pieces matched up nicely.
I then added more nails to the vertical pieces, making sure I had an even ¼” reveal around the entire door.
I repeated the process for this small door which leads to our crawlspace, and I needed to rip down one of the vertical pieces to fit the space. Also, I’m using finish nails here and nailing into the framing around the door, but I came back with a brad nailer and nailed the casing to the jamb as well.
With the door casing installed, I could work on installing the 1x6 baseboards. I marked my stud locations to make sure I was nailing into the studs, and I used 2” finish nails to attach the baseboards.
You might also notice a small gap between the end of the flooring and the baseboard, and that is because the 1x6 boards I bought were actually only ⅝” thick rather than the ¾” I was expecting. I actually had to come back and shim the baseboards in a few spots to cover this up, which was definitely frustrating.
I continued installing the baseboards around the rest of the room, leaving the wall where I’d be installing the Murphy beds and other cabinetry without trim since it’d have to be removed anyway.
The last thing to do once the baseboards were in was to fill any visible nail holes in the flooring with matching acrylic filler. This filler is made by the same manufacturer as the flooring and is colored to match the flooring.

With the nail holes filled, I could call this flooring installation finished!