How To Build A Storage Shed Part 2 : Shed Roof, Shed Doors and Shed Ramp
Learn how to build a 4x8 lean-to storage shed in this two part series! In part 1, I'll show you how to prep the site, build the foundation and floor, frame the walls, add the siding, and finally build the roof framing.
Note: Links Below Are Affiliate Links
Thanks to HART Tools for sponsoring, learn more here.
🛠 All tools used on the shed build were from HART Tools

Process For Building A Storage Shed (part 2):
Step 1: Attach OSB Roof Sheathing To Roof Rafters
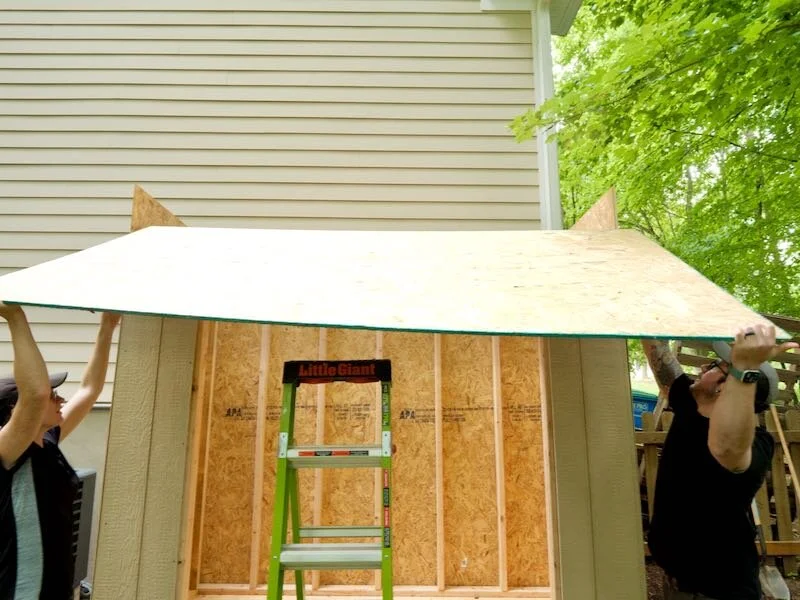
Next on the list was getting the roof sheathing on, and I used ½” OSB for this. I got the first sheet up onto the roof with the help of my ever-helpful wife and then added a few screws to hold it in place before I climbed up on the roof and added more screws.
After adding the first sheet, I measured for the second piece I’d need to add, cut it off camera, and then dropped it in place and got it screwed down.
One thing I forgot to do here was add a little spacing between the two sheets, to allow for expansion seasonally. I’m not too worried about it since it’s the middle of a very humid summer here, but it’s good practice to add a few nails as spacers temporarily while you’re installing the sheathing.
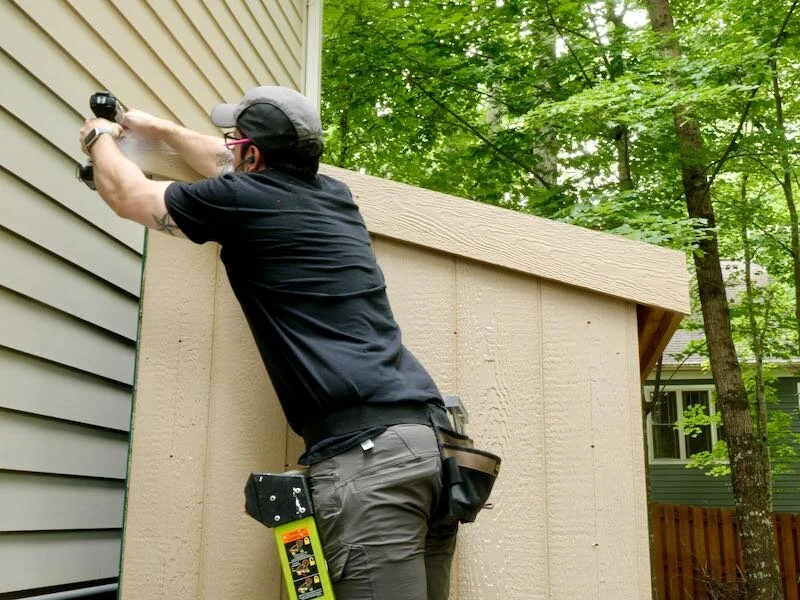
Step 2: Trim Shed Siding To Correct Length With Circular Saw
Always practice safe habits with power tools
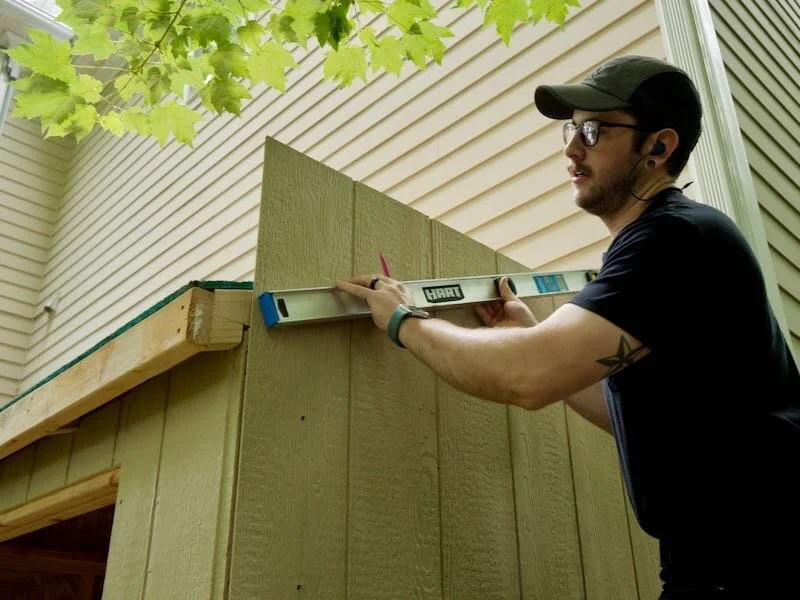
With the roof sheathing on, I could go ahead and cut the excess siding off. I left it long up until now so the siding could act as a guide for that first sheet of OSB when sliding it up onto the roof.
I marked a line using a level just below the surface of the roof sheathing, set my circular saw blade to cut slightly deeper than the siding, and then cut to my line. This was definitely a little awkward due to how sloped the ground was in this spot, but I got eventually got it cut down.

After cutting down the siding, I could go back and add filler pieces to the gable fascia at the two ends, to act as spacers for the fascia trim I’d be adding next.
Step 3: Attach Fascia Trim To Sub-fascia Board
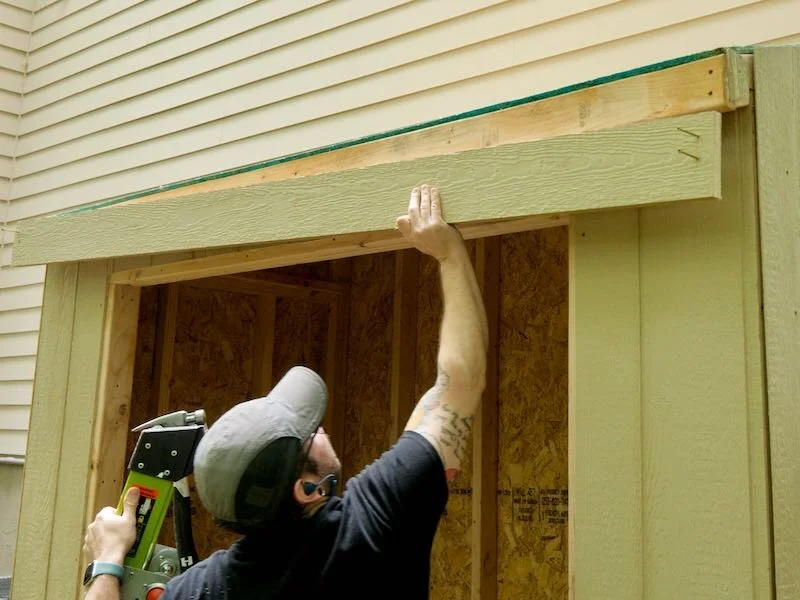
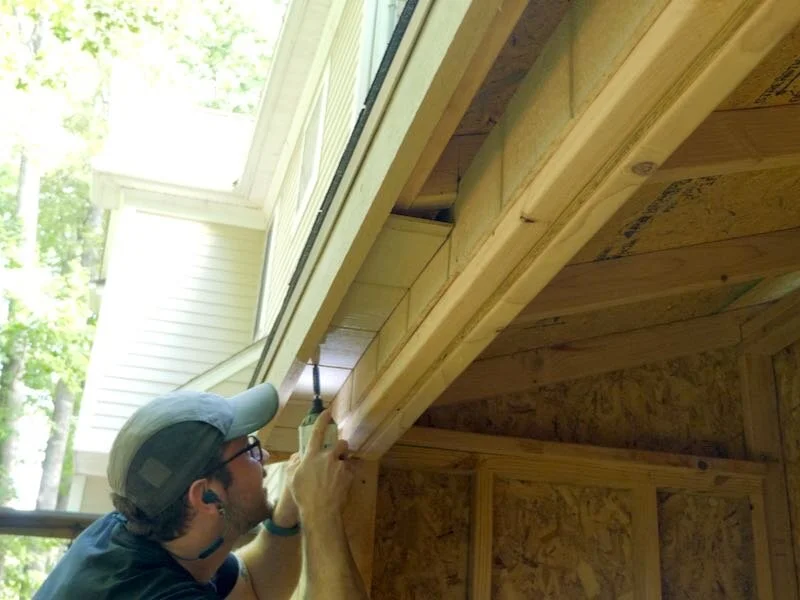
Speaking of which, next I could get the 1x6 trim added to the fascias. This was one spot where the plans I used were incorrect, as the plans call for 8 foot long pieces of trim, but since this trim has to span the roof framing and the siding, I actually needed 8 foot 1 inch long pieces for the eve fascia trim.
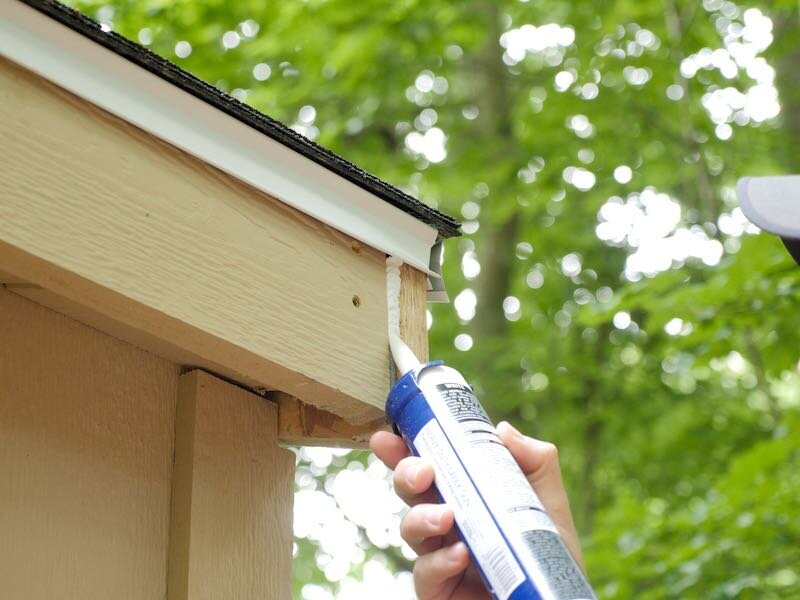
This wasn’t a huge deal, as I needed to leave gaps at the ends of this trim for expansion anyway based on the manufacturer’s instructions, but these gaps were a little larger than I’d like, but nothing a bunch of caulk won’t hide.
I repeated the process adding the fascia trim to the back of the shed, which was again extremely awkward due to how close to the house I was, and then I could get the gable fascia trim added.
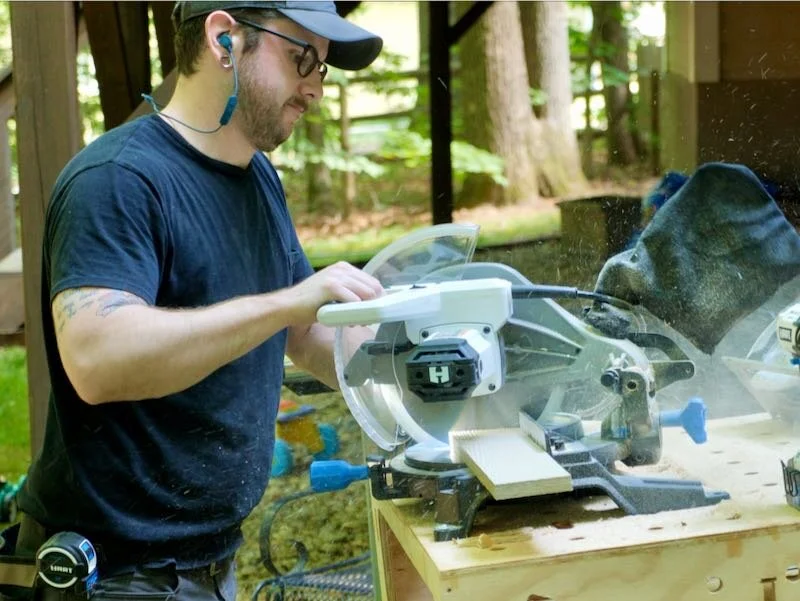
The ends of this trim are cut to that same 18.5 degree angle the rafter tails were cut to, and I cut these pieces at the miter saw. After getting the trim fit, the trim is installed with more 2 ½” screws.
Typically, at this point you’d continue adding the rest of the trim to the shed, but I decided to skip ahead to roofing as we were set for multiple days of rain and I wanted to get the shed dried in.
Step 4: Dry In Your Shed With A Front Drip Edge, Felt Roofing Underlayment, And Shingles

The first thing to add here was a drip edge to the front edge of the roof, and I needed to cut and bend the drip edge around the front corners of the fascia.
To fasten the drip edge, I use 1 ¼” roofing nails and added nails every foot or so through the drip edge into the roof sheathing and sub fascia.

The next thing to add was some felt roofing underlayment, which acts as another barrier between the elements and the roof sheathing. I attached this with more roofing nails, although plastic cap nails are the more traditional choice, I just didn’t have any on hand.
Once the felt paper was on, I measured for more drip edge for the gable fascia, cut it to length, and nailed it on, overlapping the felt paper and front drip edge.
I repeated the same process on the other side of the shed and then I could prep for adding shingles by snapping some reference chalk lines every foot going up the roof. This felt paper actually already had lines but, due to my hefty overlap on the felt paper, they didn’t really line up with the shingles as they went higher on the roof.
With that, I was ready to get to adding shingles, and I first needed to make some starter strips, which help that first full row of shingles stick to the roof. To make my starter strips, I cut a few pieces of shingles in half lengthwise along the tar strip, and then I cut one of the starter strips down by six inches to get a sufficient offset from the first row of shingles.
Step 5: Cut Shingles To Size With Sharp Utility Knife, You Will Dull And Use Multiple Blades During This Process
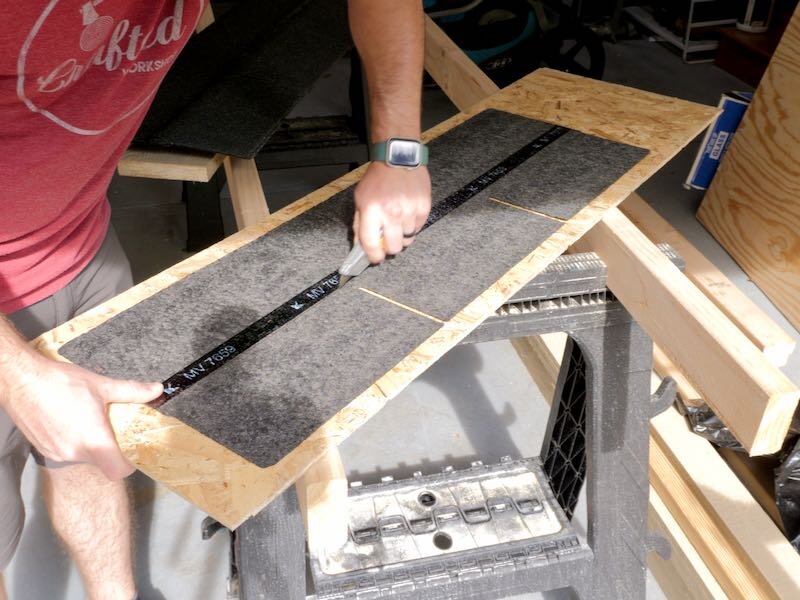
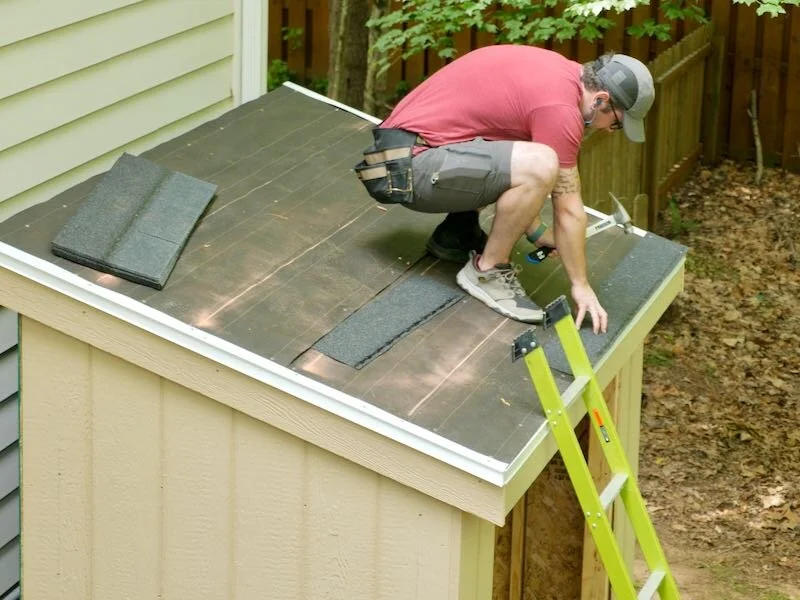
Next, I could get the starter strips installed on the roof, making sure to overhang them over the edges of the drip edge by ⅜” on both edges. Each strip and shingle needs nails spaced every foot, with one nail at each end and two spaced evenly in the center.
After adding the starter strips, I cut the end off of the overhanging strip, making sure to leave that same ⅜” overhang, and then I could add my first strip of shingles.
Notice anything wrong here? Somehow in my haste to get these shingles on before the rain came, I completely spaced and installed the entire first row of shingles upside down.
After realizing my mistake, I decided to just go with it and installed my actual first row of shingles on top of my mistake row. I figure the roof will just be double protected in this area.
Anyway, the first row of shingles started with a full sized shingle and ended with an overhanging piece, which I cut down with a utility knife, using another shingle as a straight edge.
If I could give you one tip when installing shingles, it’s to have plenty of extra utility knife blades on hand. I only had the one blade left here at the house and it was incredibly dull on both ends by the time I got about halfway up this roof and it made cutting the shingles much more difficult.
The second row of shingles is offset from the first row by six inches, so the flaps on the second row are centered between the flaps on the first row, and the process just continues up the roof from here. As you can see, I screwed up again by having a larger offset on the third row and spaced it too far, but I was able to just fill it in and continue up the roof.
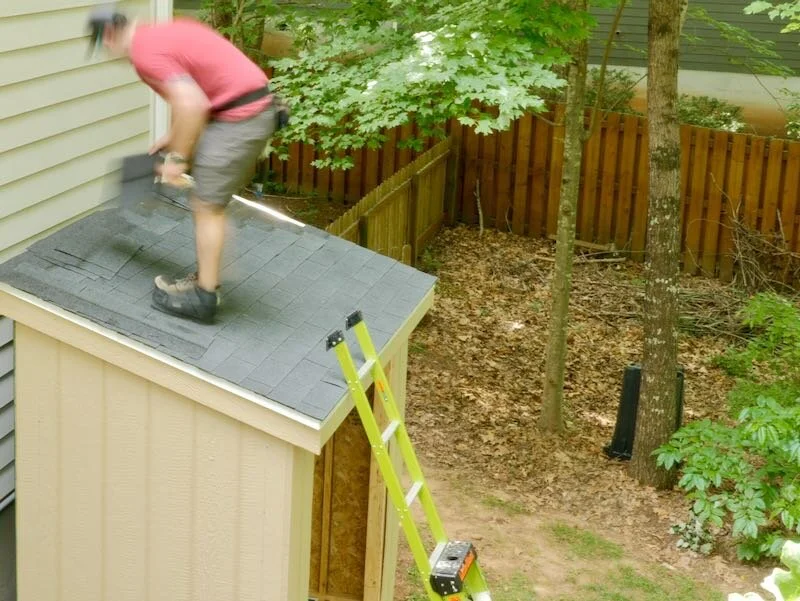
As I continued up the roof, I would restart a row with a full shingle after six rows, and I could fill in the offset areas on the right side of the roof with the offcuts from the left side, so I was able to use the shingles very efficiently.
Of course, I ran out of nails right before that last row, so I had to run back out to the store, but once I got the last row installed, which was a half row in my case, I could add a wider drip edge along the top edge of the roof.
To help seal this piece, since it will be more exposed to the elements, I added some roofing sealant to the underside of the drip edge and then nailed it in place.
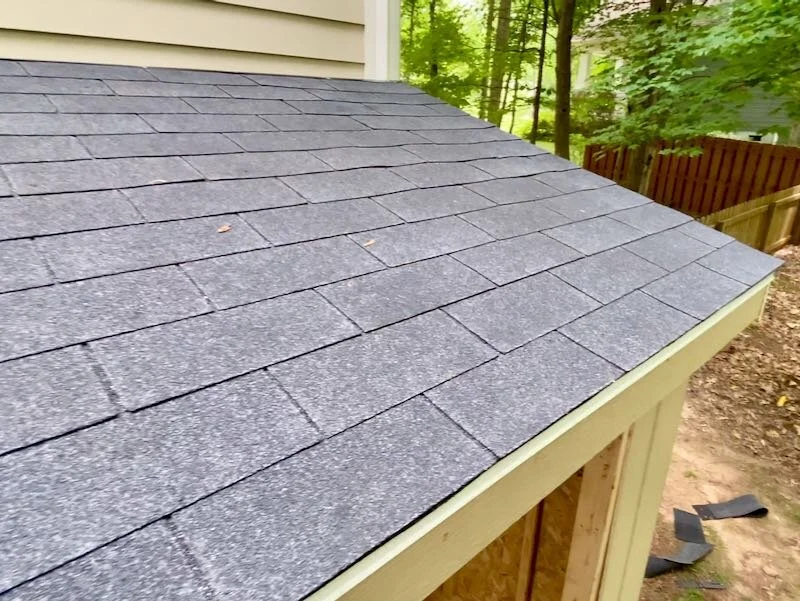
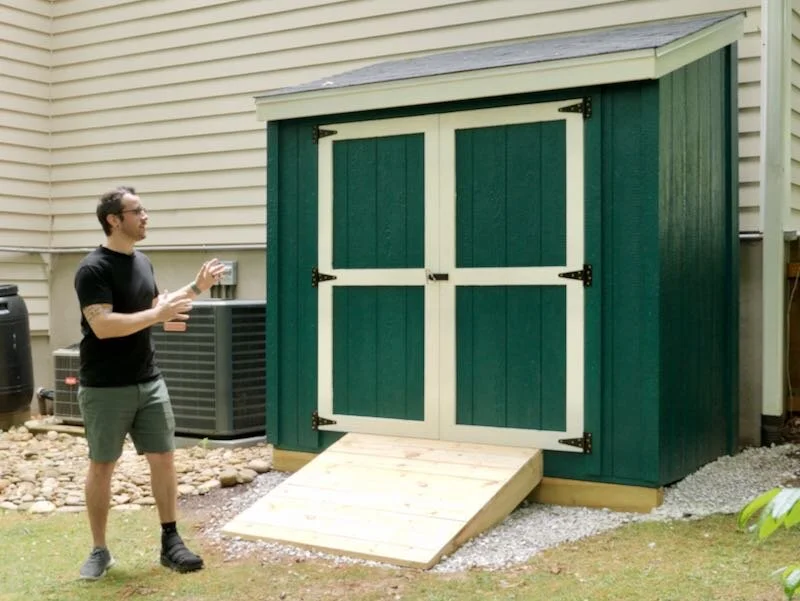
With that, the roof was done and the shed was dried in, and I’m really happy with the way it turned out. Roofing is definitely a pain but it pays to install it well, especially when you can see the roof easily, like you can see this roof from our deck, which overlooks this shed.
Step 6: Cut Trim To Correct Lengths With Miter Saw And Attach To The Corners And Edges Of The Shed
Now that the shed was dried in, I could move back to the trim, and the next pieces to install prior to the corner trim were a few pieces to cover the soffits on the underside of the rafters.
I used some of the scrap pieces of siding for this, which worked out perfectly, and installed them by screwing them onto the sub fascia. In reality, these need to be screwed to the rafters instead, so the soffit pieces angled upwards, as otherwise there won’t be enough room for the trim above the door opening, which I found out a little later.
Next, I got the corner trim installed, starting with one of the pieces on the sides of the shed. These need to have a matching angle cut onto one end, to match up with the gable fascia trim, but, as long as everything was built correctly, this should again be that same 18.5 degree angle that we’ve become so familiar with.
After cutting the piece to length at the miter saw, I could get it installed on the shed and, as I mentioned previously, this particular trim needs a 3/16” gap left anywhere it butts up to another piece of trim. Luckily, my speed square is exactly 3/16” thick, so I used it as a spacer, and used an offcut piece of trim to help align the piece I was installing with the front face of the shed.
I installed the trim with more 2 ½” screws, and then I could continue adding the rest of the trim around the shed. The corner trim on the front and back faces of the shed need to be notched around the gable fascia trim, which I did with my jigsaw, but otherwise the rest of the trim is fairly straight forward to install.
After getting the trim added to the front corners and the door opening, I added the trim to the back corners, and I decided to change things up a bit here and used some of the leftover 1x6 trim from the fascias at these back corners.

I had ended up with a bunch of extra screw holes here by adding the screws in the wrong place when adding the siding and I wanted to cover those up, and these 1x6s were perfect for this.
With that, the trim was done, so I could move on to building and installing the doors on the shed.
Step 7: Build The Shed Doors
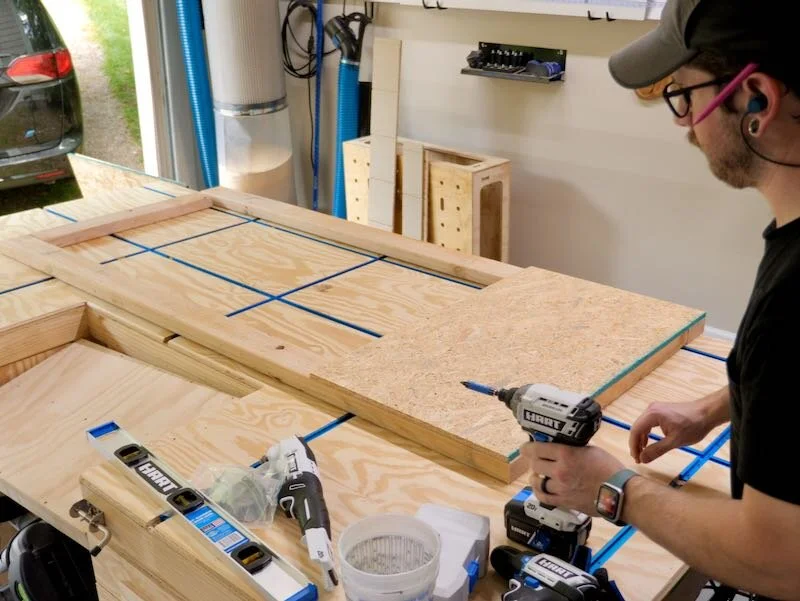
To assemble the doors, I first attached these OSB pieces to the 2x4 framework that makes up the core of the door using some 1 ⅝” trim head screws. I made sure to check for square frequently here, as the last thing I wanted was an out-of-square door that wouldn’t fit in my door opening, but, after locking in the squareness, I came back and added a bunch more screws for reinforcement.
I actually ended up cutting up the remaining OSB from the roof sheathing for the inside faces of these doors, rather than going out and buying another whole sheet of OSB for this, and this worked out great and left me with essentially no wasted OSB.
Step 8: Measure And Create The Framework Of The Shed Doors With 2x4’s And OSB
Next, I flipped the door over and dropped on the front face, which is more of the siding. This is actually from the offcut from the siding on the front of the shed, and this design makes really efficient use of these siding pieces with very little waste.
The siding is oriented on the front face of the door so that it overhangs the edges of the door on all four sides, at least on this right door, and that the overhang will overlap the left door, keeping it locked in place.
Step 9: Attach Siding And Trim To The Outside Of The Shed Doors
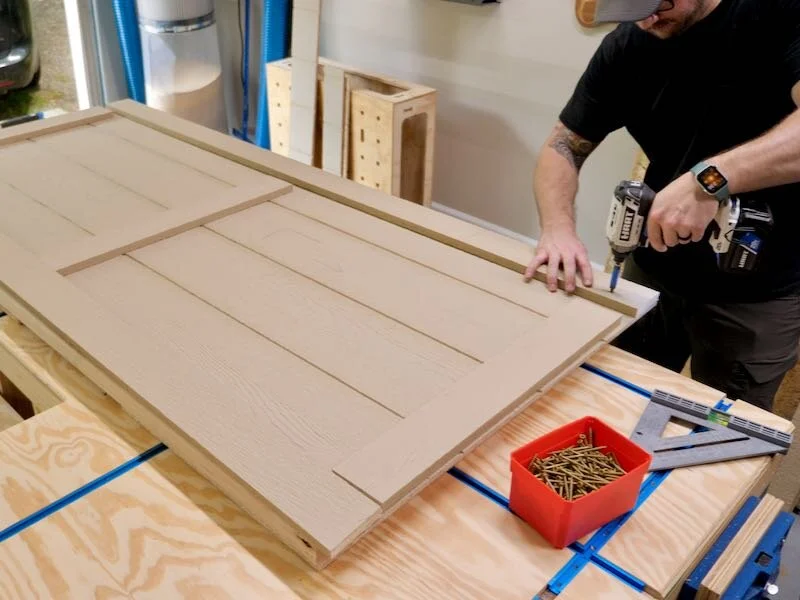
Getting this overhang just right on all of the edges takes a little adjusting but, once I had the placement dialed in, I attached the siding to the door with more trim head screws.
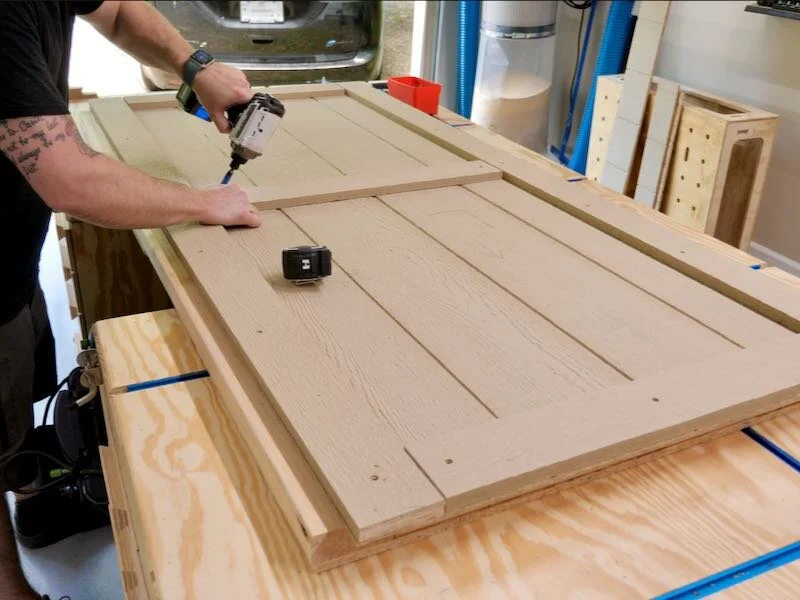
The last pieces to add to the door are more trim pieces, which both make the door look nice but also beef up the edges and center, giving the hinges something more substantial to attach through. Once again, I left the 3/16” gaps between each end of the trim pieces here, which I will need to caulk later, and I added the trim with more 2 ½” screws.
Here’s the left door, just to show you how the siding and trim are offset from the 2x4 framing here, which is where that right door will overlap and lock the door in place. This really helps to keep the elements out and seals up the shed nicely.
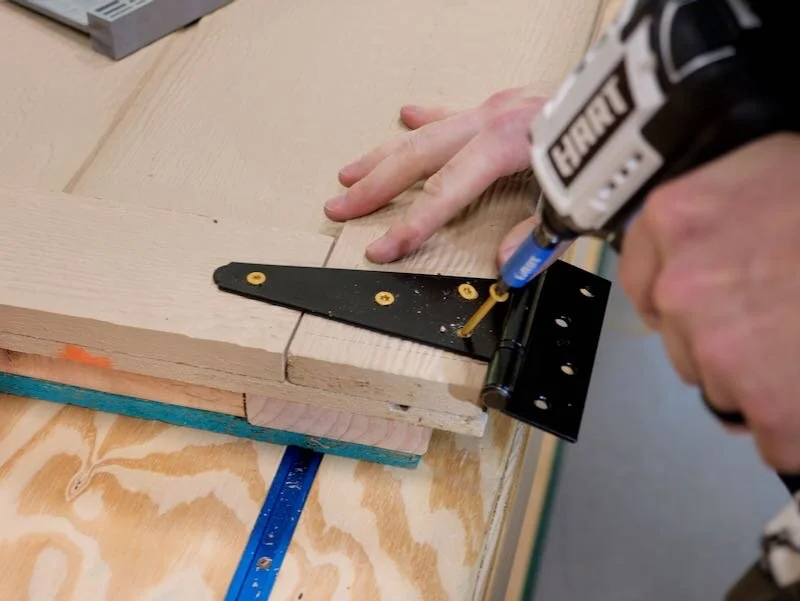
I took the left door out to the shed before installing the hinges, but I wised up on the right door and installed the hinges while the door was on my workbench, which was much easier.
I centered the hinge on the trim and then pre-drilled the holes using a self-centering drill bit, to keep the screws from causing the hinge to shift when I added them.
Also, you might notice that the center screw holes fall over the 2x4 framing, but I needed to angle the 3” screws near the edge of the door to make sure they hit the framing.
Step 10: Add Hinges To Shed Doors Before Installing
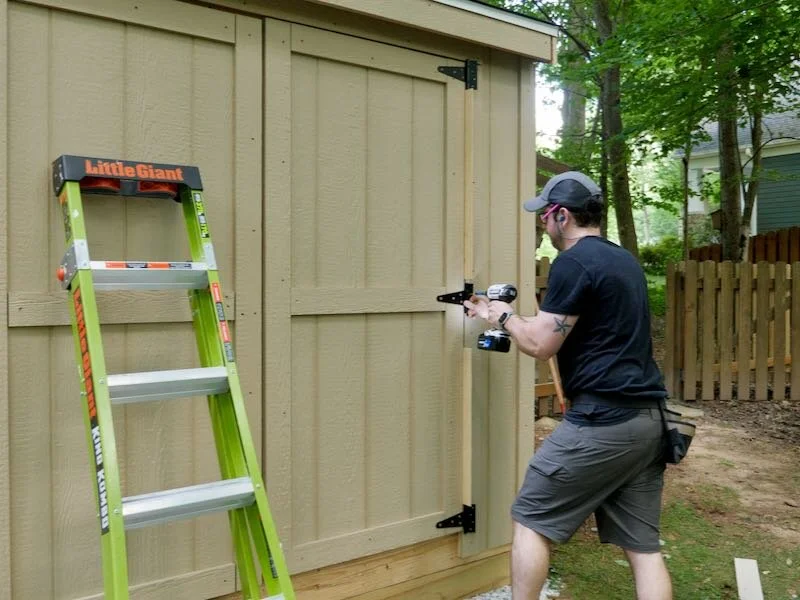
I repeated the process for the other two hinges and then brought the door out to the shed for installation. Before installation, I added a ½” piece of plywood to act as a spacer below the door, to help center the door in the door opening.
Next, I set the door in place and then added ¼” spacers between the right edge of the door and the door opening, again to help center it.
With the spacing dialed in, I could attach the other side of the hinges to the shed using more 3” screws. These screws go into the door opening framing and create an extremely strong door that should resist sagging over time.
Step 11: Determine Gaps Around The Door With Thin Plywood Scraps and Attach To Shed With Screws
After adding one screw in each hinge, I removed the spacers and tested the door to make sure it swung freely, which it did, so I could add the rest of the screws to lock it in place.
I repeated the process for the left door, which went smoothly, and the doors were installed and working great.
Step 12: Install Shed Door Lock And Handle Hardware
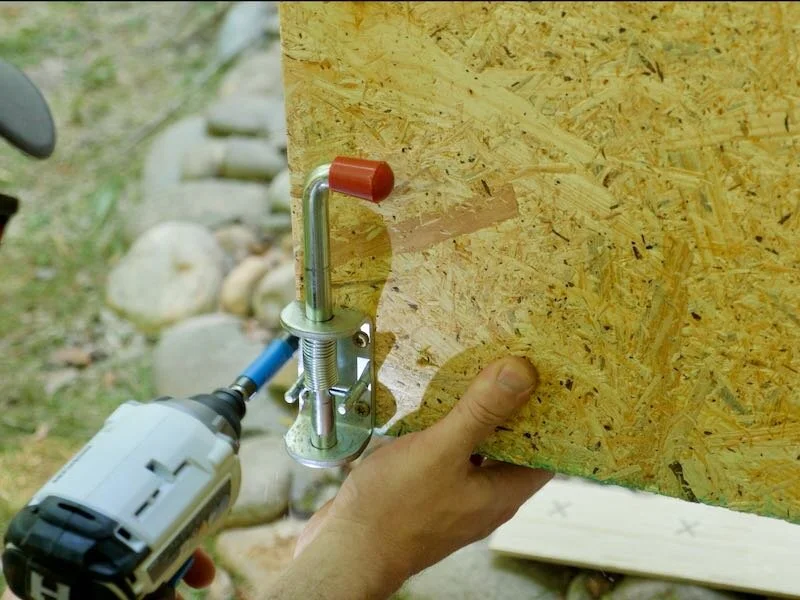
Next, I needed to add some hardware to lock the doors in their closed position, starting with a few barrel latches on the left door. I installed these on both the bottom and top corners of the inside of the door with more 2 ½” screws, and the latches were installed flush with the bottom edge of the door.
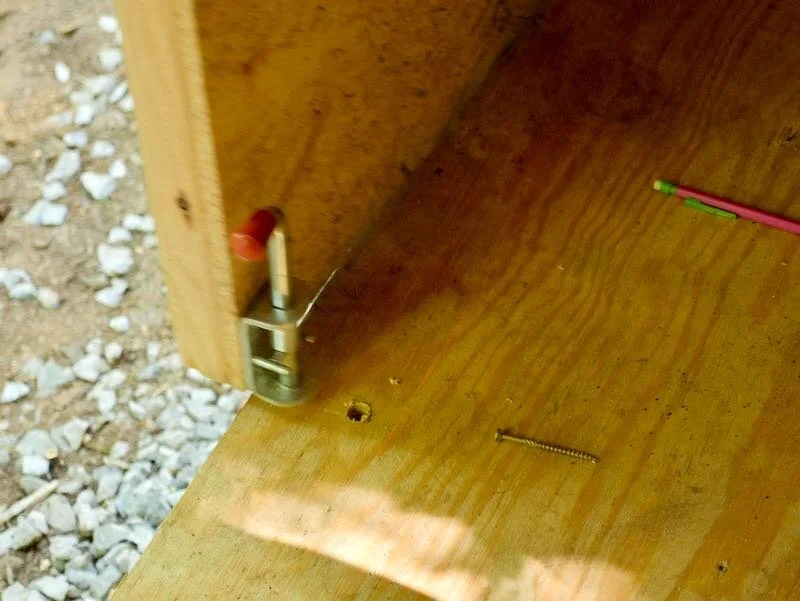
After attaching the latch to the door, I closed the door fully and traced around where the barrel contacted the floor, then drilled out a hole in this location. I needed to enlarge the hole slightly so the fit wasn’t too snug, but once I did that, the latch was functioning really well and I repeated the same process at the top of the door off camera.
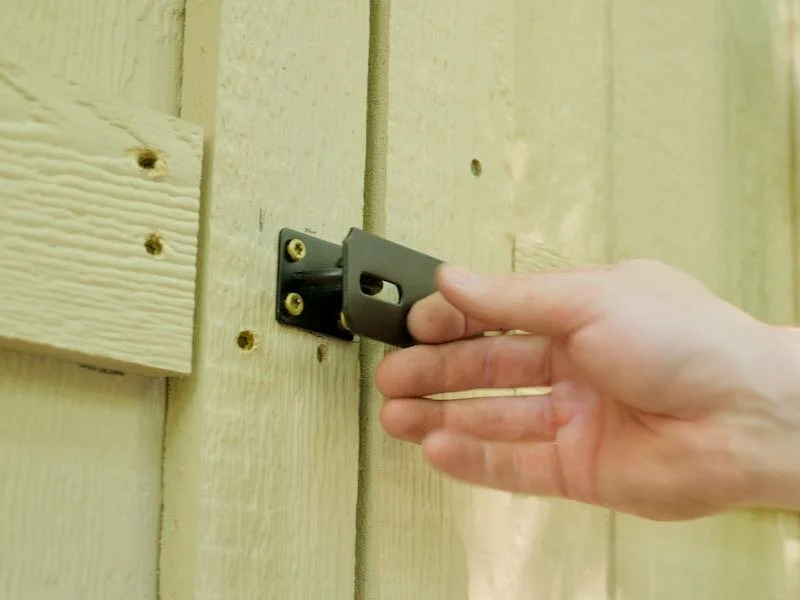
To hold the right door in place, I added a latch where I can add a padlock to secure the door. I centered the latch on the doors and also made sure to use 2 ½” screws rather than the included screws, so the latch was securely attached to the door framing.
The handles for the shed hadn’t arrived yet, so I decided to move on with painting the shed. I first needed to prep for paint, and I started by trimming this little overlap between the fascia trim boards. I think I was supposed to install the eve fascia trim boards a little lower, but my oscillating multi-tool made quick work of cutting the overhanging piece flush.
While I was at it, I switched over to a sanding pad on the multi-tool and softened those edges, along with the front edge of the floor.
Step 13: Caulk All The Gaps In Shed Which Were Left For Seasonal Movement
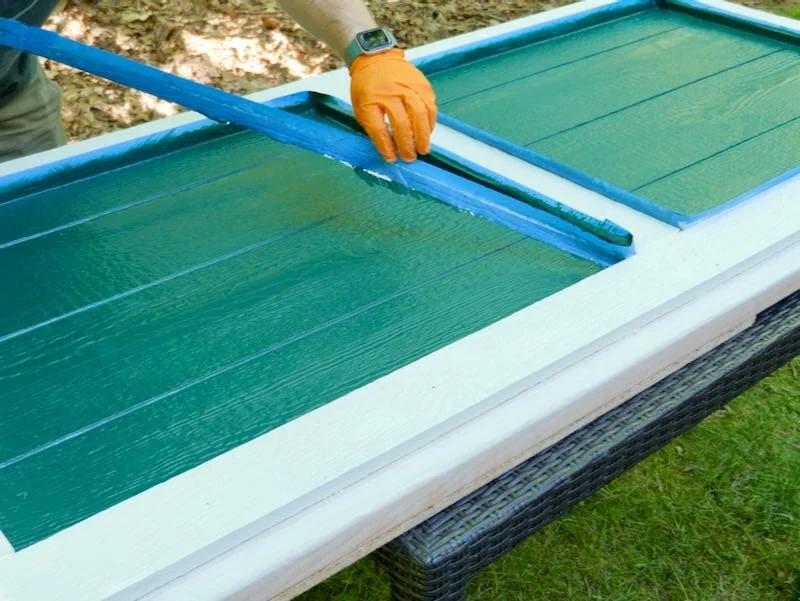
I figured that removing the doors would make painting a little easier, which I definitely think it did, and it only took a minute or two to remove them and set them up on some sawhorses for painting.
Next came the time consuming process of caulking all of the joints and screw holes. As I mentioned when installing this trim, I ended up with a larger gap than I wanted between these fascia trim boards.
To avoid having to use an entire tube of caulk here, I added a bit of foam backing rod, which I could just stuff into that joint. This gave something for the caulk to sit against and made it much easier to get a clean seam here.
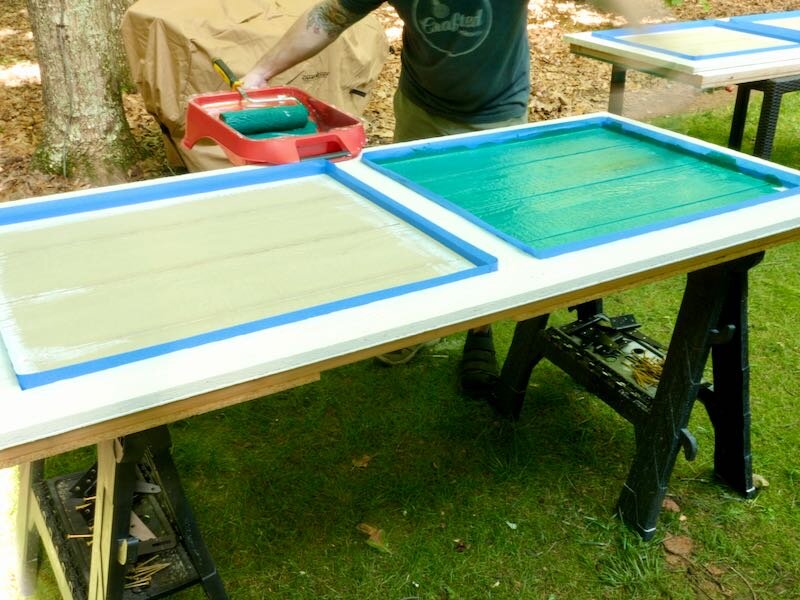
Step 14: Paint Trim, Once Dry, Mask Edges With Proper Tape And Paint The Siding Of Storage Shed
I repeated the same process at the other end and then I could start caulking the screw holes, which there were quite a few of, but luckily this went pretty quickly.
I just added a glob to each screw hole and then evened it out with the surface of the siding or trim with my finger. Because both the siding and trim have a wood texture, this process is pretty forgiving and the paint made the majority of these holes disappear.
I also needed to caulk the rest of the butt joints, where I had to leave those 3/16” gaps. I ran out of my first tube of caulk here filling this huge joint and definitely used quite a bit filling all of these large gaps.
I also caulked the seams between the siding and the trim, which really makes for a nice finished look. I did this on both the shed and on the doors.
Once the caulking was done, I could move on to paint, first painting the trim white. I used TotalBoat Elixir paint on this shed, and you might have seen me use this paint on previous projects. Elixir is a water-based enamel paint and is super durable, dries quickly, and has almost no fumes.
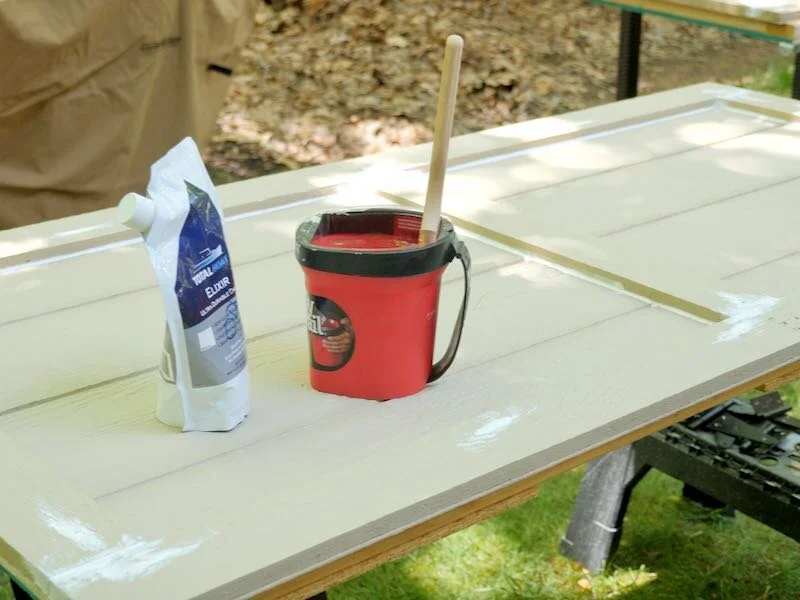
It is a little thinner than your typical latex paint, so it did take three coats on both the trim and the siding to get good coverage, but I’m really happy with the finished look. I’ll link to the paint in the video description below in case you’re interested.
Anyway, I started by applying paint to the trim on the door with a brush, and I wasn’t worried really about overlapping the siding at this point, as I’d be painting that green.
I repeated the same process for the fascia trim, making sure to get paint under the drip edge and on the cut ends of the fascia trim, as they need to be well sealed.
After applying three coats on the trim, I could tape off the trim to prep for adding the green paint. I ended up being extremely disappointed with how this particular tape worked, as you’ll see in a bit, so I’d really recommend investing in good quality painter’s tape for a project like this.
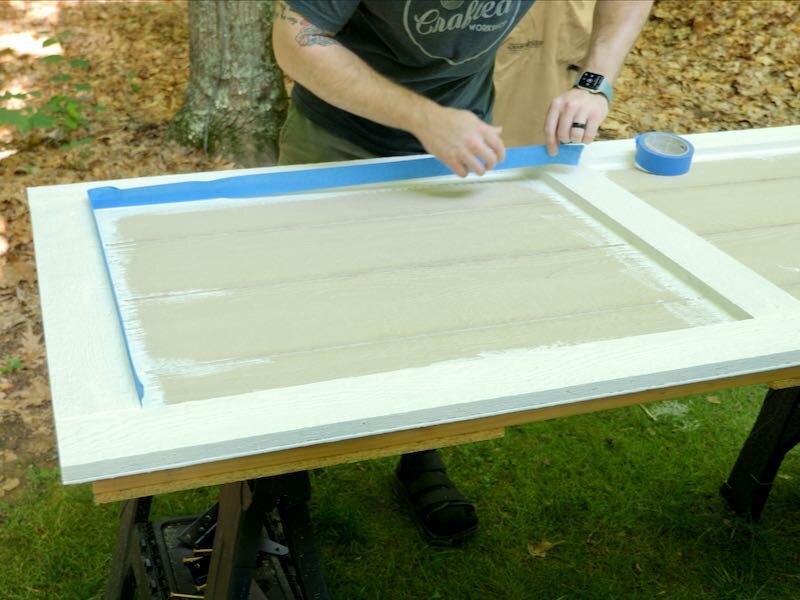
After taping, I rolled on the green paint onto the door panels and then cut in with a brush around the trim. I definitely tried adding too much paint per coat here, which caused it to pool up on the tape and cause problems later, which you’ll see.
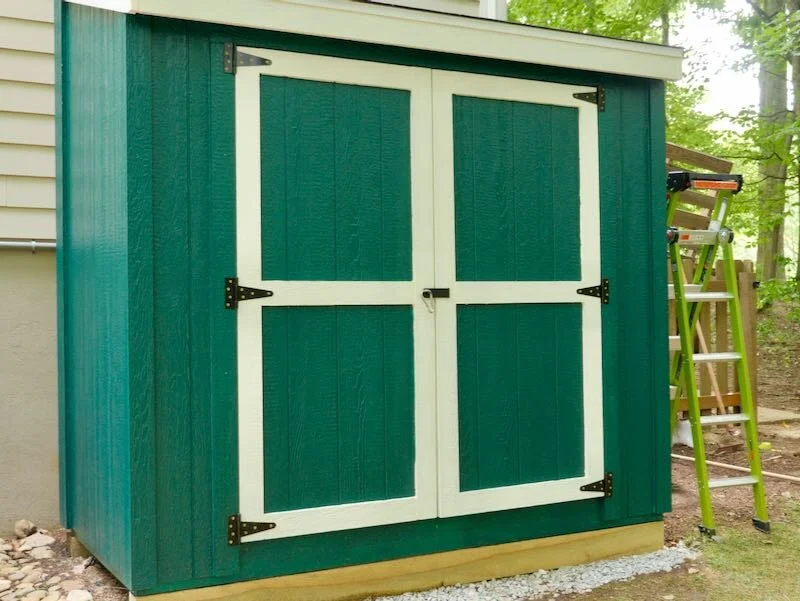
I repeated the same process on the shed, and you’ll notice I decided to paint the majority of the trim the same green color as the body of the shed. I actually tried out some different color options in SketchUp and thought that having all of the trim painted white made the shed look a little busy, and I really like how painting the majority of the trim green made it blend in with the siding. It also meant less taping, which is a bonus.
You can see that this first coat definitely looked a little rough, but after three coats, the color looked great.
Unfortunately, when I went to remove the tape from the doors, I realized I had added way too much paint, which had dried on top of the tape, causing the tape to pull off some of the paint from the doors. The paint also seeped under the tape, which I blame on crappy painter’s tape.
Step 15: Remove Masking Tape From Trim To Reveal Clean Paint Lines
This was definitely frustrating after spending a day and a half prepping and painting the shed, but it looks fine from afar and is good enough for a storage shed.
Step 16: Build The Ramp For Your Storage Shed
The last major part of this shed build was adding a ramp, so we can roll items in and out of the shed easily. I had mocked up a ramp in SketchUp, but honestly, it’s probably best to just cut your pieces on site, as you’ll see.
First, I measured out where the ramp would land in front of the shed and dug out the area so I could add gravel.
Before actually adding the gravel, I figured I would cut one of the stringers for the ramp to make sure it would work. I marked out my layout lines on a pressure treated 2x6, which I used for the stringers and ledger board for the ramp, and then cut the long angled section of the stringer with my circular saw.
Step17: Measure And Use The Circular Saw To Create One Stringer Of The Ramp
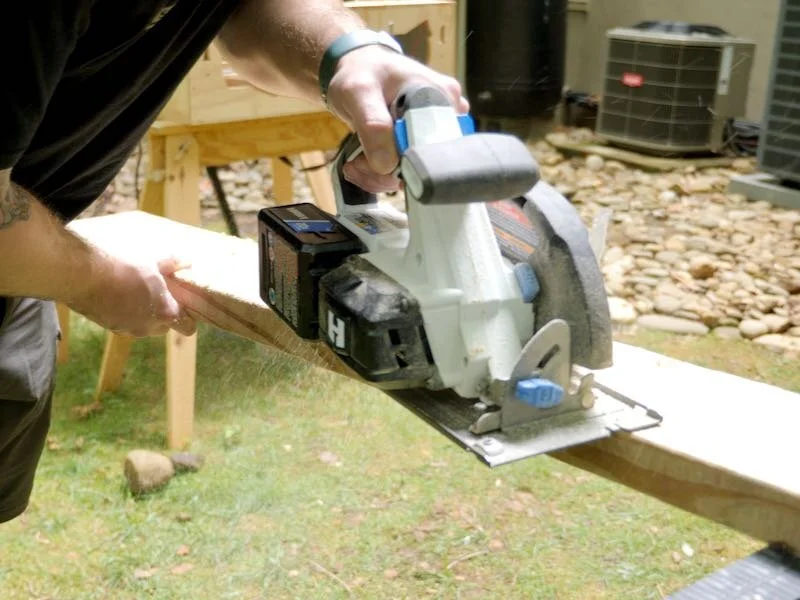
I cut the other angled end of the stringer at the miter saw and then test fit the stringer, realizing that it was way too short for this shed just due to how the ground slopes away from the shed here.
Step 18: Test Fit First Stringer And Adjust If Needed
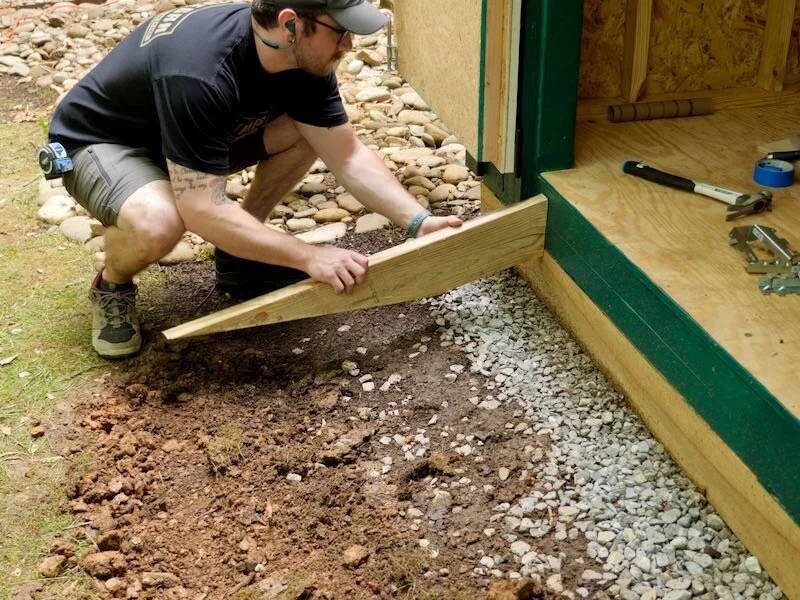
I called an audible and cut another stringer about a foot longer, using the opposite side of the stringer I had just cut, and this looked much better.

Finally, I could dial in the angle where the stringer met up with the shed with some test cutting at the miter saw.
Once I had that dialed in, I could trace that stringer shape onto the rest of my boards, and I was able to nest them together so that long angled section only had to be cut once for each pair of stringers.
I cut the stringers to rough length with my circular saw and then cut them to their final length at the miter saw, using that same angle I had found previously.
Because of my audible call, I actually ended up with more stringers than I needed, but I figured this would just make for a stronger ramp. I marked out locations for the stringers and added three 3” screws per connection, which made for an extremely sturdy ramp.
Step 19: Cut Remaining Stringers And Attach Each To A Top Board
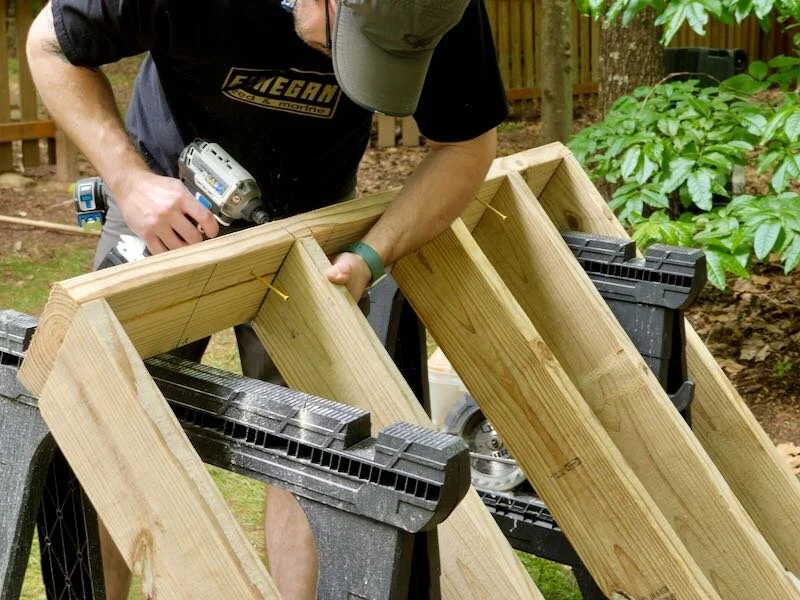
Unfortunately, when I was laying out the stringer spacing on the ledger board, I screwed up my math and accidentally laid out locations for one too many stringers, which I didn’t realize until halfway through assembling the ramp.
Not a huge deal, I just split the difference between the last two stringers I had installed and called it good, as the spacing was still tighter than your typical 16 inches on center.
With the ramp framing built, next I moved it into place temporarily to mark where it landed in the yard, so I could dig out the area a little more to accommodate this longer ramp.
I dug out the area, added a few bags of gravel, and got the gravel roughly leveled before dragging the ramp back into place and getting one screw added to hold the ramp in place.
Step 20: Attach The Top Board To The Shed So The Ramp Top Will Sit Flush With The Shed Floor
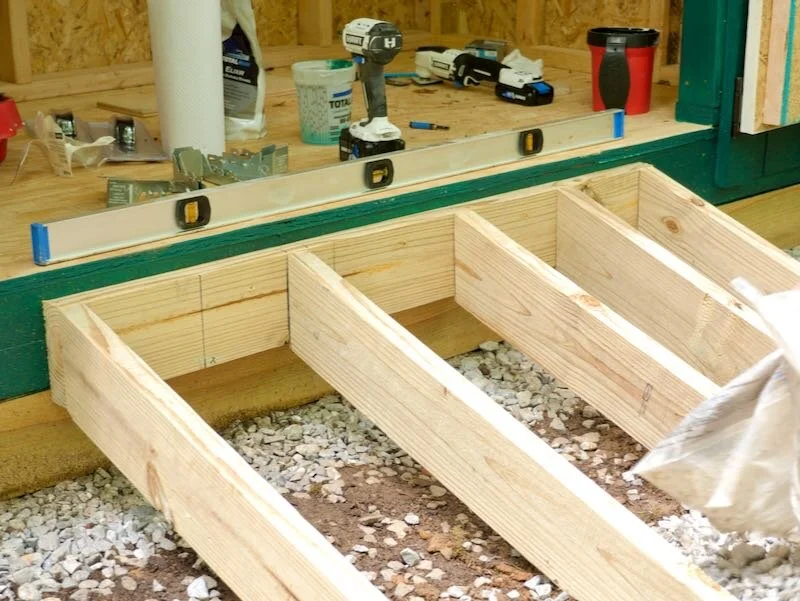
The ledger board needed to be 1 ½” below the surface of the shed floor so that the 1” thick deck boards could be added and the doors could still close. After adding that first screw, I just made sure the ramp was level and then added more 3” screws to tie the ramp into the floor framing.
Next, I could spread around the gravel a bit more to make sure it was nice and even beneath the stringers, and then I added more gravel between the stringers to help keep the ramp in place securely.
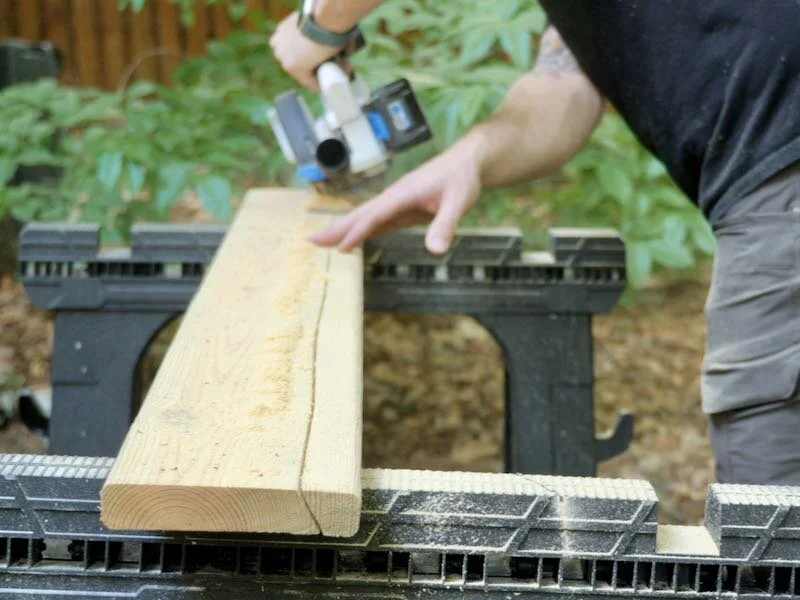
As I mentioned, I used 5/4 pressure treated deck boards for the surface of the ramp, so next I got those cut to length at the miter saw. I made my ramp four feet wide, so I got three pieces out of each 12 foot board.
The last board at the very bottom of the ramp needed to be ripped to width, and I did this with my circular saw, also adding a slight bevel to make it easier for items to roll onto the ramp.
With the boards cut to size, next I could pre-drill holes into the treads, first marking the stringer locations on the back edges of the boards.
I pre-drilled and countersunk two holes at each stringer location in each board, and I used this little tip I picked up from Jon Peters to make sure the holes all had even spacing.
Basically, you mark out your hole locations on a piece of painter’s tape on your speed square and then just line up your drill bit with these marks before drilling. This keeps you from having to measure and mark each hole location, and has the added benefit of avoiding having a bunch of layout lines left on the face of your boards.
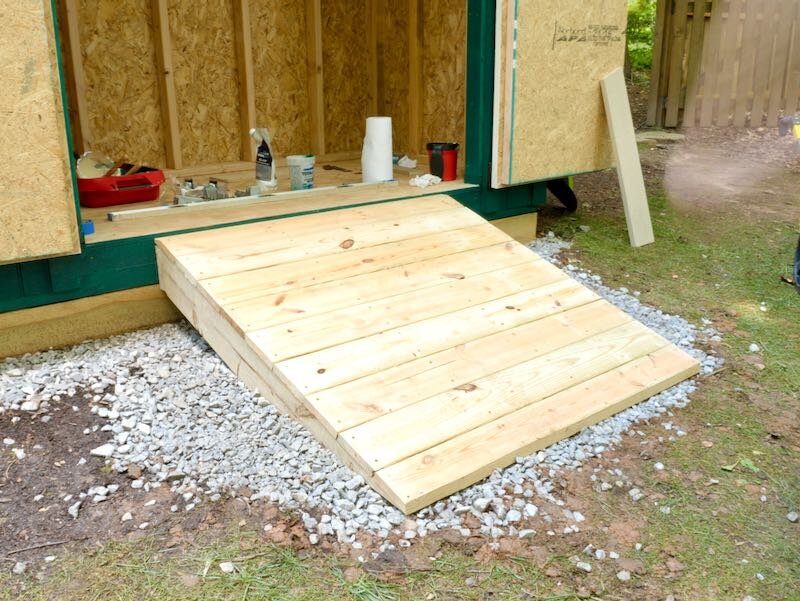
Anyway, after pre-drilling, I could get the boards added to the ramp, which went extremely quickly with the holes already drilled. I added the first few boards and then went ahead and added the very last board, to make sure my stringers were oriented square to the ledger board.
Step 21: Stabilize Stringers By Pour Gravel Between Them, Then Attach Top Boards Of Ramp
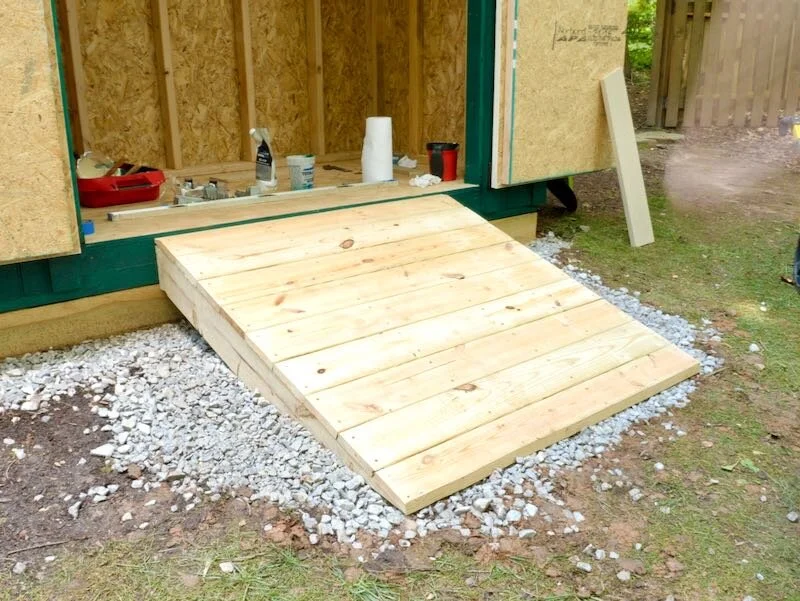
Finally, I hit the edges of the ramp with that sanding pad on the oscillating multi-tool so my little guy doesn’t get any splinters when he inevitably plays on this ramp, and I could call the ramp done.