Building a GIANT CUTTING BOARD for my Kitchen Island // Kitchen Remodel Pt. 4
Learn how to build an end grain cutting board and install it as a kitchen island countertop! I reclaimed an old butcher block dining table top and turned it into this huge end grain cutting board, making the perfect food prep surface for our kitchen island. Enjoy!
Note: The links below are affiliate links
📦 Materials Used On The End Grain Cutting Board Island:
🛠 Tools Used On The Butcher Block Island:
The Process Of Building A Butcher Block Counter Top:
Step 1: Milling Reclaimed Table For Butcher Block Counter
In case you missed my video a few weeks ago, I built and installed the countertops for our main counter areas in our kitchen. With those done, I wanted to work on something slightly different for our island, basically a large end grain cutting board top. Since this island is the main working surface in our kitchen, I figured making the countertop out of something we could cut things on directly would be ideal, so I moved forward with that idea.
When picking out the material for this cutting board top, I looked around my shop and remembered that I had been holding on to this old butcher block table top. This is the table my parents owned when I was a kid and the date on the bottom showed that this table was actually made in 1996. The table had since been passed along to my wife and I after my parents got a new table, and then it was relegated to storage once the next generation of kitchen tables was passed along through our family.
I ended up giving away the trestle base that went along with this table top, but I figured I could repurpose the top into something cool, and today was finally the day for that.
Step 2: Cutting Down Table Top To More Manageable Sizes
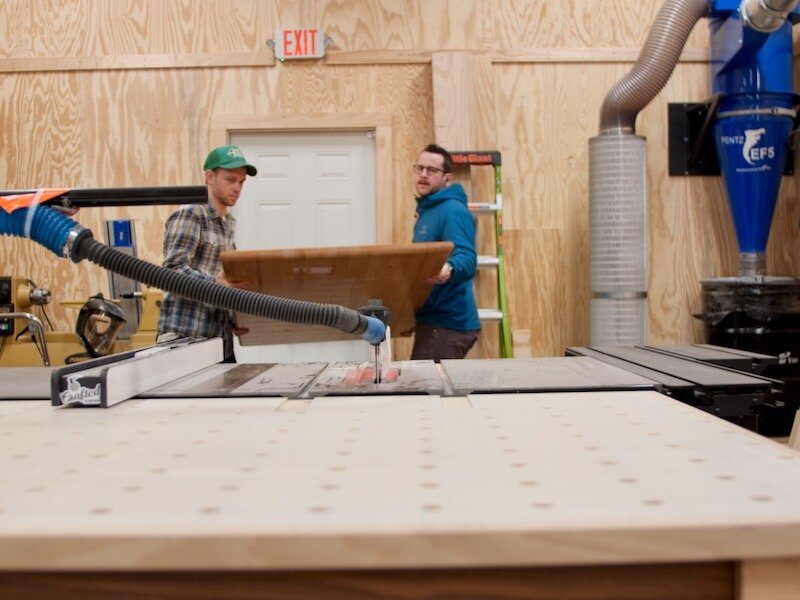
I started by hoisting the extremely heavy top up onto my table saw, with the help of my buddy Eddie, so that I could cut it down into a more manageable size. My main goals here were to rip the top in half so it could fit through my planer, and I also wanted to rip off these heavily rounded edges.
After cutting the top down, I ran the pieces through my planer to remove the finish. I probably should have tried sanding some of this finish off first, as I’m sure whatever finish was used was pretty rough on my planer knifes, but it still cleaned the pieces up like a champ.
With the faces of the pieces cleaned up, I could move on to crosscutting the pieces into strips, so that I could turn this into an end grain butcher block top.
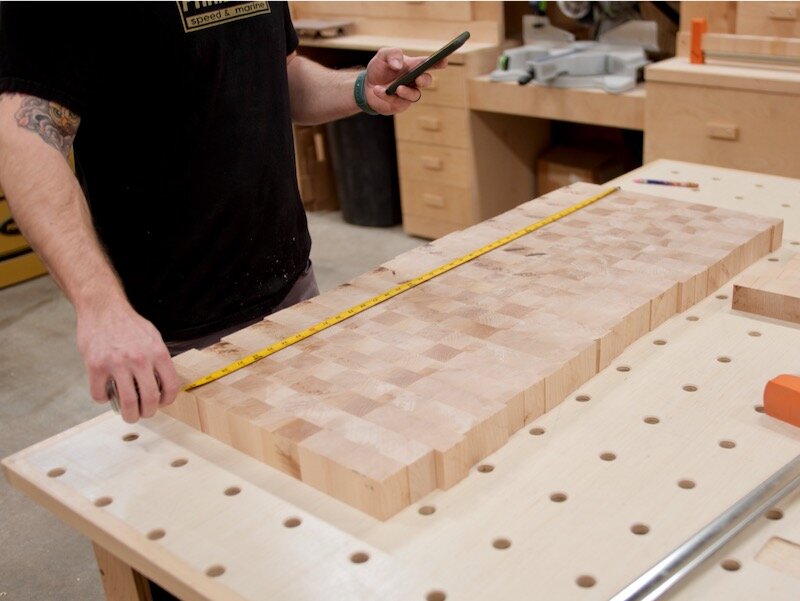
Before cutting, I did some math to figure out how I could use the pieces most efficiently while still ending up with a top the size I wanted, which was roughly 26 ½ wide by 39 long in my case. I wanted to keep the top as thick as possible, hence all of the math.
Once I figured out my thickness, I first crosscut the pieces in half, again just to make them a little more manageable, and then I could start crosscutting them into strips. I kept the strips matched up as I cut them, so that any color variations would kind of flow through the top once I turned the pieces on edge.
Step 3: Crosscutting Maple Butcher Block Strips
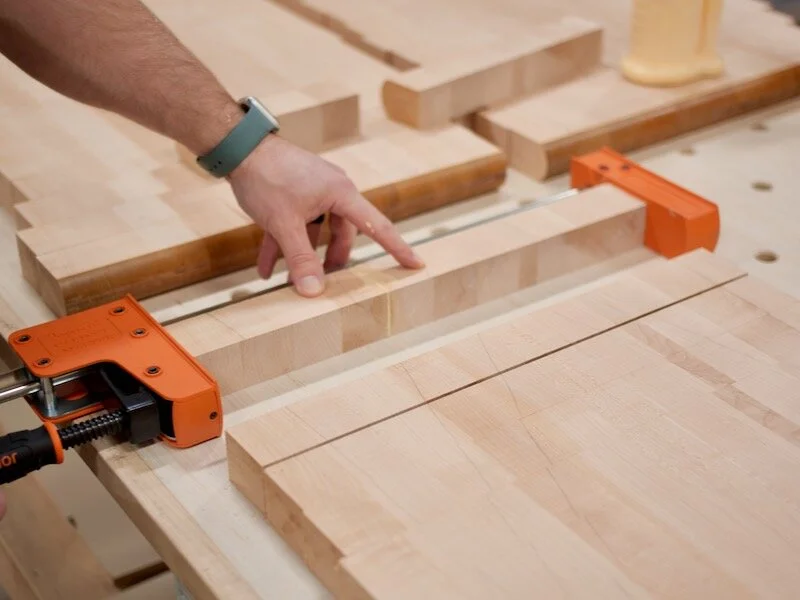
After a bunch of crosscutting, I had the strips cut, but I needed to do some maintenance on a few of the strips, where whatever glue the original manufacturer of this top used had failed. Fixing these strips was simple enough, I just added some fresh wood glue, Titebond II in my case, which is food safe and water resistant, and then I clamped the pieces together.
Step 4: End Grain Butcher Block Layout Design
While that piece dried, I could work on arranging the rest of the strips into the final pattern. I started by turning each strip 90 degrees, so that the end grain was facing up, and then I flipped every other strip end over end, which results in the kind of checkerboard pattern so common in end grain cutting boards like these. I made sure to check for any major defects at this point as well, and I really lucked out for the most part, these pieces were pretty clean.
Step 5: Gluing Up Maple Butcher Block End Grain Strips

With the boards arranged, I could move on to the big glue up. I used way, way too much glue here, but these pieces definitely aren’t coming apart any time soon. I also made sure to check for flatness, as these clamps can definitely put quite the bow in your piece if you aren’t careful.
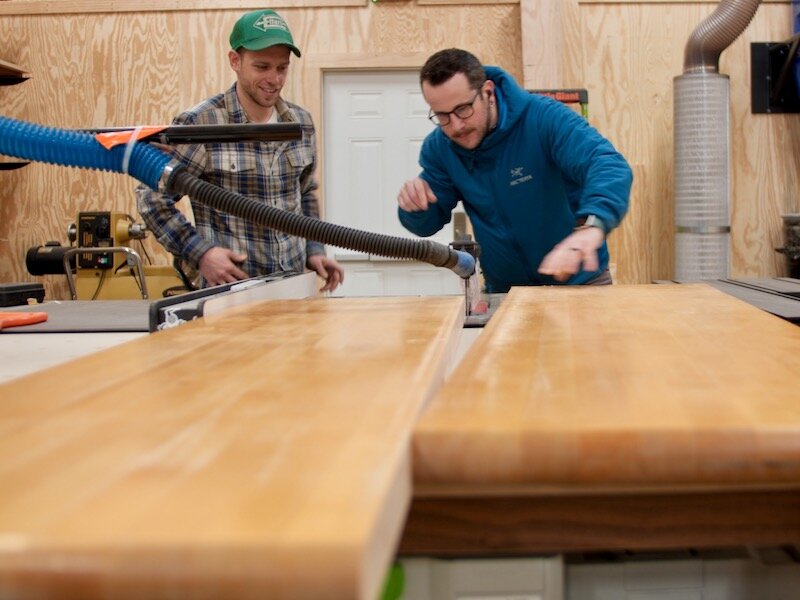
After letting the glue dry overnight, I came back, removed the clamps, and then scrapped off the ridiculous amount of excess glue from the pieces. I mostly focused on the glue on the bottom, as I’d be running these pieces through the planer again and I really just needed one flat reference surface.
Step 6: Carefully Planing End Grain Butcher Block

Speaking of which, planing end grain cutting boards like these is definitely a topic of debate, but I’ve never personally had an issue with it. That said, work at your own risk and do your own research here.
I’ve personally found that one of the main keys to success when planing these types of pieces is to heavily chamfer the trailing edge, i.e. the edge that will be the last area planed. This chamfer will help a ton with reducing chip out on that edge, although this wasn’t as big of a deal for me since I’d be trimming these to length later anyway.
The other key to success when planing end grain is to take very light passes, especially if your planer has straight knives. Luckily, my planer has carbide inserts, which have an easier time with end grain, but it’s still a good idea to take it nice and slow.
Step 7: Final Butcher Block Glue Up
After cleaning up the two sections at the planer, I was trying to decide how I wanted to glue these sections back together, and I had a good bit of extra width to work with. After thinking about it for a bit, I figured that cutting the edges at an angle could add a really interesting pattern to the final cutting board, so I started laying out where I’d make my cuts on the pieces.
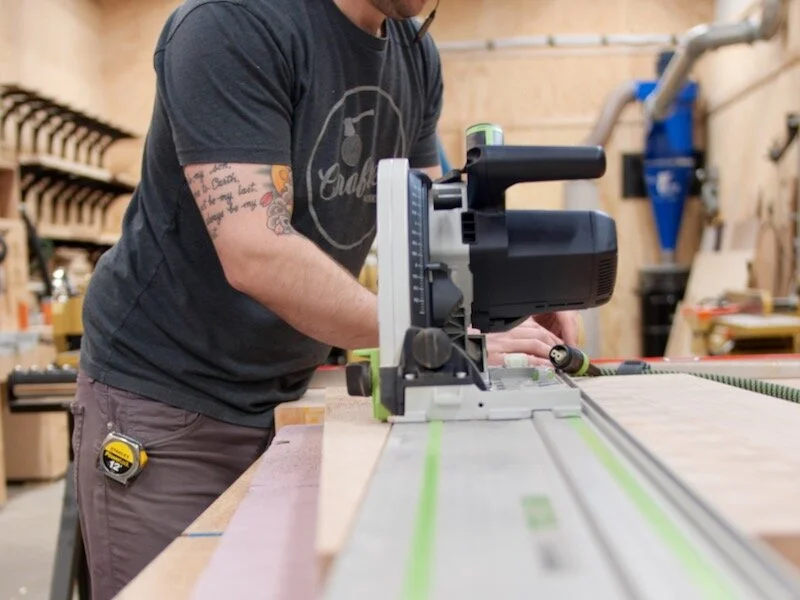
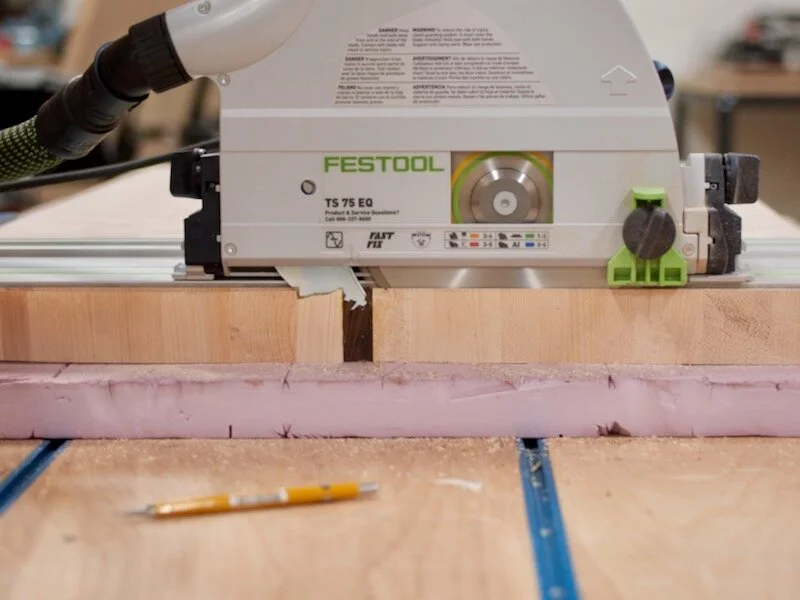
To make these cuts, I pulled out my track saw, but this particular track saw really doesn’t have the power to cut through over 2 inch thick Maple end grain. Luckily, I also own the bigger brother to this track saw, and it made really quick work of this cut.
That said, if you don’t have a track saw powerful enough to make a cut like this, you could probably freehand the cut at the bandsaw and clean it up with a hand plane, or you could rig up a jig at the table saw.
After cutting the angle on one edge and squaring up one end to that edge, I could rip the other edge parallel to the angled edge at the table saw. I could have used the track saw again here, but the table saw ensures that the two edges are perfectly parallel to each other.
After ripping, I checked the end for square, which it was, and then I could move on to the glue up.
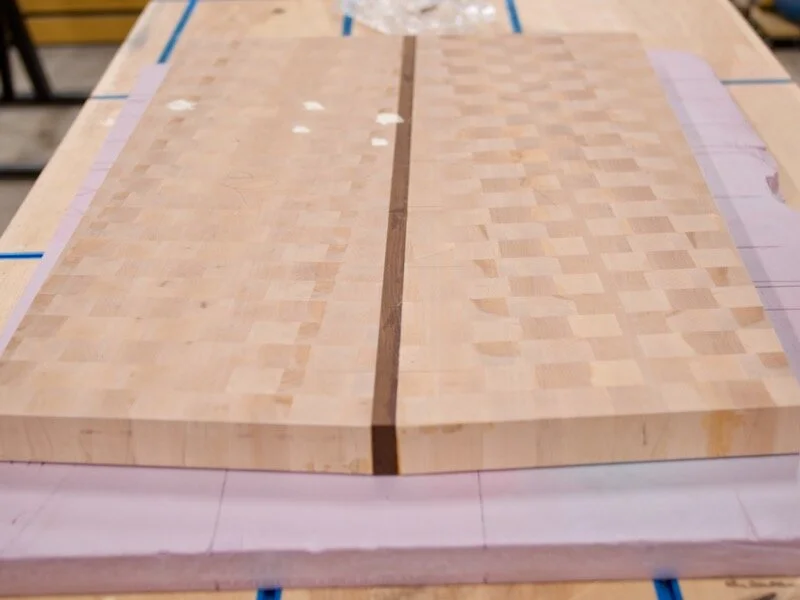
Kind of on the fly, I decided to add an accent strip in the middle of the top and I used a leftover piece of thermally modified Ash for this. This specific wood type is extremely dimensionally stable and is also really water resistant, which are both great qualities in a cutting board.
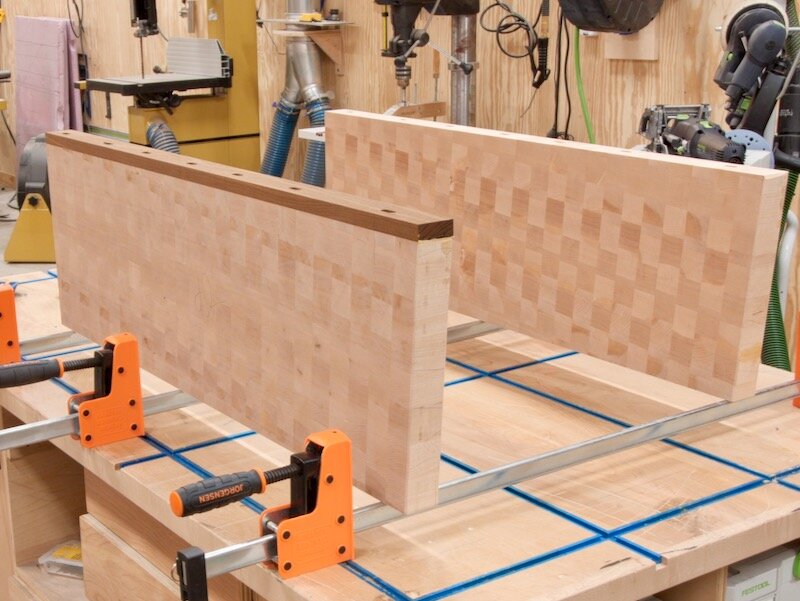
I glued the strip to one of the two halves and then passed the piece through the planer again off camera, to flush the strip up perfectly with the main top, and then I could glue the two halves together.
I wanted to make sure things stayed perfectly aligned here, to avoid extra sanding later on, so I added a few Dominos to help with this. The Dominos also added a little strength to this joint, although the glue is really plenty strong for that.
After marking out the Domino locations and cutting the mortises, I added some glue and clamped the two halves together, bonding them for good.
Once the glue had dried and I had taken the cutting board out of the clamps, I was about to trim both ends square but stopped short after looking at the end with the two angles. Something about the look of the two angled ends coming together in this kind of subtle point really stuck out and I decided to keep as much of this point as I could while still cleaning up the end of the board.
I also squared up the other end of the board while I was at it, once again calling on the track saw, which made quick work of this.
Step 8: Sanding End Grain
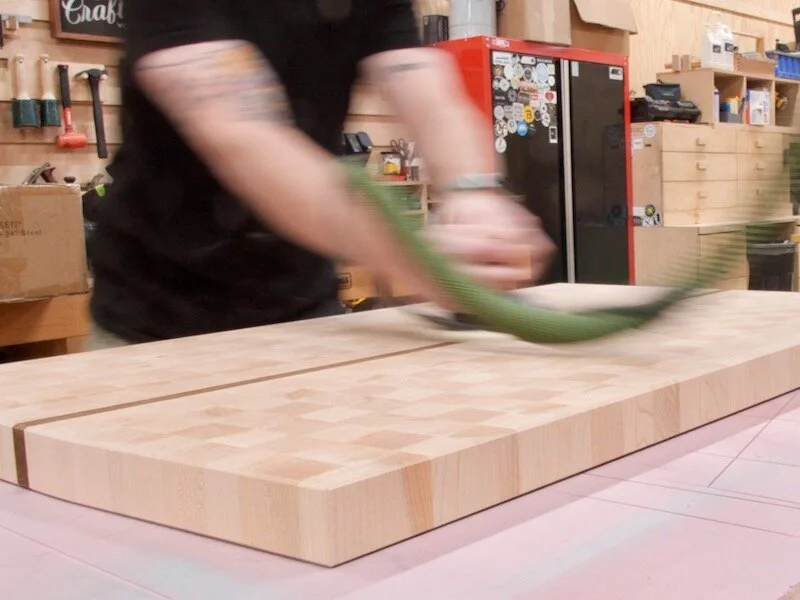
With that, all that was left was some finish prep, which is always pretty time consuming when working with end grain. I worked my way up from 80 grit to 180 grit, sanding all of the faces of the board, and I also chamfered the edges while I was at it. I like using a block plane for this, as I tend to get a cleaner cut than I do with a router. Also, after chamfering, I made sure to sand those edges as well to really smooth things out.
Also, one step I inadvertently skipped was raising the grain, which I think is a really good idea on end grain cutting boards like this. The basic process is to spray on a light coat of water after sanding to your final grit, let it dry, and then sand with your final grit again. The water will cause the wood fibers to stand up, leaving you with a rougher surface, and once removed, your smooth surface will stick around even after washing.
Step 9: Finish Butcher Block With Natural Conditioners
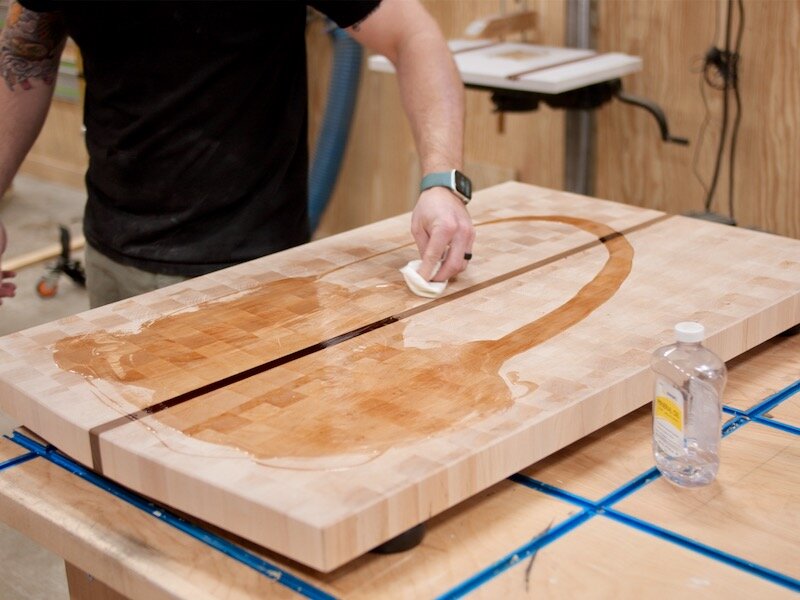
Anyway, after finish prep, I could move on to my favorite part of cutting board building, adding the finish. Once again, I wanted this to be a food safe surface, so I started by adding a heavy coat of mineral oil, which this maple completely soaked up. This mineral oil is drawn to the center of the board and helps to keep moisture from being absorbed into the board as the surface oil wears off over time.
After letting the mineral oil absorb for a few hours, I came back and added a few coats of this butcher block conditioner, which contains mineral oil along with some natural, food safe waxes including carnauba wax. These waxes will help to prevent the mineral oil from being washed away from the countertop, which will just mean less frequent reapplication of finish on my part.
Step 10: Install End Grain Butcher Block Counter Top
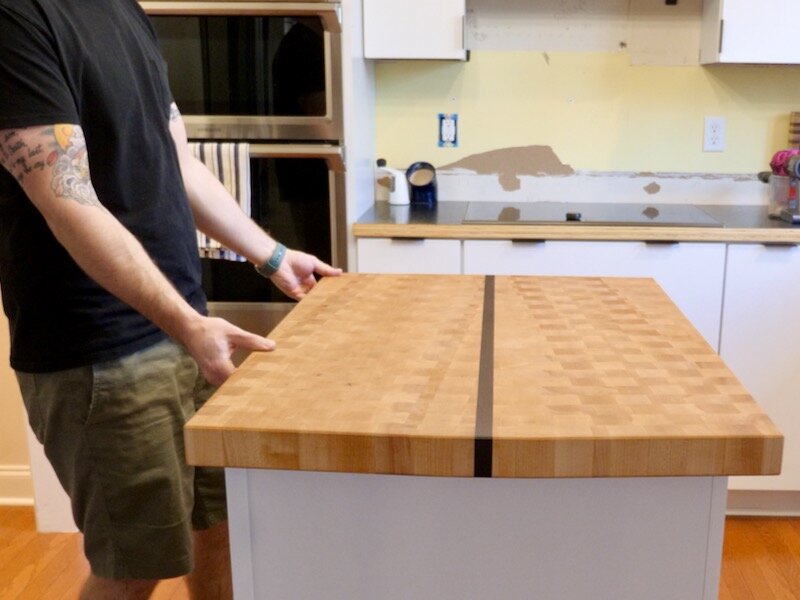
With that, I could head back to the house to get the butcher block installed on the island. I started by adding a few scraps of ¾” plywood, which act as spacers, filling in the gap between the internal structure of the cabinets and the bottom of the cutting board.
I also drilled a few oversized holes through these spacers, and these holes will allow for seasonal wood movement without constricting the top.
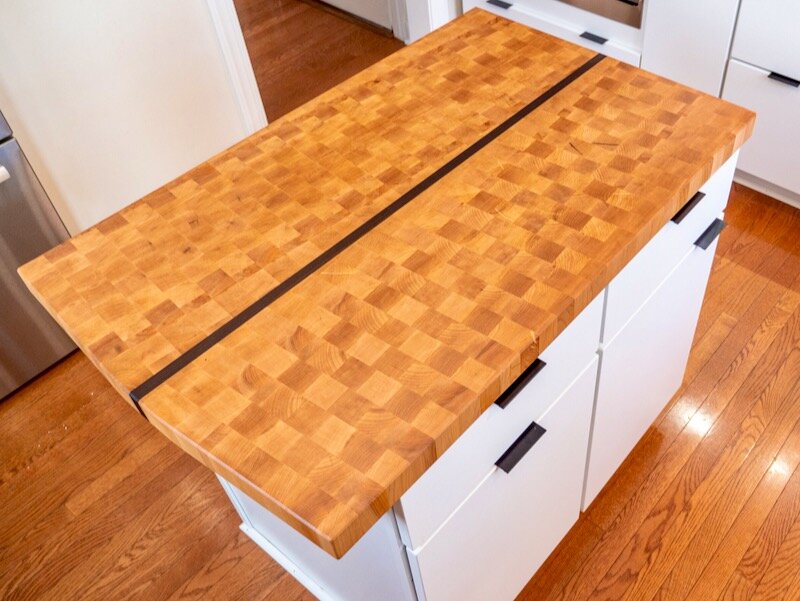
Finally, I moved the cutting board into place, got it centered on the cabinets, and then clamped it in place before adding screws from below. I made sure to pre-drill the holes here to avoid splitting the top, and I used 2 ½” screws to attach the top to the cabinets. It’s definitely a little awkward getting at the locations for these screws but, eventually, I got them all installed and I could call this cutting board island complete.
Now, let’s fast forward a few weeks and I’ll show you how the top looks after some use, and it’s been about a month since I originally installed it. As you can see, the color has lightened up, meaning that some of that finish has been washed away, and I figured I’d go ahead and show you the process of applying more finish while we’re here. That said, you’ll probably only need to reapply once or twice a year, depending on how much you use the top.
Since I have a random orbit sander here at the house, I used that with some 320 grit sandpaper to smooth out the top, and then I just applied another coat of the butcher block conditioner after sanding. If you don’t have a powered sander, you can easily get by with hand sanding, as you’re really not looking to remove much material, just to smooth out the top.
Anyway, with that done, I could call this project finished.