How To Build and Install Butcher Block Countertops // Home Bar Pt. 4
Learn how to build butcher block countertops, which finish to apply to your counters, and how to install them!
Note: The links below are affiliate links
🛠 Tools Used On The Butcher Block Counters (affiliate):
📦 Materials Used On The Butcher Block Counters (affiliate):

Pin It!
How To Build Butcher Block Counter Tops
Step 1: Choosing Material For Counter Tops

I decided to build my butcher block counters out of Hard Maple, which is a traditional choice for butcher blocks. Hard Maple is a great choice because, as the name implies, it’s hard, so it’ll stand up to wear, but it also has an extremely tight grain structure that will keep bacteria and dirt from getting caught.
I picked up this Hard Maple from Asheville Hardware, my local lumber and woodworking store, and the total price for the wood actually ended up being just about as much as a commercially available butcher block counter. I probably would have just purchased a pre-made countertop, but the length I needed was 99 ½ inches and most commercial countertops come in two foot increments.
I guess I could have purchased a 12 foot long countertop, but that would have been much more expensive and I would have ended up with an awkward offcut to deal with.
Step 2: Milling Lumber For Butcher Block Counter Tops
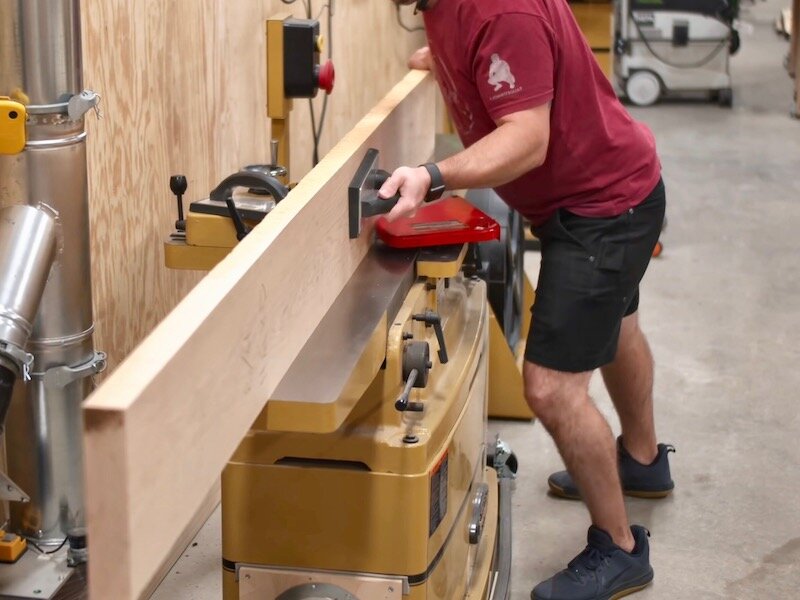
Anyway, I cut my boards to a rough length of 101” and then jointed one edge, in preparation for ripping the boards into strips at the table saw.
After jointing, I headed over to the table saw and that’s where my problems started. Little did I know that these boards had a ridiculous amount of tension in them, and this is pretty common with Hard Maple. After struggling to rip a strip from the first board, I was hoping the issues were just with that board, but all of these boards were full of tension, so much so that my table saw turned itself off after trying to rip a strip on the second board, to keep the motor from overheating.
With the table saw pretty much out of the question, I moved over to the bandsaw, which is the much slower but also much safer choice. The reason the bandsaw is safer is because I could rip these boards freehand, so the fence wouldn’t be constraining the strips and pinching the blade. The blade is also much narrower on the bandsaw, reducing the likelihood of pinching, and kickback is basically nonexistent on a bandsaw.
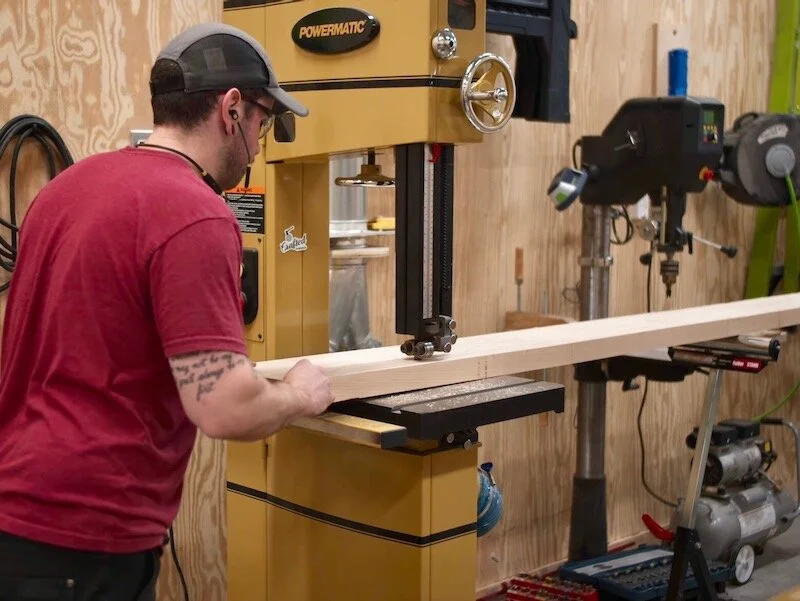
Since I was ripping the strips freehand, I first needed to mark a line at my width and then follow that line on the bandsaw. This was easier said than done, considering the length and weight of these boards. An outfeed roller helped a lot, and I would have used an infeed roller as well if I had two on hand.
I also swapped over to a behemoth of a bandsaw blade for this task, a 1” wide resaw blade with carbide teeth, and it actually made pretty quick work of the task. I just made a new mark after each pass and followed my line, occasionally jointing the edge if I started to get too out of whack. I didn’t want to remove too much material though, as I didn’t buy enough wood to cut a ton of extra strips.
Anyway, once I ripped all of the strips, I sorted through them and removed a few that ended up shy of the dimensions I needed. I cut a few extra strips anyway, so this was fine, and those strips will certainly be useful in the future for solid wood edge banding.
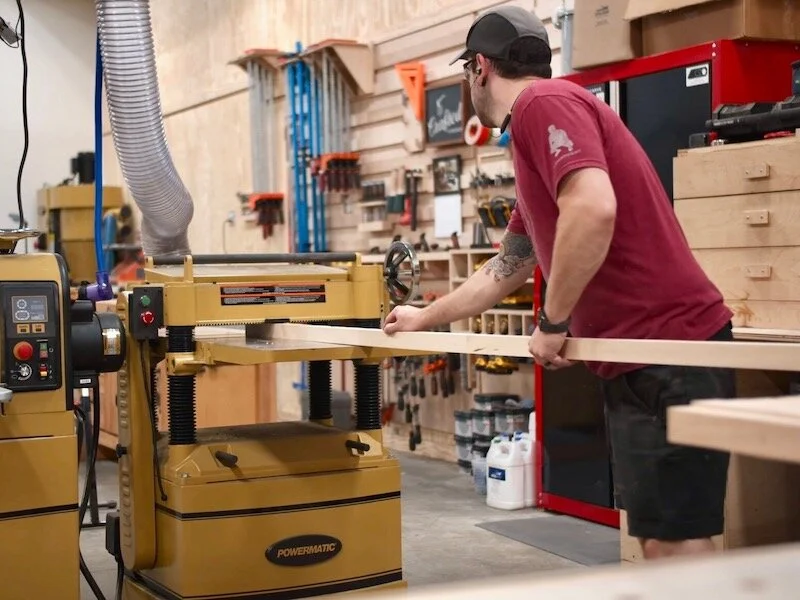
After ripping the strips, I wanted to skip plane the two faces on each strip that would glued together, to get a nice, clean glue line, but first I needed to empty my dust collector, and this is the first time I’ve had to empty this new 55 gallon dust bin. Let me tell you, 55 gallons of sawdust is really, really heavy.
Anyway, with an empty dust bin, I could plane the glue faces on each strip, and I only took off enough material to clean up the faces. As always, I ran the boards through one right after another, to help reduce planer snipe, and I used an outfeed roller again to help support the strips as they exited the planer.
With the glue faces cleaned up, I decided to also clean up the show face of each board, to give me a flat reference surface when clamping the boards together. You can see in this shot how bowed some of these boards are, and having a flat face made aligning everything during the glue up later a lot easier.
Step 3: Glueing Up Maple Counter Tops
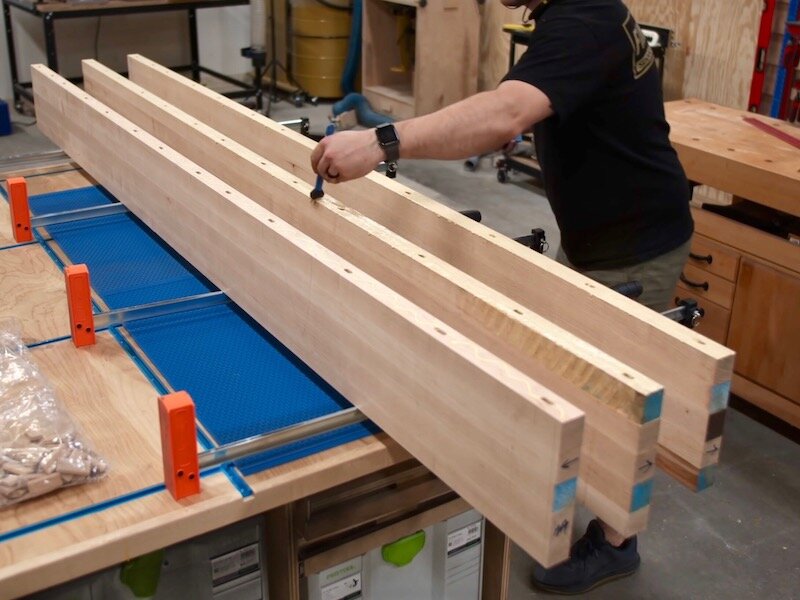
After planing, I marked the show faces with marker so I didn’t get them confused during the glue up and then sorted the boards into groups of five.
I decided to glue the countertop into three sections like this for a few reasons. First, trying to get all of these strips aligned in one big glue up would have been incredibly stressful, since I would have been fighting the glue curing. Second, flattening a 25” wide countertop would have been much more difficult than three 8 ½” wide sections, since those sections would fit on my jointer and were much easier to move.
Anyway, after rotating the boards so the glue faces were facing up, I swapped over to this super handy glue spreader attachment from Rockler. This glue spreader really helps to apply glue evenly without applying more glue than you need and making a mess.
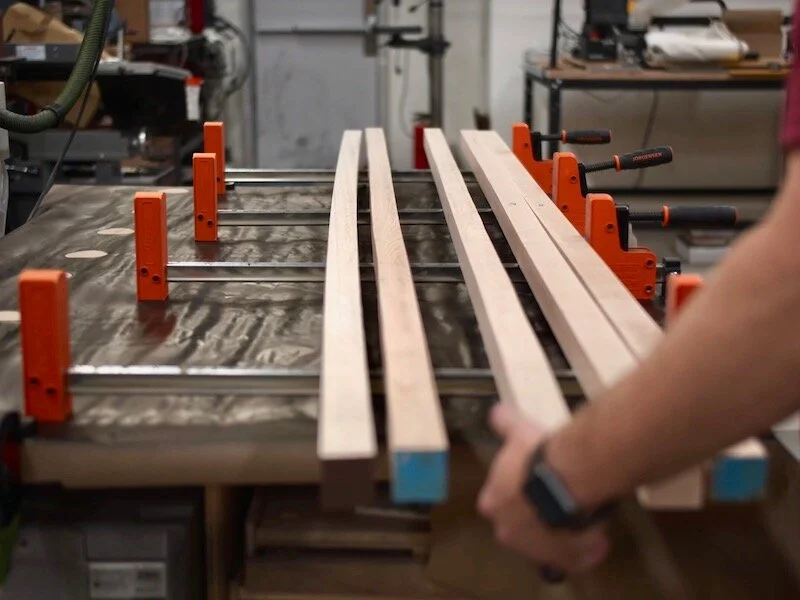
After applying glue, I made sure the strips were aligned squarely and then slowly tightened the clamps, wailing on the boards with a dead blow mallet to get them flat against my parallel clamps. Again, since the flat show faces of the strips were facing down, I could just make sure those faces were aligned.
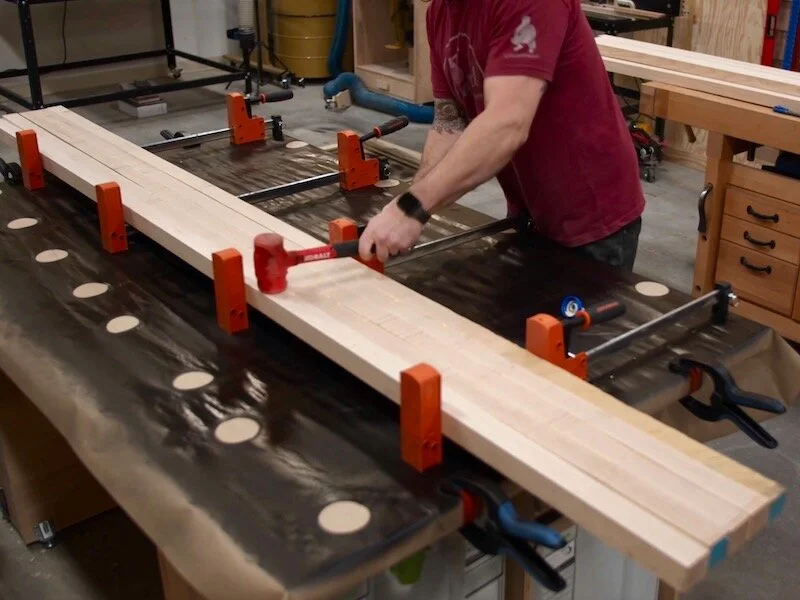
Since this countertop was longer than any of my work tables, I ended up with a good portion of the countertop overhanging each end of the table. To help align the ends, I clamped the strips to one of my Rockler bar clamps with some f-style clamps. On this first glue up, I accidentally aligned the non-show faces by putting the bar clamp on top of the glue up, but on the next two, I put the clamp on the bottom.
Just a word to the wise, a woodworker can never had too many clamps…
Anyway, after letting this first section sit in the clamps for about an hour, I removed the clamps and scraped off the glue squeeze out. It’s a ton easier to do this while the glue is still slightly wet then waiting for it to fully dry.
I repeated the same process on the other two sections and let the glue dry fully overnight.
Step 4: Flattening Lumber On Jointer
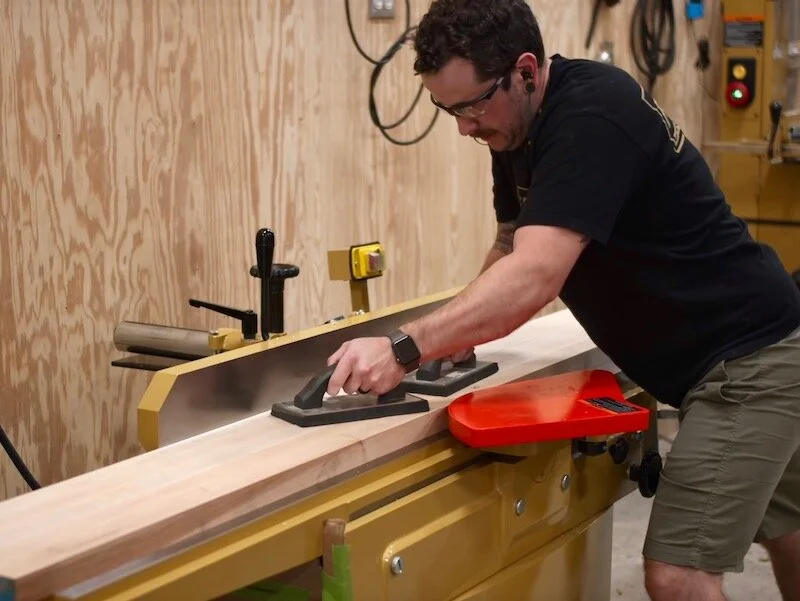
With the glue completely cured, I could get the sections flattened. Luckily, I just upgraded to a brand new 12” Powermatic jointer, so these 8 ½” sections fit just fine, but you could just break your countertop down into more sections if you have a smaller jointer. If you don’t have a jointer, you could probably get away with skip planing your countertop sections as long as they’re reasonably flat, or you could use something like a planer sled to get them perfectly flat.
Luckily, my sections were pretty flat and I only had to make two passes at the jointer, removing about 1/16” per pass, and then I could clean up the other face at the planer.
Once again, I wanted to remove the minimum amount of material, so I only raised my planer bed about a quarter turn per pass. Removing less material also results in a nicer surface finish, especially with the helical head on my planer.
After getting the sections to their final thickness at the planer, I jointed the edges to square them up and then ripped the sections to final width at the table saw.
Actually, after ripping the sections at the table saw, I made one more extremely light pass at the jointer on the edge I cut with the table saw, and I find the jointer leaves a cleaner edge than the table saw, especially on pieces this large. I also jointed the edges that would be glued together with the opposite faces of each section against the jointer fence, so that any error would be cancelled out. If you want to learn more about this technique, there are some incredible videos on youtube explaining how.
Step 5: Large Butcher Block Glue Up
Finally, with the sections milled square, I could get ready for the big glue up. To help keep the sections aligned during the glue up, I used Dominos, but biscuits or dowels would give you similar results. I’d really encourage you to use something to help with alignment though, as any mismatch in the surface will require a ton of work later on.
I marked for Dominos roughly every 8 inches and then cut the mortises, making sure to count them out to ensure I didn’t miss any. I’ve done that in the past and, let me tell you, it makes for a stressful glue up, trying to figure out why your boards won’t go together.
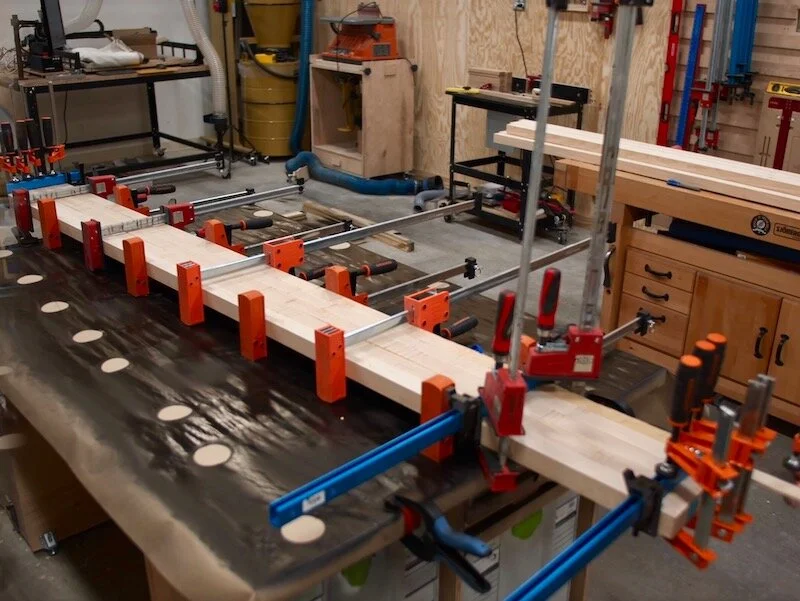
Anyway, after cutting the mortises, I could get the sections glued together, which went fairly uneventfully. I’m lucky in that I have quite a collection of parallel clamps, so I might have gone a little overboard with the clamping. It’s also really important to apply even clamping pressure from both sides of your glue up, to keep it from cupping.

I actually overtightened the clamps on the underside of my top and ended up loosening them slightly later on to remove the slight cup I had added with the clamps.
Once the glue dried for a few hours, I scraped off the excess glue and then could get the countertop cut to final length. I used my track saw for this, but a circular saw and straight edge would work in the same way.
After cutting one end square, I measured and marked my final length of 99 ½” and then cut the other end square. After cutting, I double checked for square by measuring the diagonals and ended up dead on.
When cutting one of the ends, I noticed a hairline crack running from the end of one of the strips. I wanted to quickly stabilize the crack, so I added some painter’s tape to seal the bottom and side of the crack and then added some thin CA glue. The CA glue is thin enough to run down the entire crack, as you can see through the painter’s tape, and a quick spritz of activator cured the CA glue instantly and locked the crack in place.
Step 6: Preparing Butcher Block Counter Tops For Finish
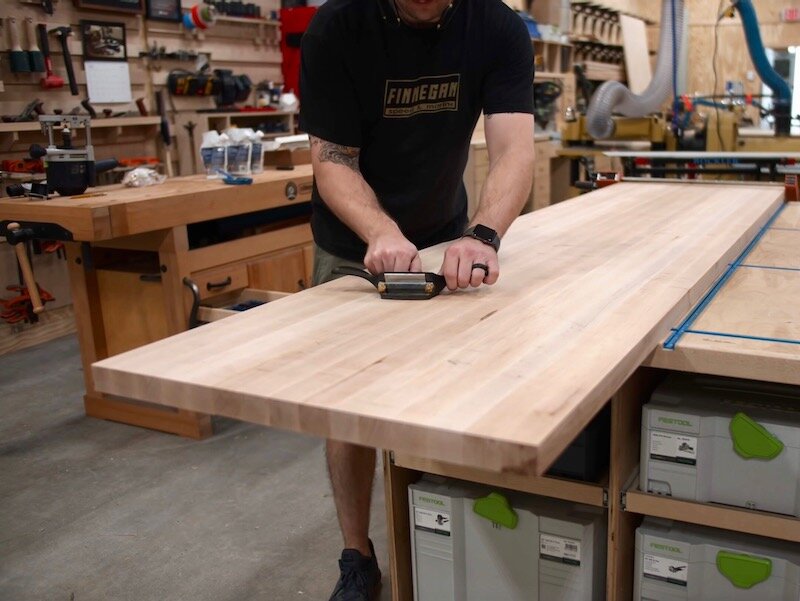
Next, it was time to get the countertop prepped for finish. To clean up the glue lines and get the top evened out, I pulled out my cabinet scraper, which is a tool I haven’t used much in the past. A woodworker friend showed me how to dial it in and, I must say, it really helped get this top smoothed out prior to sanding.
After scraping, I could sand the top with 120 grit to really smooth it out.
After sanding with my first grit of 120 grit, I pulled out my router and a chamfer bit from Infinity Tools and added a chamfer to the top and bottom edges of the countertop. I realize a chamfer on the back edge of a countertop is kind of pointless, but it will be covered by my backsplash and caulk and it’s easier to get a clean corner by chamfering all of the edges, rather than trying to stop the chamfer at the corner.
The sharp edges are also super fragile, so the chamfer will help keep the edges intact when I move the countertop into place.
It would have been tricky to chamfer the corners with the router, so I pulled out my block plane after chamfering the rest of the edges. It’s important to chamfer the corners after the other edges, to help reduce blowout. This cheap little block plane made quick work of this and gave the countertop a nicely finished look.

Once the edges were chamfered, I sanded the countertop with 180 grit, sanding the chamfers as well, and then I could add some finish.
Step 7: Finishing Butcher Block Countertop
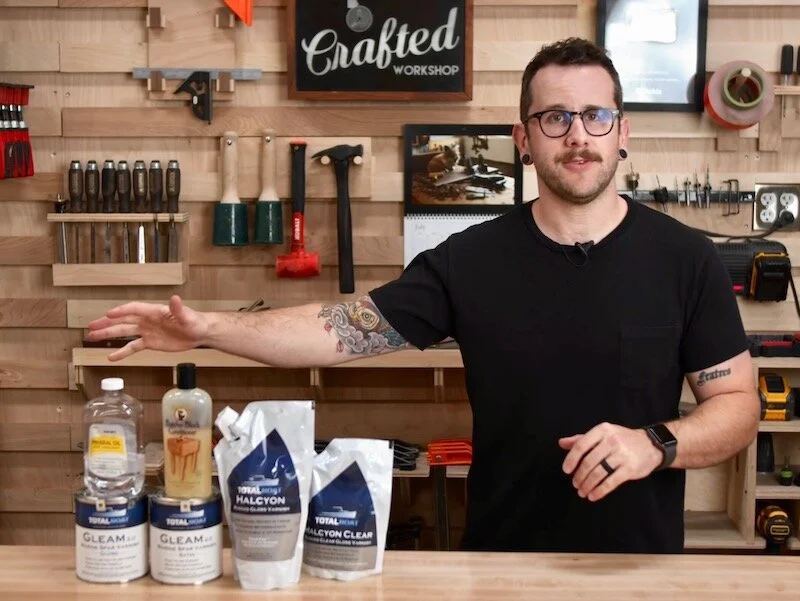
So as I mentioned, I used Halycon Clear for the finish on my countertop and I decided to spray it on, although it can be brushed or rolled on as well. Also, I should mention that I thinned this finish about 20% with water after applying the first coat and that made it spray a lot better in my experience.
I sprayed two coats on the bottom of the countertop, letting the finish dry about an hour between coats, then flipped the countertop over to finish the top. First, I vacuumed off any dust to make sure I got a perfect finish, and then I sprayed on three coats, sanding with 320 grit after the second coat.

I really love the color this finish brought out in the Maple without darkening it too much or yellowing it, I’ll definitely be using this Halcyon Clear again in the future.
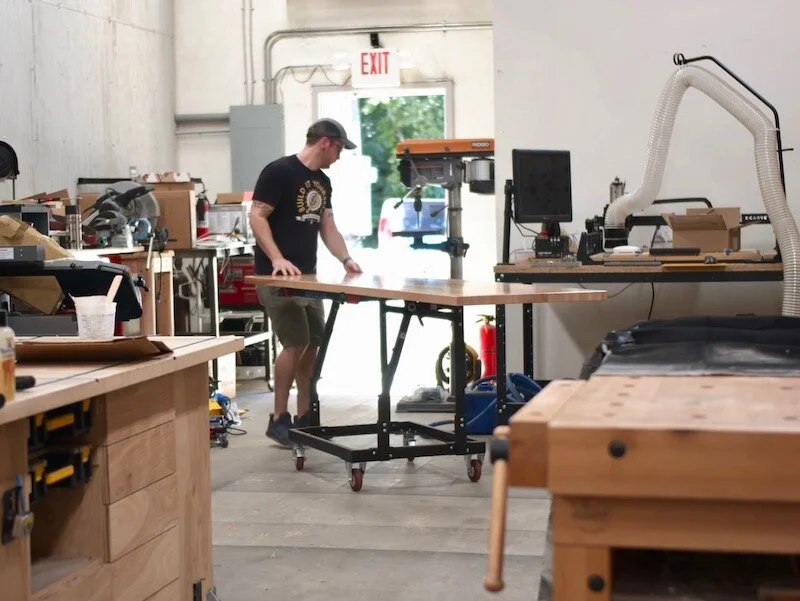
Anyway, after the last coat dried, I could get the countertop loaded up and brought to the house, which was a little tricky by myself. This Rockler Material Mate cart has become an absolute lifesaver in the new shop, I highly recommend picking one up if you have to move pieces around your shop solo like I do.
Step 8: Installing Butcher Block Counter Top On Home Bar

Before putting the countertop in place on the cabinets, I went ahead and drilled holes through which I’d attach the countertop. The stretchers were the perfect spot for attaching the countertops, and I drilled large oversized holes to allow for seasonal wood movement. If you don’t drill oversized holes, your countertop will most likely split in the future, especially if you’re installing it in the middle of summer like I am.
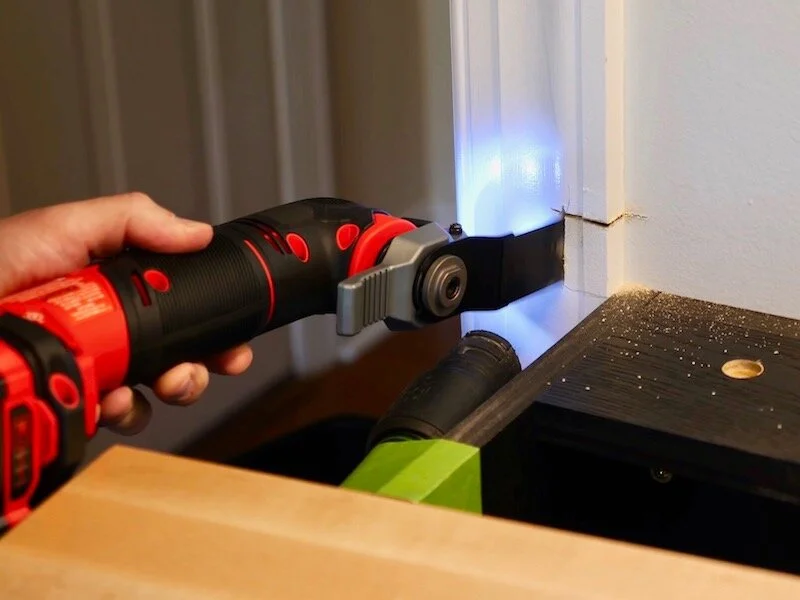
Once the holes were drilled, I moved the countertop into place. The only spot where I had some interference was the trim around the door, which I knew was going to require some scribing. I marked out where the countertop met up with the trim and then cut away the trim with an oscillating tool. I figured it would be easier to scribe a square corner into the trim rather than trying to scribe the countertop to the trim, which I want to replace with more modern looking 1x4 trim in the future anyway.
After cutting away the trim, I could slide the countertop into its final location and get it attached with 1 ½” screws from below. I added large washers to the screws to keep them from going straight through my clearance holes, and I also pre-drilled for the screws in the underside of the countertop. The last thing I wanted was to split my countertop at this point, and I’d definitely recommend you pre-drill your holes.
With the countertop attached to the base cabinets, the last step to finish the countertop was to add a bead of caulk around the perimeter. I’ll most likely be adding a tile backsplash in the future, but the caulk will keep water from running off behind the countertop in the meantime.
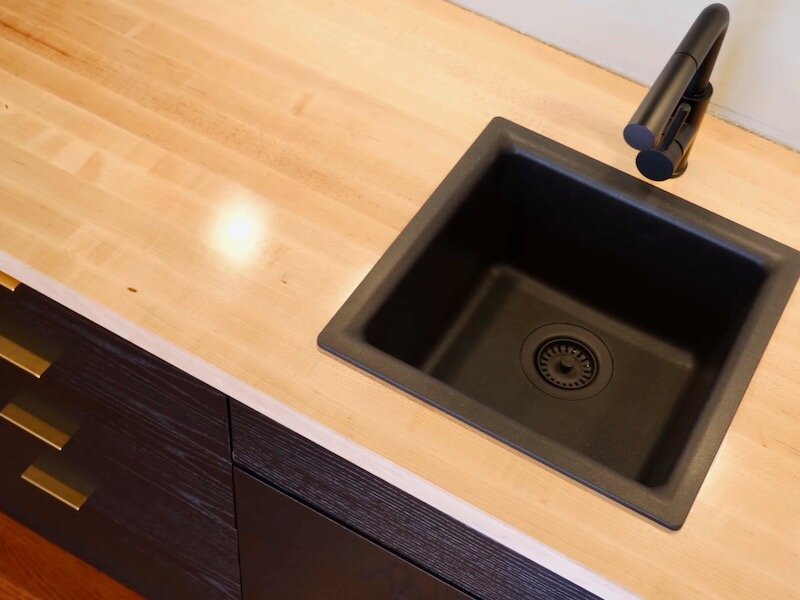
Step 9: Faucet And Sink Installation
As I mentioned earlier in this series, I designed these cabinets to fit a sink, so the last step for me was to get my sink and faucet installed.
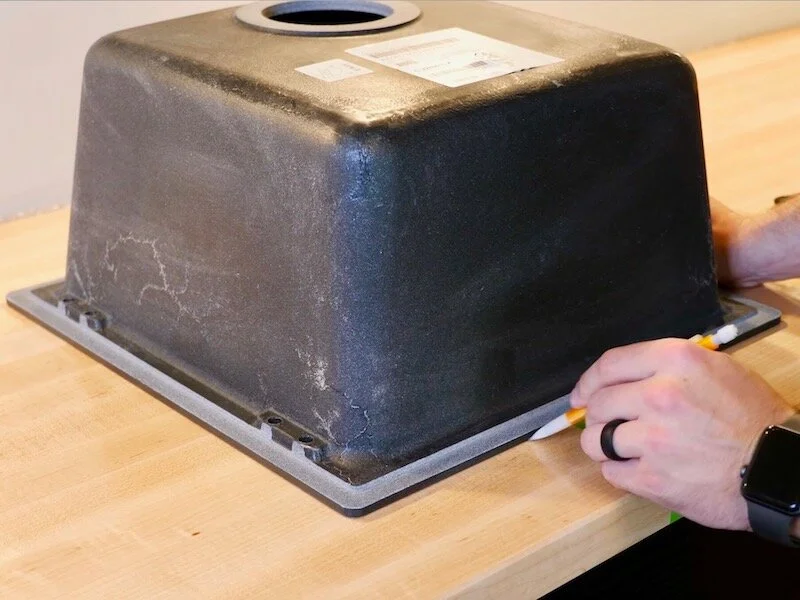
First, I needed to cut a hole for my sink, which is designed to be both an undermount or drop-in sink. I went with the drop-in option, to help reduce the water contact with the countertop. Drop-in sinks are also much easier to install, in my opinion.
I traced out the edge of the sink and then marked another line 5/16” in from the original line, which was based on the sink instructions. To cut out the hole, I first drilled an access hole for my jigsaw blade and then cut the opening with my jigsaw. I made sure to stay as close to my line as I could, but again drop-in sinks are a little more forgiving with less-than-perfect cuts.
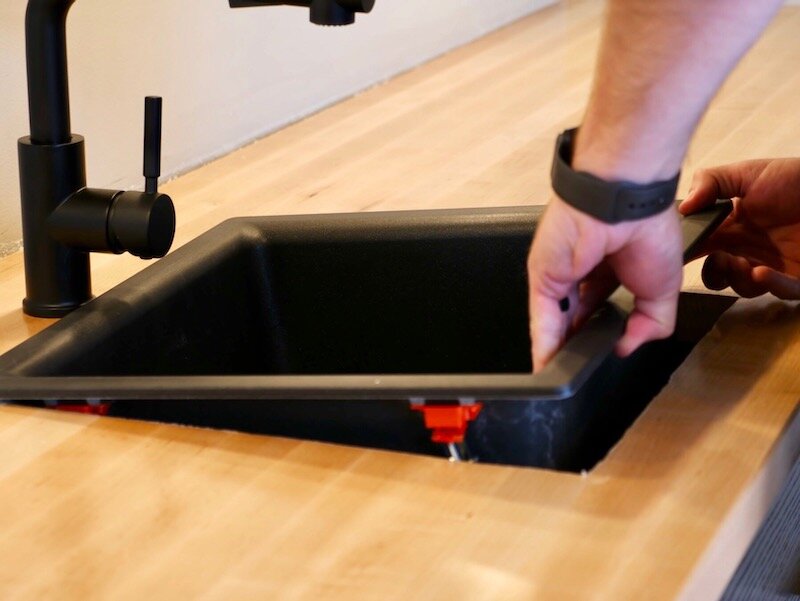
After cutting the opening, I vacuumed up any dust, applied a bead of silicone to the bottom edge of the sink and dropped it into place. This sink is held in place with these little clips, which I attached on the underside of the sink.
Next, I installed the drain, which is a perfect match for the sink, since it’s made by the same manufacturer. I applied a bead of caulk to the underside of the drain flange, set it in place, then tightened down the bolt that connects the two halves of the drain assembly. Finally, I wiped away the excess caulk.
Finally, I could install the faucet. The faucet I went with required a 1 ⅜” diameter hole, which I drilled out with a Forstner bit, and I just made sure the hole was centered with the sink.
Installing the faucet was super simple, I just dropped in the faucet and tightened it down by hand. This faucet has a built-in gasket, so you don’t need to add any other sealant, but you could add something like plumber’s putty or caulk if you wanted to be extra safe.
And, with the faucet installed, I could call this countertop install done and this home bar project complete, at least for now.