
How To Build DIY Garage Storage Shelves
Learn how to build simple, cheap garage storage shelves that use the wasted space above your garage door! Reclaim your garage with this easy weekend woodworking project. Gotta make some room for that Tesla Cybertruck 😜
Note: Below are Amazon affiliate links
🛠 Tools Used On The Murphy Bed Build:
📦 Materials Used On The Garage Storage Shelves:
3” Screws (attaching 2x2s to walls/ceiling)
2 ½” Screws (attaching 2x4s to 2x2s)
1 ⅝” Trim Head Screws (attaching plywood)
I created a set of free plans for these garage storage shelves, in case you’re interested in building a set for yourself. Click the button below to grab the free plans from my store.


Process For Building Storage Shelves In Your Garage:
Step 1: Clean Garage

I actually started this project back in May when my buddy Alex from the Singletrack Sampler was in town working on his van with me, and luckily he gave me a helping hand cleaning out the garage.
Step 2: Design Storage Shelves In Sketch Up

After cleaning out the garage but before actually getting to building, I jumped into SketchUp to start figuring out where I wanted the shelving. We’re lucky in that we have super tall 10 foot ceilings in our garage, so that gave me plenty of room to add shelving in the upper corners.
My goal was to be able to get two of your typical plastic storage bins stacked on top of one another in the space between the ceiling and the shelves, and I also wanted to minimize waste when cutting the parts from typical dimensional lumber. That said, looking back, I would have made these shelves just a little taller, but we’ll get to that later.
Step 3: Breaking Down Lumber For Storage Shelves

After figuring out where all of the shelving was going to go, I headed out to the garage and started cutting things down at the miter saw. Since most of these pieces were cut to similar lengths, I could batch things out quickly by setting up a stop on the miter saw.
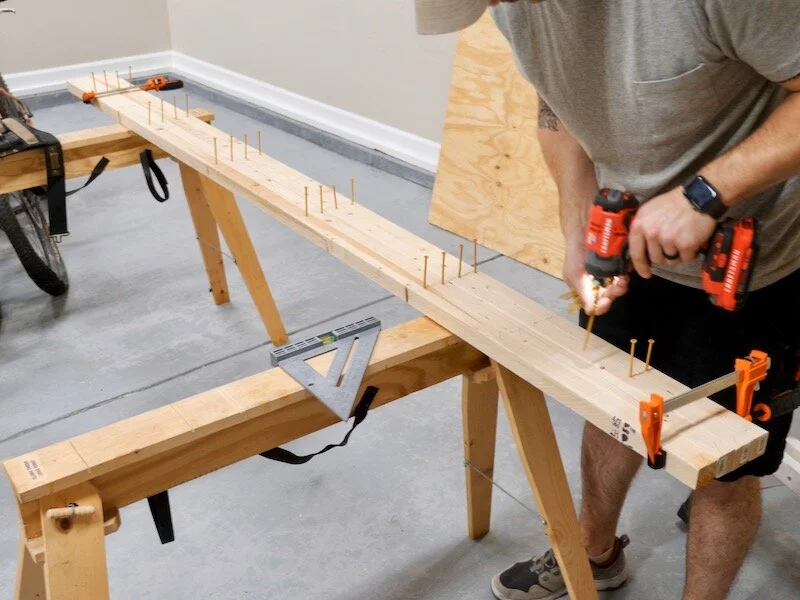
Step 4: Mark Stud Locations and Fasten 2x2’s To The Wall
Next, I went ahead and found my stud locations in the first area where I’d be adding shelving then transferred those locations to my 2x2 horizontal support pieces. Once the stud locations were marked out, I partially drove in screws in those locations, which really simplified things when it was time to mount the pieces. Also, I used 3” screws anywhere I was fastening these 2x2s to the walls or ceiling and they provided a ton of strength.
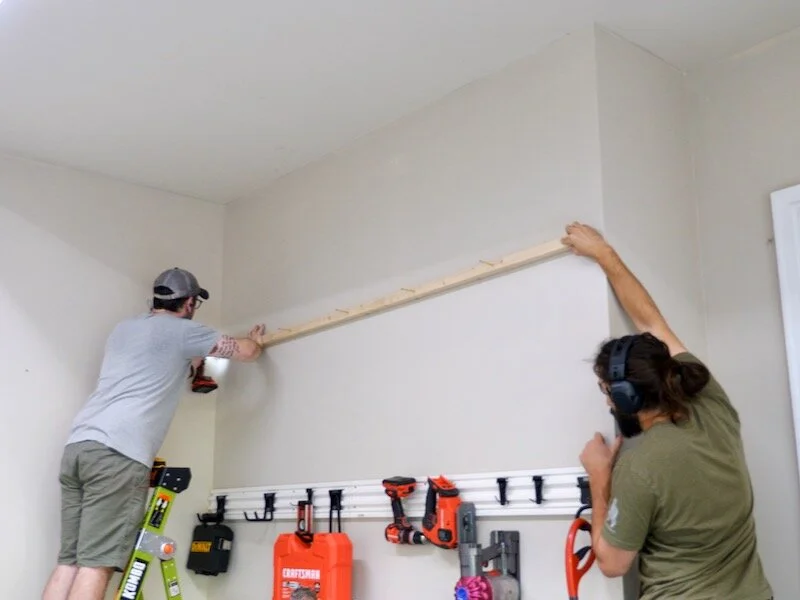
With the screws already in the board, mounting the 2x2 was super easy, and I just made sure it was level and also that the distance from the ceiling to the 2x2 was what I needed it to be, 31 ¾” in my case. Once again, I would have made that distance about two inches longer, but I’ll get to that in a bit.
Next, I mounted another 2x2 to the ceiling, making sure I was driving screws into the joist above. Having Alex there to help definitely came in handy this time, as it’s pretty tough to hold these boards up and drive in the screws by yourself. I’d definitely recommend finding a helper on this project if you can.
Step 5: Install 2x4 Uprights In Garage
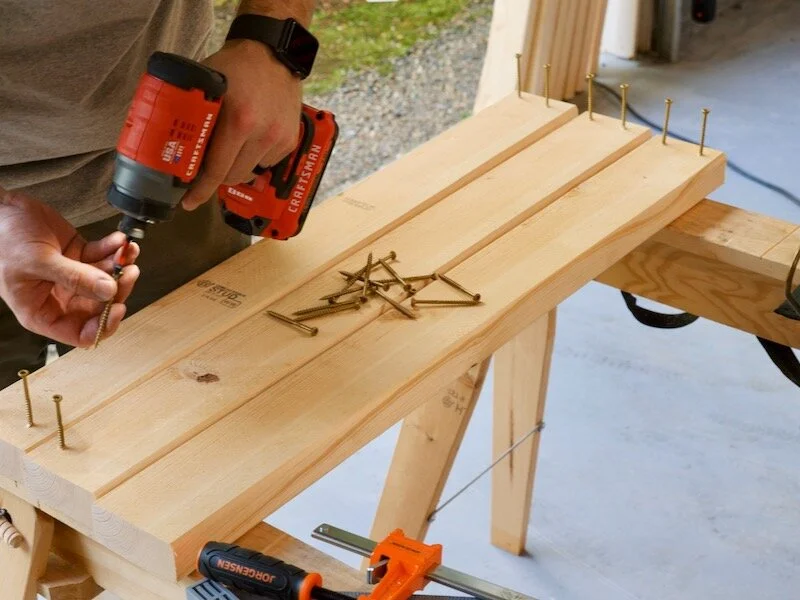
With the 2x2s mounted, I could get the 2x4 uprights prepped by driving in more screws, 2 ½” screws this time. I also ended up pre-drilling these holes later on to help avoid splitting the 2x4s and it helped a ton.
Once the screws were in, I could go ahead and get the uprights mounted to the 2x2s, making sure they were level. The spacing on all of these pieces is pretty specific, and here is a link to free plans for these shelves.
Also, I didn’t end up adding glue to these joints on this first shelf, but I ended up coming back and adding it later, and I also added it to the rest of the uprights moving forward. These shelves ended up holding a ton of weight, and the glue will help keep the joints strong over time.
Step 6: Complete Framework By Adding Last 2x2

To complete the framework for the shelving, I added the last 2x2 to the bottom end of the uprights with more 2 ½” screws. Once again, having a helping hand here was extremely useful.
Step 7: Cut Out And Install Plywood Storage Shelving Material
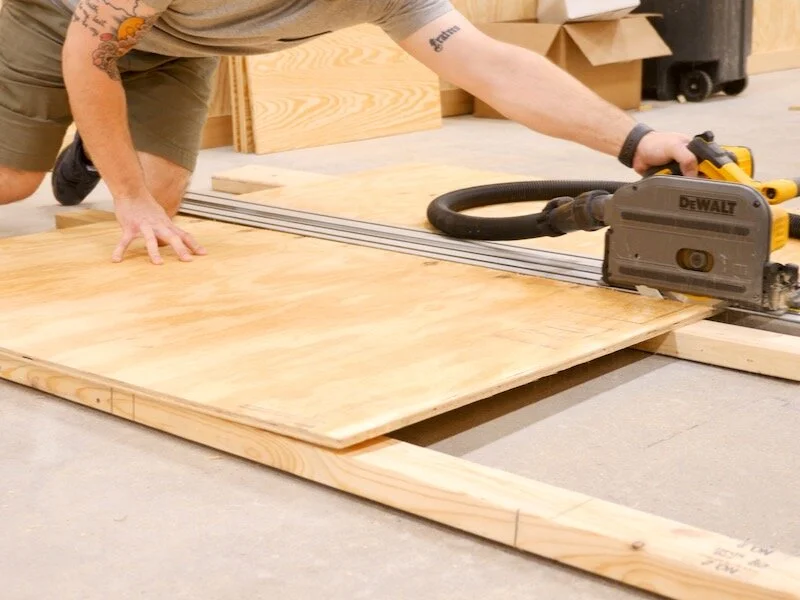
With the framework of the shelving done, I could get the actual shelving material, ½” plywood in my case, cut to size. This plywood was actually left over from my shop build and was perfect for this. Since most of the weight is over the 2x2 structure when using the plastic storage bins, ½” plywood is plenty strong, but you could certainly use ¾” plywood if you wanted some extra strength.
Also, since I already had this plywood on hand, I had to cut it to size myself with my track saw, but I would highly recommend letting your local home center cut it for you if you’re buying this plywood new. All of the pieces are cut to the same size and it would save you a ton of work having them cut the pieces on their panel saw.
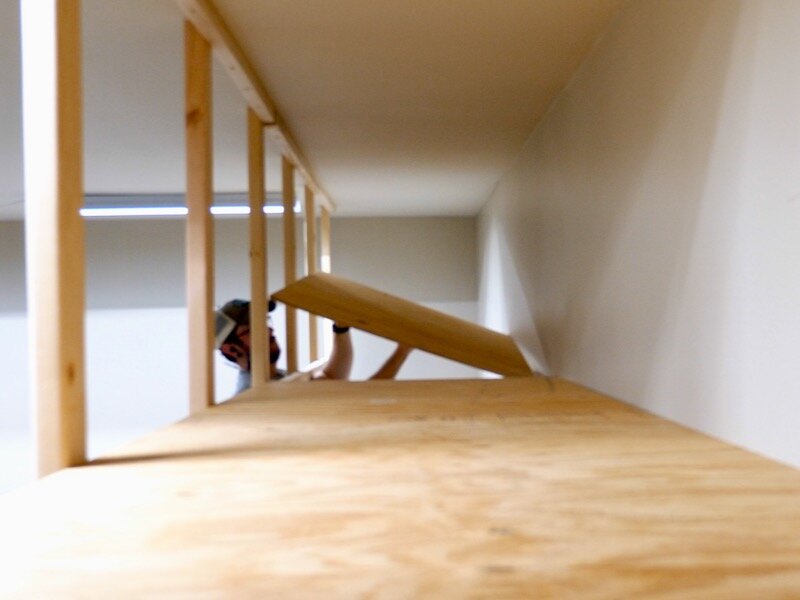
With the plywood pieces cut to size, I could get them mounted on the 2x2s, and you can see that the plywood fits perfectly between the wall and the 2x4 uprights. I used 1 ⅝” trim head screws to mount the plywood, but pretty much any screw shorter than 2” will work.
That said, I like trim head screws for this application because the heads end up below the surface of the plywood, so it’s easy to slide the storage bins onto the shelves without them catching on any screw heads.

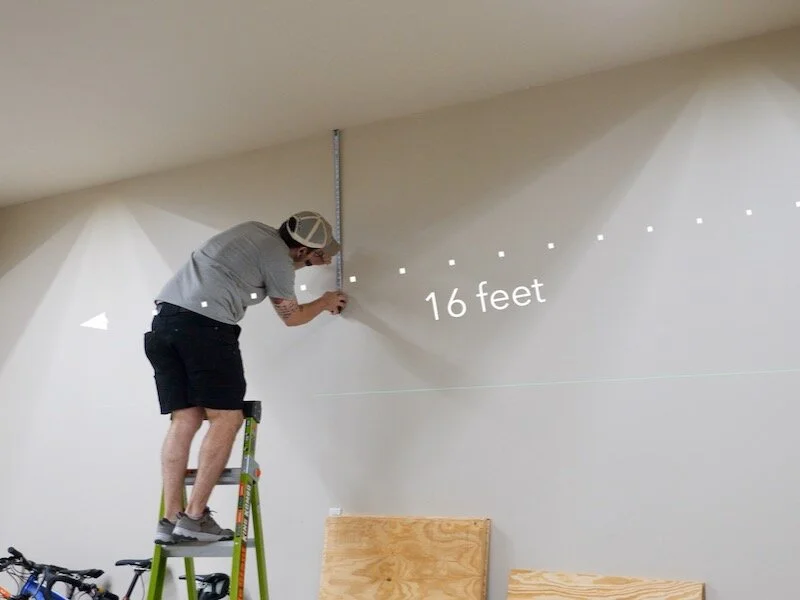
With that, the first set of shelving was done and I could just repeat the process on this longer wall in our garage, and this time I pulled out my line laser. Since I was going to have to use two eight foot lengths of 2x2 here, I wanted to make sure they lined up nicely along the length of the wall, and the line laser is the perfect tool for this.
I made pencil marks on the wall, using the laser as reference, so I could still line things up even if my body was blocking the laser when it came time to mount the 2x2s.
Once again, I found my stud locations on the wall, transferred those measurements to the 2x2s, and pre-drove screws to make things easier.
This time, I didn’t have a helping hand when mounting the 2x2s, but it was still pretty simple with the screws already in place and my alignment marks on the wall.
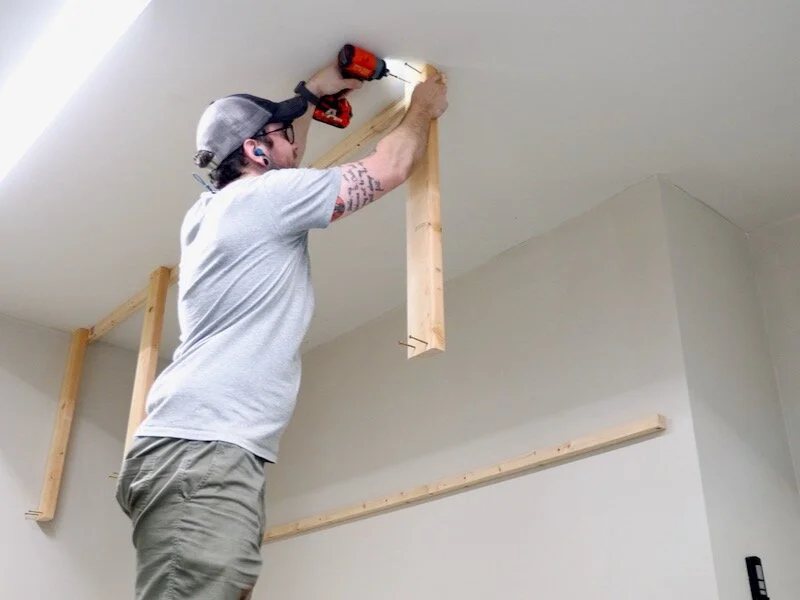
Next, I could mount the 2x2s on the ceiling, and this time I had to be more conscientious of where I was driving the screws, as my joists run perpendicular to these shelves. Because of this, I had to figure out where the joists were located before mounting the 2x2s, and I went ahead and pre-drove screws in those locations before mounting the 2x2s on the ceiling.
With the 2x2s up, I could go ahead and pre-drill and pre-drive screws into the 2x4 uprights and then just repeat the whole process of mounting the uprights. As you can see, I did add glue this time and it definitely made the whole shelf feel a lot more solid.
Also, on this shelf, since again there were two lengths of 2x2s butted up to one another, I ended up attaching the centermost upright to both 2x2s by driving one screw on each end of the upright into each 2x2.
Finally, I could add all of the plywood to finish another section of shelving.
Also, I wanted to mention that this shelving design is based on a video my buddy Jay Bates put out a few years ago.
It was at this point that I decided to try loading one of the shelves with the two bins stacked, and this is where I realized I wasn’t going to be able to get the bins out without sliding them out partially so they’d clear the 2x2 on the ceiling. I didn’t take that 2x2 into account when figuring out the dimensions and, in retrospect, I would have made the 2x4 uprights two to three inches longer and just used 10 foot long 2x4s so I didn’t end up with large offcuts.
Step 8: Test Fitting Storage Bin On New Garage Shelves

My shelves still work, it’s just a bit of a pain, especially if the bins are loaded with heavier items.
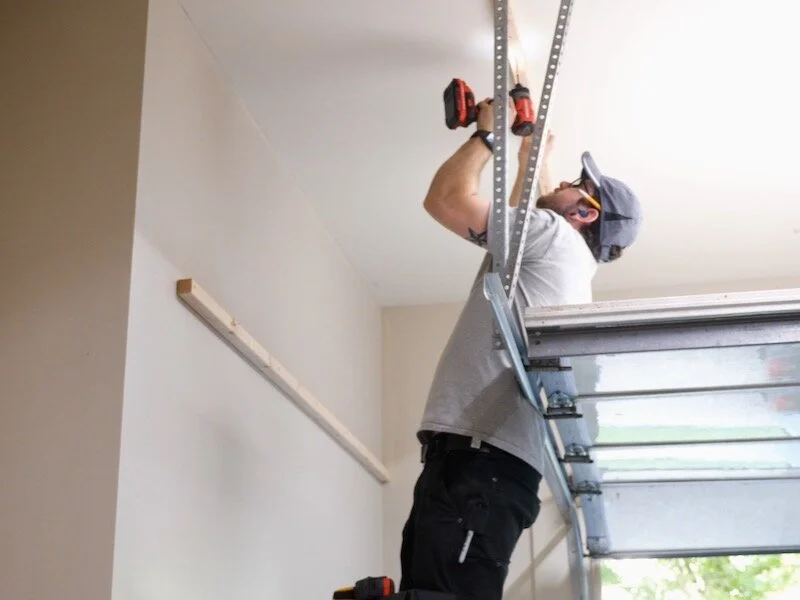
The next sets of shelving to install were on the opposite wall from the previous shelving, and these are directly above our garage door. I knew I would need to make these uprights shorter so they didn’t interfere with the garage door, and I went ahead and measured for this before cutting the parts for these shelves.
Installation was more of the same, mounting the 2x2s into the studs and joists, mounting the 2x4 uprights to the 2x2s, and then adding the plywood, but this time I did need to notch around this little bump out in our wall.
Step 9: Back To Installing More Storage Shelves On The Other Side Of the Garage
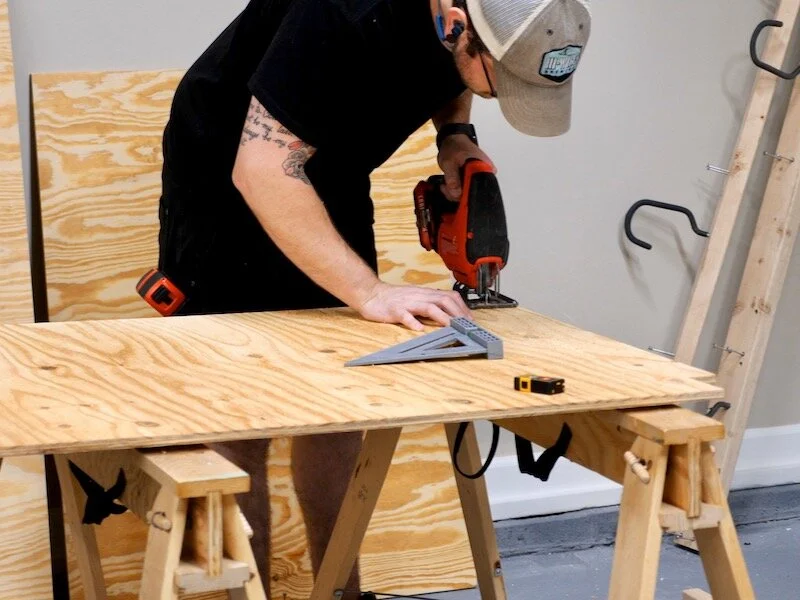
To do this, I first marked out where I needed to cut using a speed square and then cut to my line with my jigsaw. I ended up with an extremely nice fit and this really allowed me to maximize my storage space against that wall.
With that shelf in, I could continue working my way around the garage, and this is really where things got tricky, as I had a lot of obstacles to work around.
For example, I needed to notch the plywood around the 2x4 uprights of the adjoining shelf, which I once again did with the jigsaw.
Once that was done, I could get the plywood attached and then repeat the whole process one more time, to create the final bit of shelving in the garage. As you might have noticed, I decided to skip the shelving on the right wall in this shot, and that’s because that’s the wall all of my shop equipment will live on that wall. I wanted to make sure I had good lighting and plenty of vertical space when I’m moving longer boards around in that area, so I left it shelf-free.
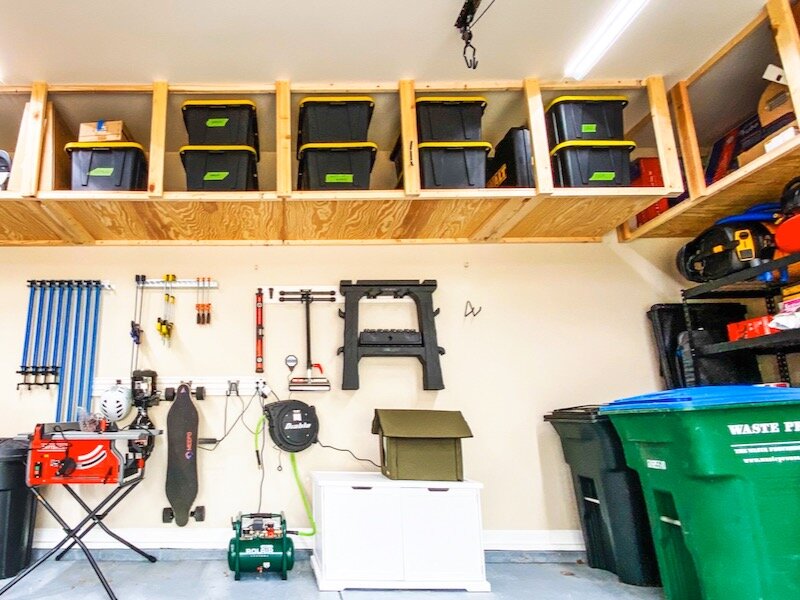
With that, the garage shelving was pretty much done and here’s how it looks all loaded up. As you can see, this added a ridiculous amount of storage to our garage and the cost was surprisingly low.
In total, I used eighteen 2x2s, eight 2x4s, and four sheets of ½” plywood. That’s about $160 of lumber, plus screws and glue, which is an insane deal for this amount of storage.
With that, other than a few odds and ends, the garage was complete, at least for the time being ; )