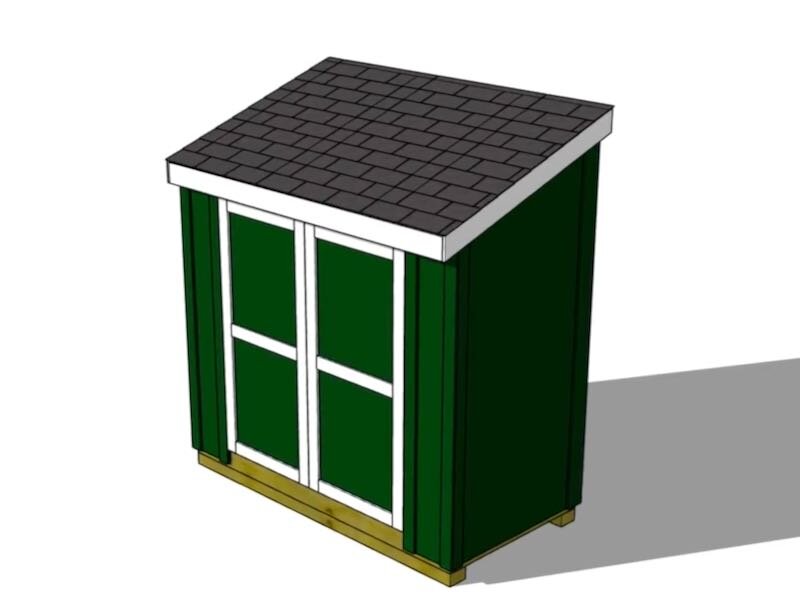
How To Build A Storage Shed Part 1 : Framing The Floor, Walls & Roof plus Siding
Learn how to build a 4x8 lean-to storage shed in this two part series! In part 1, I'll show you how to prep the site, build the foundation and floor, frame the walls, add the siding, and finally build the roof framing.
Note: The links below are affiliate links
📦 Materials Used On The Shed Build:
3” Screws (for framing)
2 ½" Screws (for attaching floor, siding)
Process For Building A Storage Shed:
Step 1: Prepping The Site For Storage Shed Construction
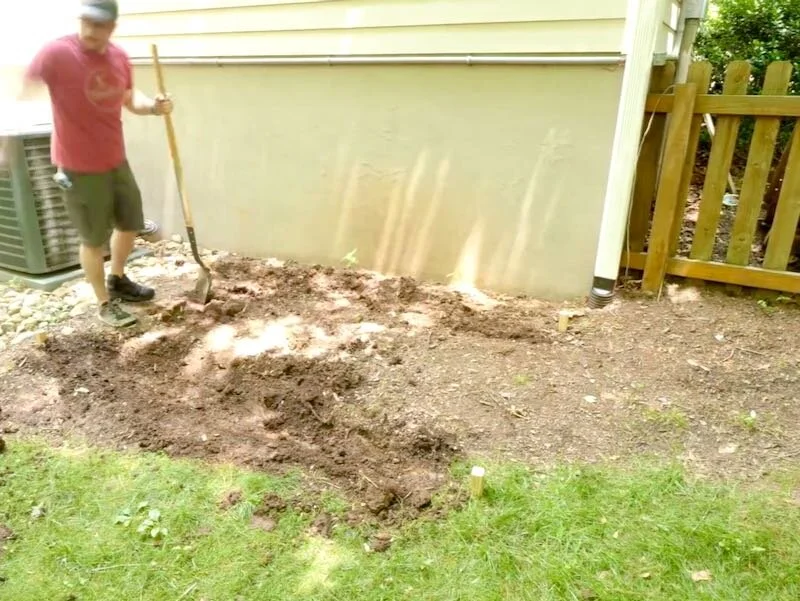
The first step in this shed build was getting the site prepped and the foundation laid. We had this little area next to our air conditioning units that ended up being pretty much perfect for a shed this size, and I started by staking out the rough footprint of the shed.
To make sure the area I was marking out was square, I pulled diagonal measurements from two of the corners and moved the stake on the opposite end of the footprint until the measurements matched.
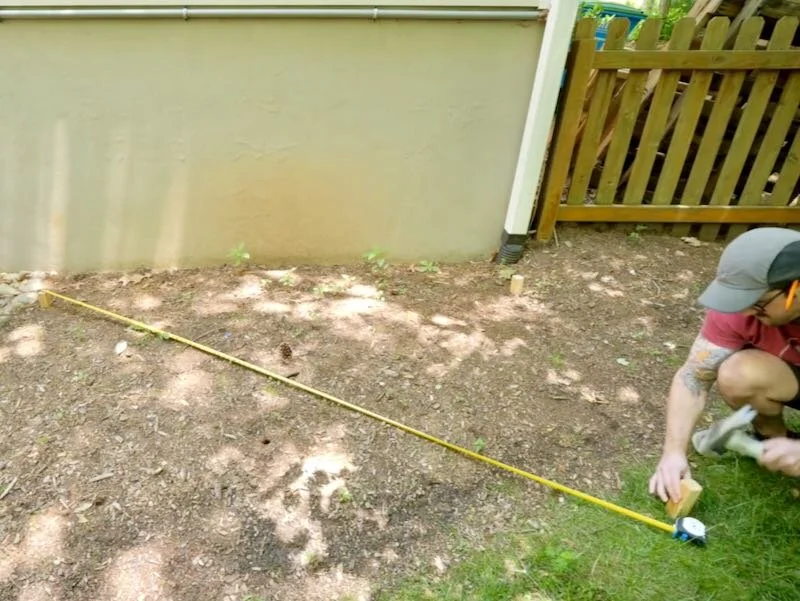
I actually placed these stakes at the exact corner locations of the foundation, but I should have offset them outwards by about six inches to give me some room for digging out an area for the 4x6 skids the shed will be built on, which I needed to do next.
My initial goal when digging was to get the areas level left to right and I figured I could adjust the front to back level with the gravel I’d add later. I used the 4x6 skids with a level on top of them to take my readings and just kept removing dirt until I got things nice and level.
Once the areas were level, I packed the dirt with a tamper, to help keep the foundation from settling, and then I started adding gravel. Gravel serves a few purposes here: first, it provides drainage and keeps the skids from staying in contact with water for long periods of time.
Step 2: Level Shed Location
Second, gravel doesn’t compress like dirt does, so it makes for a more stable foundation. Last, gravel is much easier to spread and level than dirt, which is what you see me doing here.
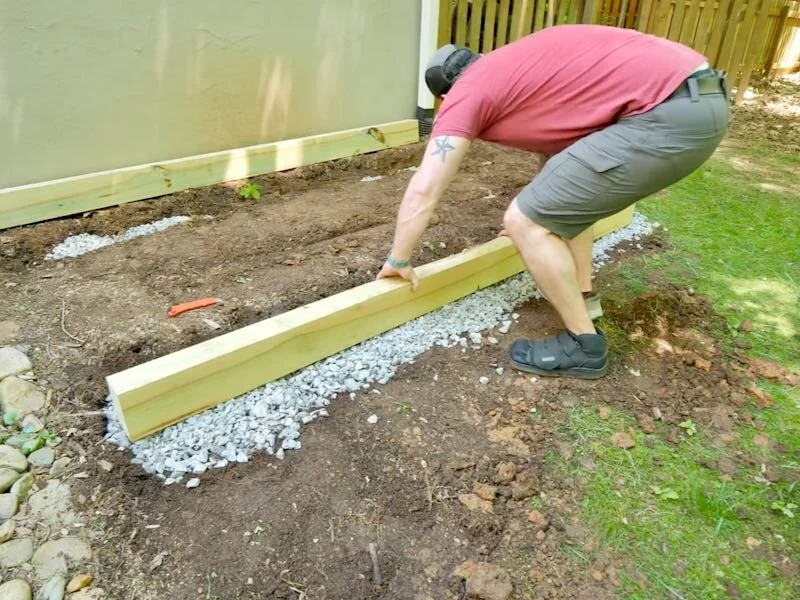
As I mentioned, I had planned to level the skids front to back with this gravel, but there was way too much of a slope to do that with the gravel I had on hand so, instead, I just turned the back skid on its side, which lowered it about an inch and a half. This ended up making up the difference perfectly, and then I could get the skids level and square to each other in their final position.
After double and triple checking the skids for level and square, I could move on to building the floor, starting with the joists.
Step 3: Building The Shed Floor From 2” by 6” Lumber
I used 2x6s for the joists and they were spaced at 16 inches on center, which made for an extremely rigid and sturdy base for the shed.
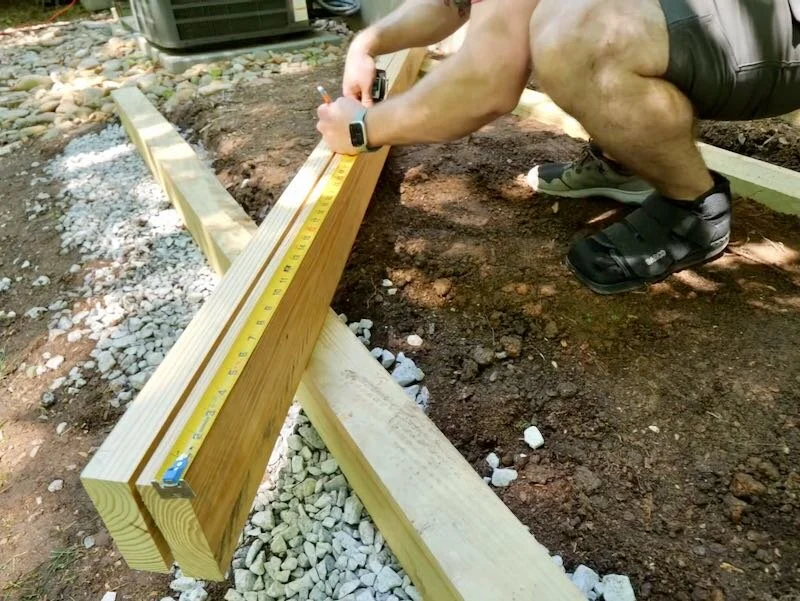
I cut the two rim joists to their 8 foot length at the miter saw and then I could lay out the floor joist locations on the boards.
If you’re never framed a wall before, generally this is the way in which framers lay out their stud or joist locations, by measuring and marking the locations on one board and then transferring those marks to the other board, with the two boards butted up against each other. This helps to reduce measuring errors, and it’s also just a lot quicker than pulling these measurements twice.
Step 4: Build Shed Floor Framework
Another common practice is to mark out where one side of the stud will go and then mark an X on the side of the line where the stud should be placed. This again avoids confusion during construction, but it also keeps you from having to mark both sides of each stud location, which saves time.
I also like to transfer my lines to the inside faces of these boards on wider boards like this, to help keep my floor joists square to the rim joists during assembly.
Last, I partially drove in three 3 inch screws in each corner of the rim joists, so that I could have both hands free when assembling the floor.
Next, I cut the floor joists to size at the miter saw, making sure they were all the exact same size, and then I could assemble the floor framing.
I lined up the first floor joist with the corner of the rim joist, making sure it was in line with the line I had added on the inside face of the rim joist, and then drove in the screws, making any necessary adjustments with a hammer between adding each screw.
I repeated this process at the other three corners, and unfortunately one of these rim joists had a decent amount of twist to it, so I had to fight it a bit.
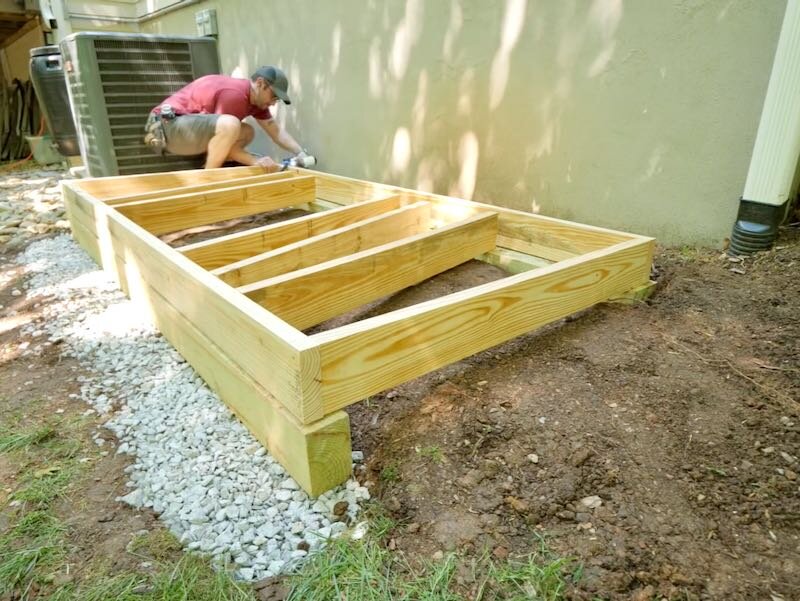
Eventually, I got it assembled and then I could go back and add all of the inside floor joists using the same method.
Step 5: Check Squareness Of Shed Base
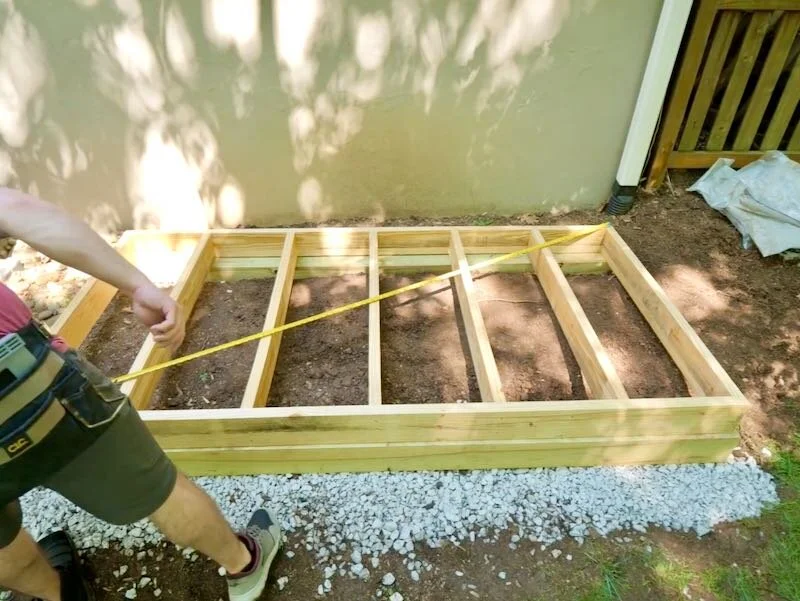
Once the frame was assembled, I checked for square, again by measuring the diagonals, and it was pretty much dead on.
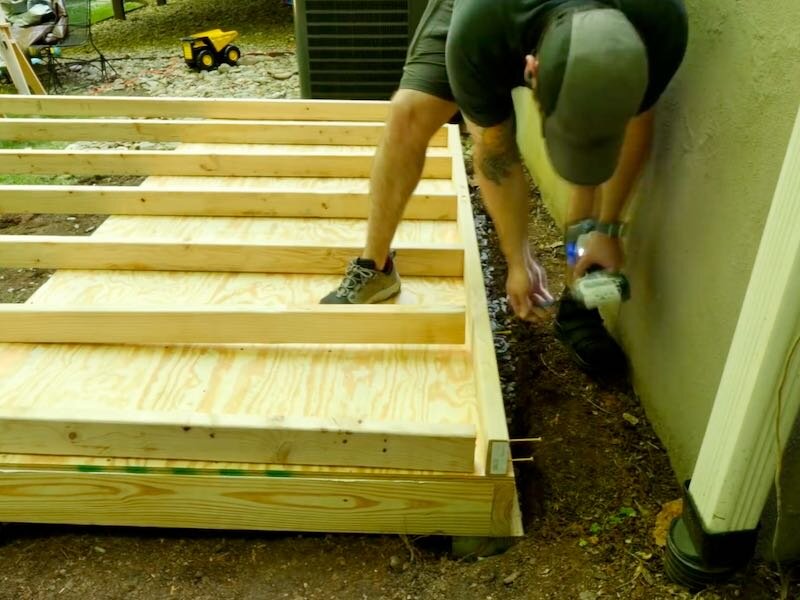
I got the floor positioned on the skids, making sure the front rim joist was flush with the front skid, and then I attached the framing to the skids using some metal brackets. You could also just toe screw through the joists into the skids, but these brackets make it easier to lock in the position without things moving around.
I added six brackets in total, one at each corner and two at the center of each rim joist, and then I called it a day for day one.
Step 6: Attach Plywood Storage Shed Floor Panel To Floor Joists
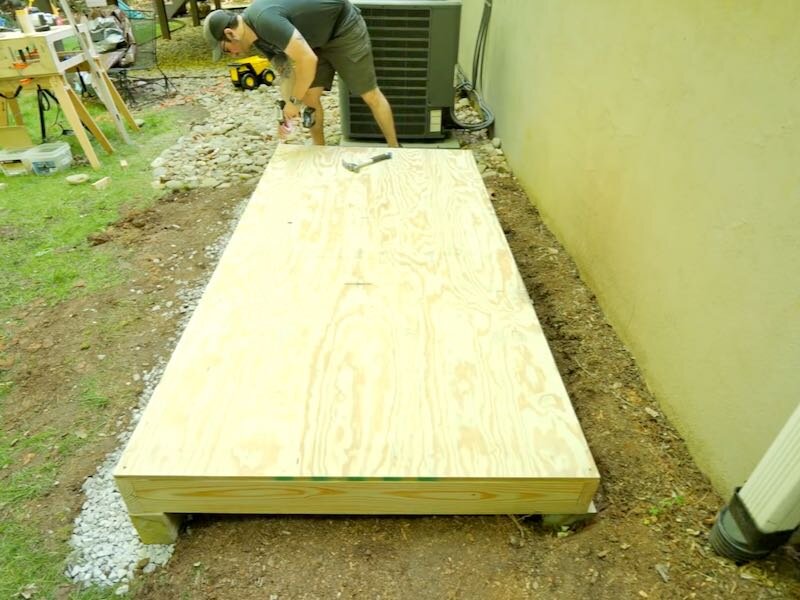
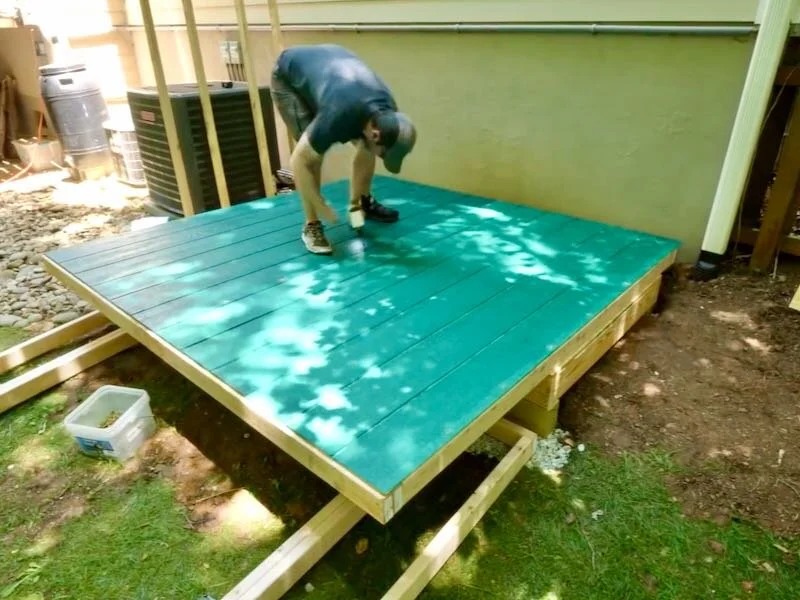
The next day, I got started by getting the ¾” plywood floor panel attached to the framing. I first added construction adhesive, which I unfortunately ran out of halfway through, so I switched over to wood glue, and then I could drop the plywood on to the framing.
I started by attaching two of the corners of the plywood, making sure they were flush with the frame, using 2 ½” screws.
Attaching the third corner locks in the squareness of the floor framing, so I made sure it was flush with the plywood and then added another screw.
Finally, I added a screw to the fourth corner and then I could add screws along the edges of the plywood to lock it into place. I spaced the screws roughly every eight inches around the perimeter of the plywood, and then I used a chalk line to mark out the joist locations in the center of the floor and added screws spaced every foot there.
Step 7: Build Stud Wall Framework
With that, the floor was built, so next I marked out the locations of the wall bottom plates, again using a chalk line. The inside face of the bottom plates should land 3 ½” in from the outer edge of the floor since I used 2x4s for my walls, and having these marks will give me reference points when attaching the walls to the floor later.
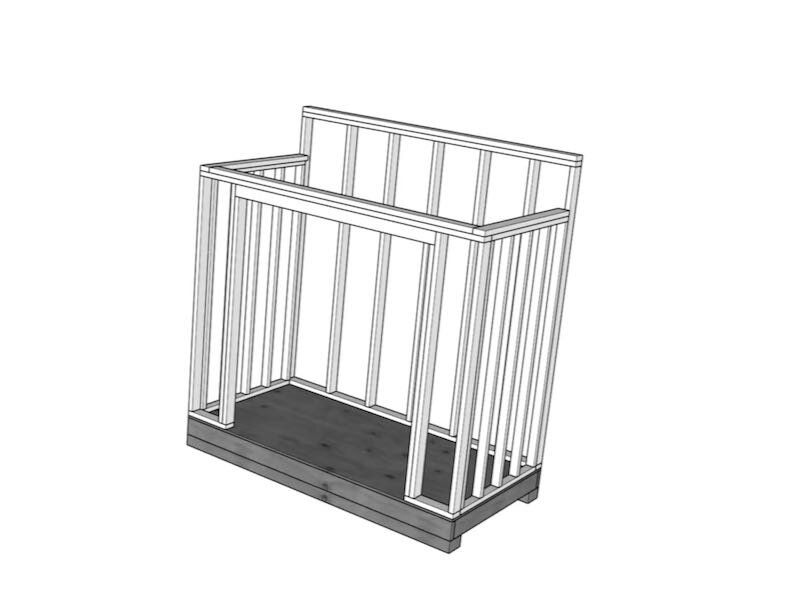
The next thing to work on was getting the walls framed, and I started with the back wall. The back wall was framed exactly like the floor, with 16 inch on center spacing, and I once again marked out my stud locations in the same way as on the floor, then cut the studs to length using the miter saw.
Before assembly, I crowned the studs, meaning I checked to see which way each stud curved along it’s edge, and I faced this curve in the same direction on all of the studs. Luckily, these studs were surprisingly straight, so there wasn’t really much need for crowning them, but it’s good practice when building structures like this.
With the studs in place, I could get the wall assembled, and I again used 3 inch screws here, but I only needed two screws per connection with these 2x4s.
Also, I should mention that I spaced this shed off of my house about 15 inches, and I definitely wouldn’t build a structure like this any closer, as assembly got really tricky as things like the roof framing moved closer to the house as the build continued.
Once the back wall was assembled, I moved on to the side walls, and I actually built these out of 2x3s rather than 2x4s. We’re going to be storing our trash cans in this shed, and that extra two inches of floor space widthwise inside the shed were a necessity if we wanted to fit all three of our trash cans in comfortably.
Instead of buying 2x3s, I ripped down 2x8s, which are made of a much sturdier Southern Yellow Pine, and these 2x3s should be plenty strong for this kind of structure.
Also, you might notice the stud spacing is a little different on these side walls, and that’s so the studs line up with the vertical grooves in the siding panels I’m going to be using later.
Step 8: Construct Proper Framework Around Shed Door With Header, King Stud and Jack Stud

Anyway, once the side walls were framed, I could frame the front wall, which was a little different than the other two walls due to the door opening. Whenever you have a door or window opening in a wall like this, you need to add what’s called a header, which is basically just a beefed up piece to support the structure above this unsupported opening.
In the case of this door opening, the header is just two 2x4s with a piece of ½” plywood or OSB sandwiched in between, and this brings the dimensions of the header up to 3 ½” square. I assembled the header with more 3 inch screws, and then I could mark out the stud locations on the top and bottom plate of the front wall.
The framing is also a little different on walls where there’s a header, as you need both a full length stud right next to the header, called the king stud, as well as a stud that’s cut down to support each end of the header, called a jack stud.
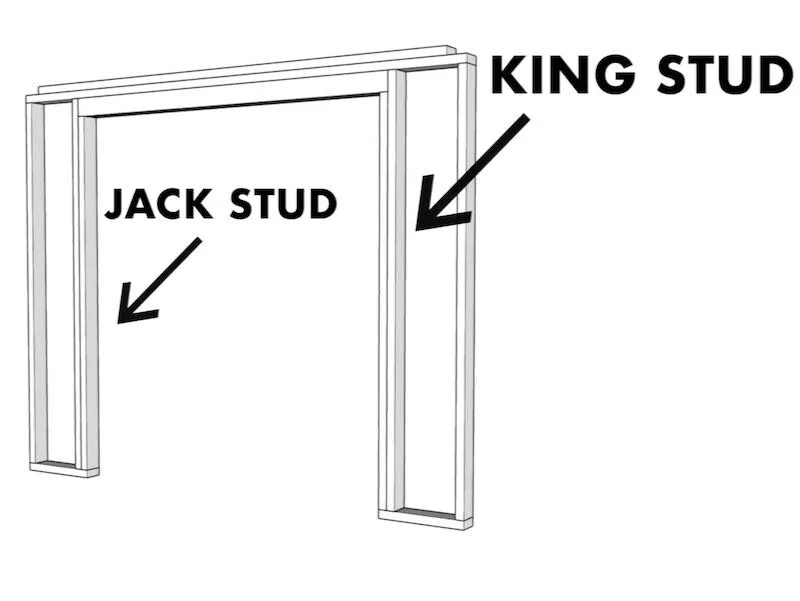
I made sure to mark out these locations on the top and bottom plate, and I like to mark J and K at these locations to indicate these are where the king and jack studs are located.
With that done, I could get the front wall assembled, initially adding the two corner studs and the two king studs. It was at this point that I realized I had cut my header too short, as I had cut it to the exact width of the door opening, when it needed to be 3 inches wider than the door opening.
This wasn’t a huge deal, as I was going to be building the doors myself anyway, so rather than remake another header, I just moved the king studs in an inch and a half on each side and moved along with assembly.
Once those were moved, I could attach the header to the top plate and king studs with more screws, and then I could flip the whole wall around to add the bottom plate. Last, I added the two jacks studs, which I cut to size after framing the rest of the wall.
With that, all four walls were framed, so I could move on to getting them attached to the floor.
Step 9: Raise And Attach The Storage Shed Walls

Luckily, I thought ahead here and realized that I would not be able to attach those siding panels to the back wall after getting the walls up, so I first went ahead and added the double top plate to the back wall, which is just another top plate on top of that first top plate, and then I could get the siding panels attached to the back wall.
I also went ahead and painted these panels so I wouldn’t have to squeeze in and try to paint the siding later, and then I could finally attach the panels with more 2 ½” screws.
These panels are offset from the top edge of the wall by ½”, to keep them from interfering with the ceiling rafters, but the panels are flush with the sides of the wall.
Also, just like when I added the plywood to the floor framing, adding this first panel to this back wall locks in the squareness of the wall, so I made sure the panel was flush with the edges of the wall before adding that third screw, and then I came back and added more screws around the perimeter and in the center of the back panel to attach it permanently.
I then repeated the same process for the second panel, which I evidently applied a heck of a lot more paint to since it’s much darker.
Also, you might be wondering about the pretty sizable overhang at the bottom of the wall. I certainly could have cut down these panels a bit, but I figured the shed would look better with more of that floor framing covered up, so I left these back panels full length.
Finally, with those back panels in place, I could start getting the walls stood up, starting with that back wall.
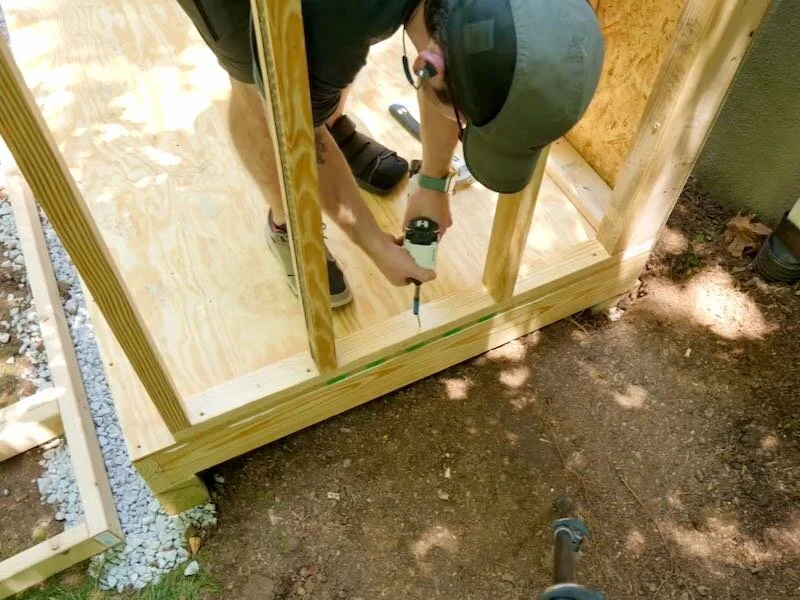
This wall had gotten pretty heavy at this point, but I got it upright and positioned it so it was in line with my chalk line and flush with the sides of the floor, and then I attached it to the floor with more 3 inch screws. I also made sure these screws went into the rim joist below, not just into the plywood.
Next, I could get one of the side walls added, and I realized I hadn’t accounted for my 2x3 side walls when laying out those chalk lines, so I marked another line with my speed square before adding the wall.
I again attached it to the floor using 3 inch screws, but I also attached the corners of the two walls, making sure they were flush. Since that back wall was already locked into square, I could ensure the side wall was also square by lining it up and attaching it to the back wall.
Finally, I repeated the same process for the other side wall and the front wall, making sure all of the corners were aligned before attaching the walls.
Step 10: Cut To Size And Attach The Siding Of The Storage Shed To Wall Framework
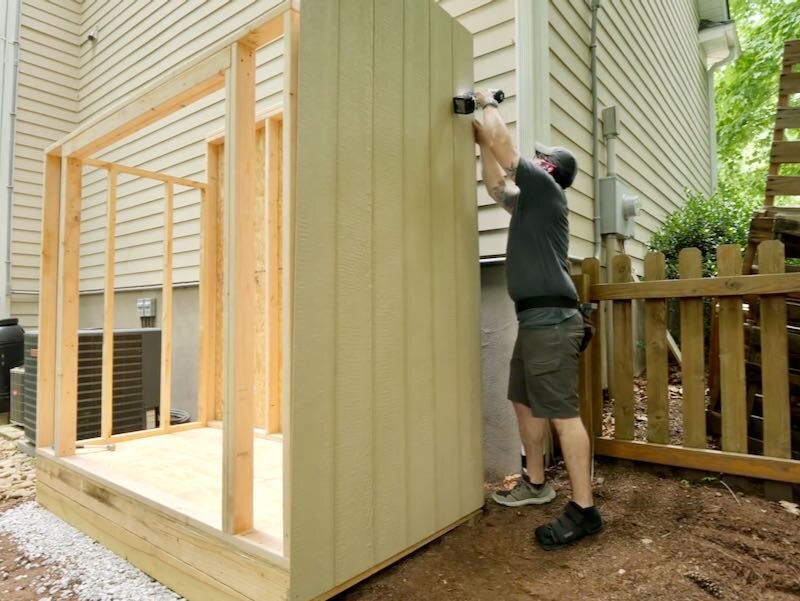
With the walls up, I could move on to adding the rest of the siding to the walls. To assist with this, since the walls were now vertical, I marked out locations in line with the bottom edge of the back panels and added a few temporary screws there, to help hold the siding in place while I got it attached.
Speaking of which, next I could move one of the panels into place and get it attached to one of the side walls, again making sure the edges were aligned to ensure the wall was totally square. I added screws roughly every foot along the edges of the panel, as well as along the grooves in the center of the panel where there was a stud directly behind it.
I repeated the process for the other side of the shed, and then I could go back and add the other double top plates, which I had forgotten to add before the siding.
These double top plates help to further lock the walls together by having the double top plate from the side walls overlap the front wall, and as you can see, I decided to use up some of the 2x4 offcuts for the double top plates on these side walls.

The front wall got a full length double top plate, as I figured it would help strengthen that span above the header, and then I could move back to adding more siding.
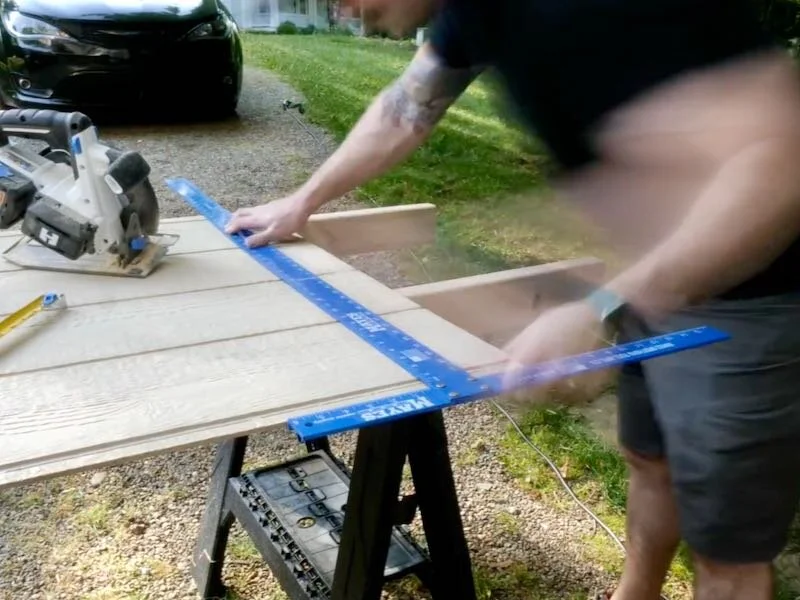
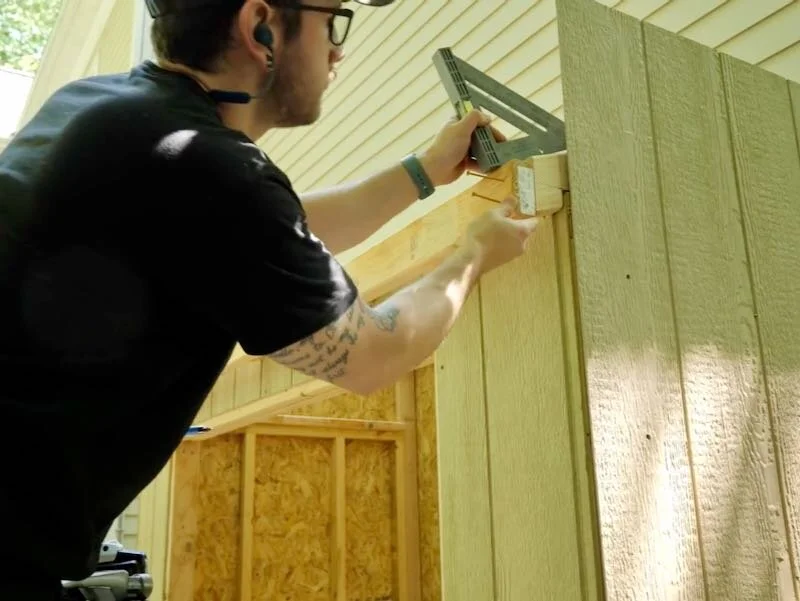
This siding on the front of the shed required a little more effort, as it needed to be cut down first, and this siding also needs to end one inch from the inside edge of the door opening to leave room for the doors to be added later.
After taking some measurements and marking out those reveals, I cut down one of the panels using my circular saw, first marking my lines using a drywall square.
I first cut the panel to length, to fit the shorter length of the front wall, and then I ripped off a long strip for the area to the left of the door opening and then a shorter strip for the area above the door opening.
I also made sure to keep track of the orientation of the panel, so the pieces would match up across the front of the shed and the doors.
With the pieces cut, I got them installed using the same method as before, also making sure the edges matched up with the reveals I had marked around the door opening previously.
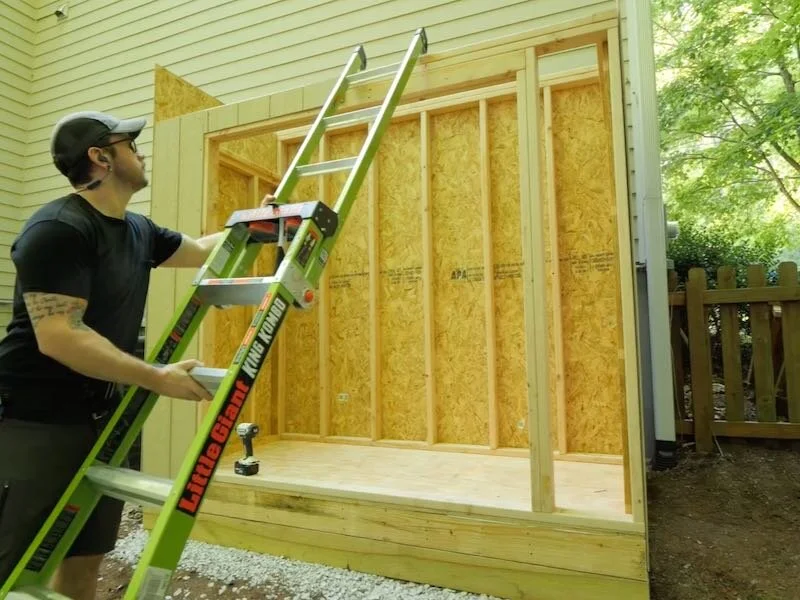
The piece above the door opening was a little awkward to attach, but luckily my ladder is pretty versatile and I figured out an orientation that let me reach the piece.
To finish up the siding install, I repeated the process on the other half of the front of the shed.
Now that all of the walls were locked in place with the siding, I could cut away the excess bottom plate from the front wall using my reciprocating saw, and this really opened up the opening into the shed.
Step 11: Create Roof Rafters On Storage Shed

The next structure to work on was the roof framing, which had honestly been intimidating me a bit as I’d never done this kind of framing. It turned out to be pretty simple once I got my head wrapped around the angles, but I was definitely glad to have the plans for reference here.
This roof has a 4/12 pitch, which means the roof rises four inches for every twelve inches of run, which is measured from the front edge of the roof towards the back of the shed.
Step 12: Measure And Cut Birds Mouth With Circular Saw and Jig Saw One Single Roof Rafter
This angle works out to 18.5 degrees, which sounds pretty specific, but luckily it’s easy to mark out with a speed square by pivoting the square until the 4 on the common pitch scale on the square lines up with the edge of the board. I actually did this wrong here and lined up the other scale on my square instead, but luckily I figured this out after making the first two cuts on the miter saw.
You could certainly make these cuts with a circular saw, but you’re going to get a lot more consistency if you can cut your rafters with a miter saw that’s set to match that 4/12 pitch angle.
You can see me here figuring out what I did wrong, again using the wrong scale on my speed square, but luckily I was able to recut the rafter with that adjusted angle and ended up with a rafter only about ½” shorter than the plans, which was easy enough to account for when cutting the bird’s mouths.

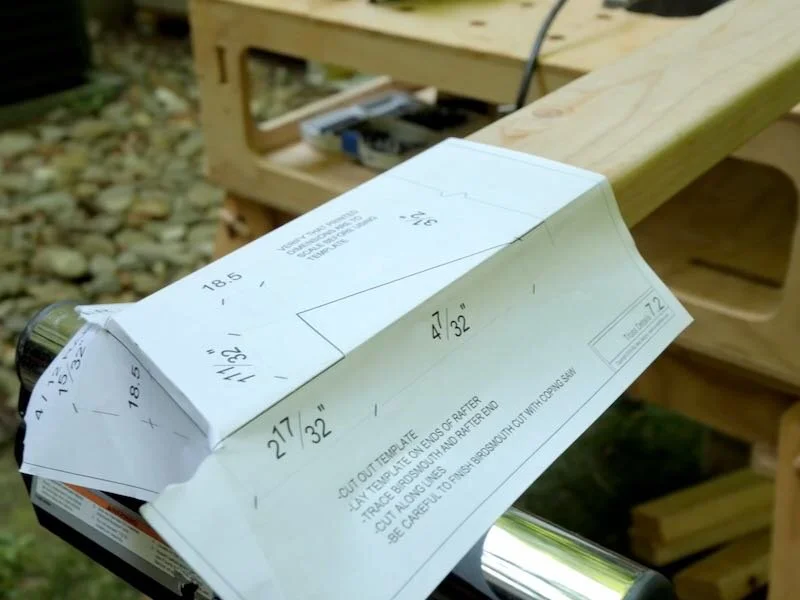
Speaking of which, next I could lay out my bird’s mouth, and the plans included a template for this, so I could transfer those lines to my rafter and then re-draw them with my speed square to confirm everything.
The vertical cut on the bird’s mouth, called the heel cut, matches that same 18.5 degree angle that was cut on the ends of the rafter, and the horizontal cut, called the seat cut, is oriented at 90 degrees to the end of the rafter.
This makes laying out these lines fairly simple with a speed square, and the exact location and depth of your bird’s mouth just depends on the span between your walls.
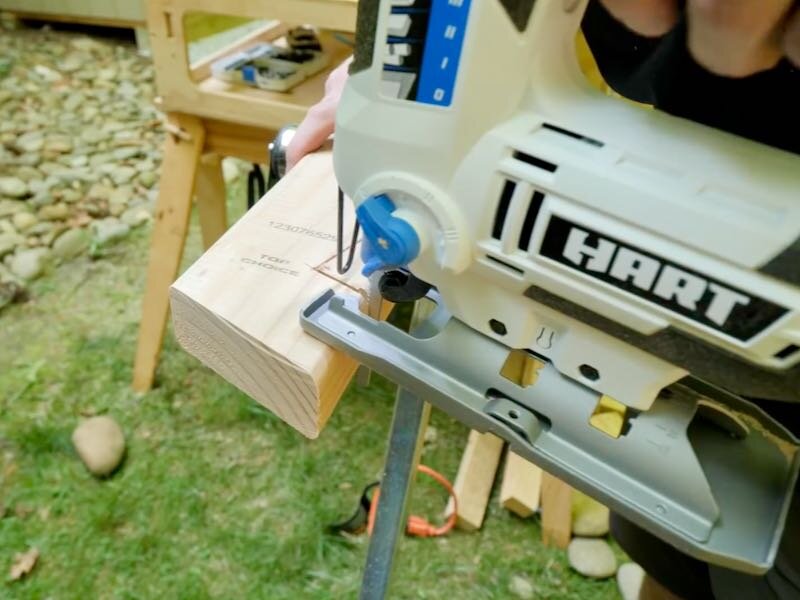
After laying out the location, I could cut the bird’s mouth, starting with the circular saw. Since this saw blade is obviously circular, it’s not able to reach all the way into the corner of the bird’s mouth, so I needed to come back and finish the cut, which I did with my jigsaw.
I’ve seen this done a bunch of different ways, including chiseling out the extra material, but a jigsaw worked great here, as long as I set it up so the blade was perfectly square to the base.
I repeated the process for the bird’s mouth at the other end of the rafter and then I could test fit the rafter on the shed. The heel cut of the rear bird’s mouth needed a little more material cut away so the front bird’s mouth would sit flush with the siding, but after a little adjustment, I had it fitting really well.
With this first rafter dialed in, I could just transfer the bird’s mouth locations and length of the rafters to the rest of my rafter boards and then get them cut with the miter saw, circular saw, and jigsaw.
Step 13: Test Fit The Roof Rafter

While I was cutting the rafters to length, I also extended the lines I had traced so it would be easier to follow them with the circular saw and jigsaw.
I also wised up and clamped the rafters in place while cutting them this time and this helped a ton. I also realized I needed to slide back the blade guard when starting the heel cut, as otherwise it would get in the way of starting the cut.
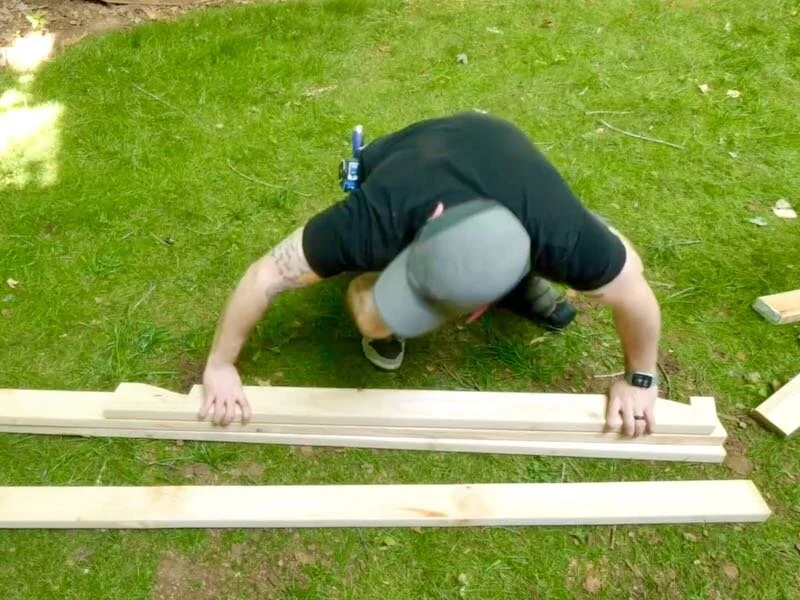
I repeated the process on the four remaining rafters and then I could line them all up to check them against each other and, luckily, the rafters looked great.
Step 14: Adjust Size If needed, Transfer Shape To Other Rafters And Cut The Remaining Birds Mouths On The Rest Of The Roof Rafters
Next, I could mark out the rafter locations on the top plates on the front and back walls, and the rafter spacing here is 24 inches on center. Once again, I marked an X on the side of the line where the rafter should sit, to avoid confusion when installing them, just like I did when framing the rest of the shed.
I attached the rafters to the top plates by toenailing 3 inch screws at each end of the rafter, and I just worked my way from one end of the shed to the other, attaching the rafters as I moved along.
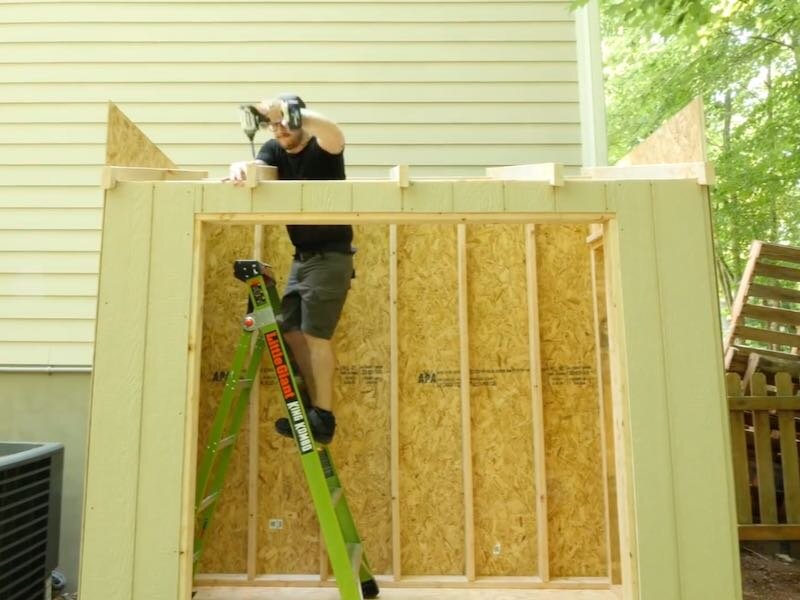
The last pieces to add to the roof framing were the sub-fascia boards, which attach to the ends of the rafters. These are definitely a little awkward to install, but partially adding the screws first definitely helped. I used my speed square to make sure the top edge of the sub-fascia was in line with the top of the rafter and then added two screws into each rafter.
Step 15: Attach Sub-fascia To The Ends Of The Rafters
Adding the sub-fascia to the back end of the rafters was even more awkward since I was so close to the house at this point, but luckily I came up with adding a few scraps to help keep the sub-fascia in position while I added the screws.
My impact driver just barely fit in this space with my shortest bit, but I eventually got all of the screws added and I could call the roof framing done.