
How To Build A DIY Telecaster Guitar, Part 2
Welcome back to part 2 of our DIY Telecaster guitar build series, where I'm building a Fender Telecaster-styled guitar from scratch! In Part 1 of our DIY Guitar build, I covered the wood I chose for the guitar and rough cutting that wood. In Part 2, I go over cutting the guitar body to rough shape on the bandsaw, resawing the top of the guitar, routing out the chambered areas of the body, and gluing the body back together.
DIY Guitar Materials:
- Potvin Guitars Template
- Sapele hardwood purchased from Asheville Hardware
- Neck from Warmoth
Tools used in Part 2 of the DIY Guitar Build:

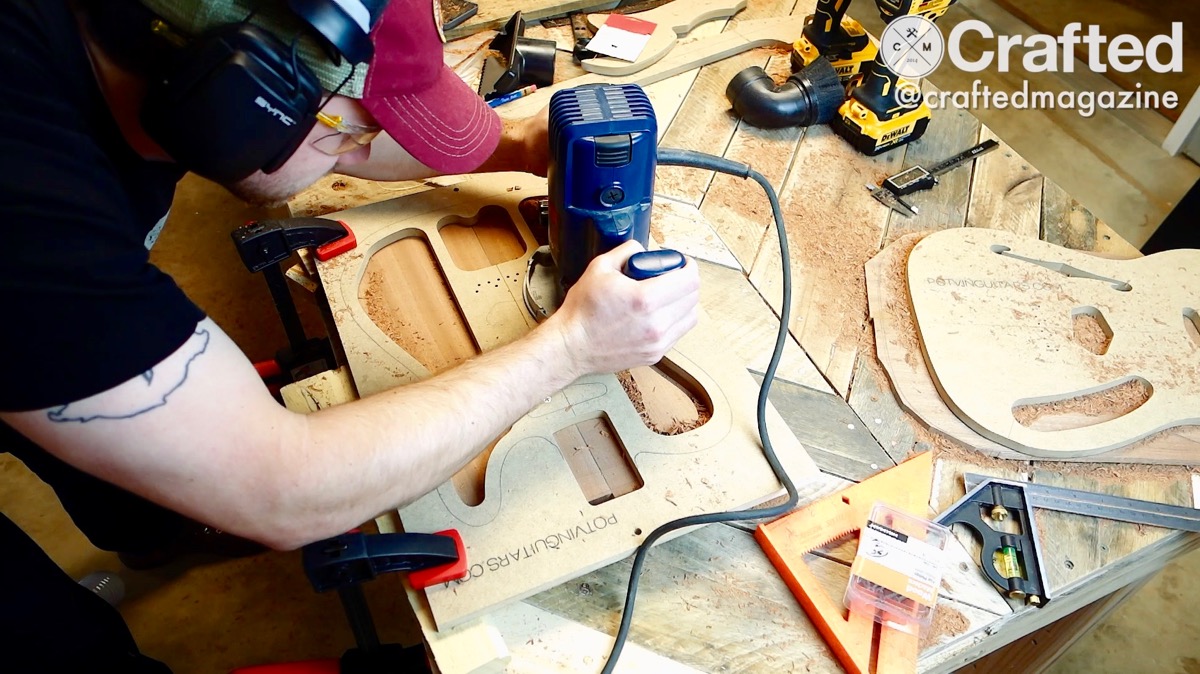
The first step in Part 2 of this build was tracing the outline of the guitar body from the template onto the wood. After that, I headed over to the bandsaw to rough cut the body to shape. A Telecaster body is about 12 ¾" wide at its widest point and my Laguna 14 Twelve bandsaw has a max resaw capacity of just under 13", so I needed to trim off as much excess as possible. After removing the excess material from the body, I resawed a ¼" slice off of the top of the body. This would allow me to chamber the inside of the body before gluing the ¼" slice back onto the body.


After resawing, I attached the Potvin Guitars chambering template and went to town with my plunge router. I used a Whiteside template bit with a depth of ¾" and width of ½". This was right on the verge of being too deep, as I had to go almost the full ¾" on the first pass to keep the bit from cutting into the chambering template. If I were to do this again, especially if using a harder wood than sapele, I would have used a bit with a shallower depth.
After chambering, I mistakenly routed the neck pocket of the guitar. This is something I should have done later on but spaced and accidentally cut it with the top of the guitar not glued on. This meant that the neck pocket was too deep. This took a lot of fixing later on, so don't do what I did here!


After having a mild freak out about the neck pocket error, I glued on the top of the guitar and let it sit overnight to cure. What comes next is for Part 3, which will go live Monday, April 18th. To be notified of new posts, subscribe to our email newsletter by using the subscription form in the sidebar to your right on desktop or below on mobile. If you're new here, thanks for checking out Crafted Workshop!