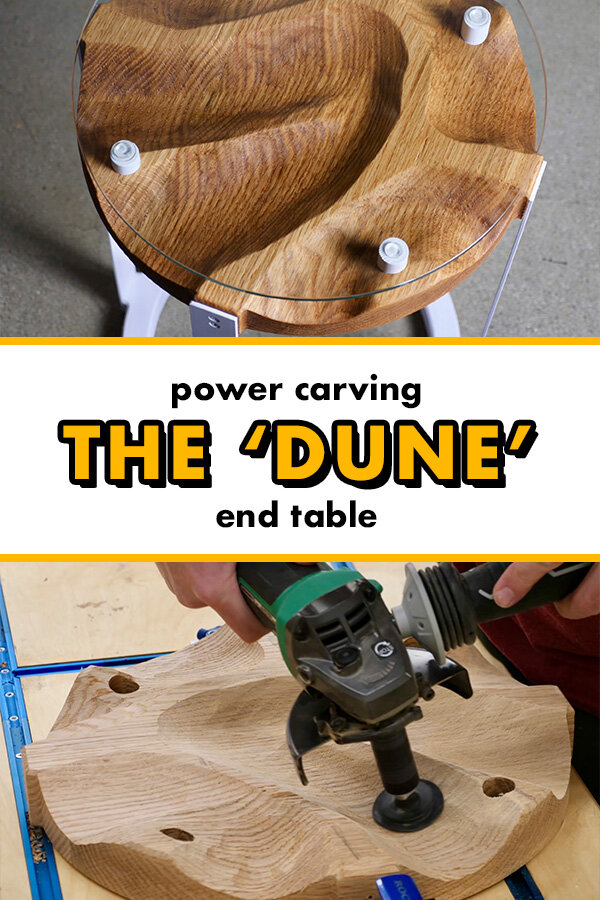
Power Carving The "Dune" End Table // How To - Woodworking
I built a power carved "dune" end table from oak, aluminum and glass while hanging out with the Modern Maker Podcast guys! This was only my second time trying power carving but I really felt like I got the hang of it and really love the final project. Enjoy!
Note: The links below are Amazon affiliate links
🔷 Support Rockler by purchasing some of my favorite Rockler innovations!
📦 Materials Used (affiliate):
How To Build A Power Carved End Table:

As you might have noticed from the intro, I didn’t build this project in my shop, but instead built this at my buddy Chris Salomone from Foureyes Furniture’s shop. My friends at Rockler wanted me to do a few in-store events recently, and I figured I’d use it as an opportunity to head out to California and hang with the Modern Maker Podcast guys: Chris from Foureyes Furniture, Mike from Modern Builds, and Ben from Homemade Modern.
I decided to try something I’ve had on my list for a long time while I was in Chris’ shop, and that was power carving one of these organic, flowing pieces. I first saw these types of pieces on Instagram, specifically on @nugeandwood and @pocketsfullofsawdust’s accounts, and I immediately loved the look.
Step 1: Glue Up And Mill Lumber For End Table

To start this project, I needed to get a blank glued up, and I decided to use Red Oak for this build, which I picked up while I was at Rockler at my in-store events, and all you’ve seen me doing up to this point was prepping the boards for the glue up. Realistically, I probably could have skipped the milling process here since this board was already S3S, but I find milling kind of relaxing.
Anyway, once the pieces were nice and square, I glued them up.
The other blank I needed was for the base, which I made from two layers of ¾” Baltic Birch plywood, and I got those glued up and added some brad nails to help hold the pieces in place while the glue dried. I was also strategic about where I put my nails, as I didn’t with my router bit to hit them in the next step.
Step 2: Cut Out Plywood Template With Bandsaw Or CNC
Speaking of the next step, next I hopped into Easel, the free software that comes with the Inventables X-Carve CNC, to model up a quick design for the table top and base. I saw something similar, with vertical legs made from metal flat bar, attached to a circular top and base with little bump outs, and I figured it would work perfectly with this style of table top.
I modeled the design up in Easel in a few minutes and then headed over to the X-Carve.
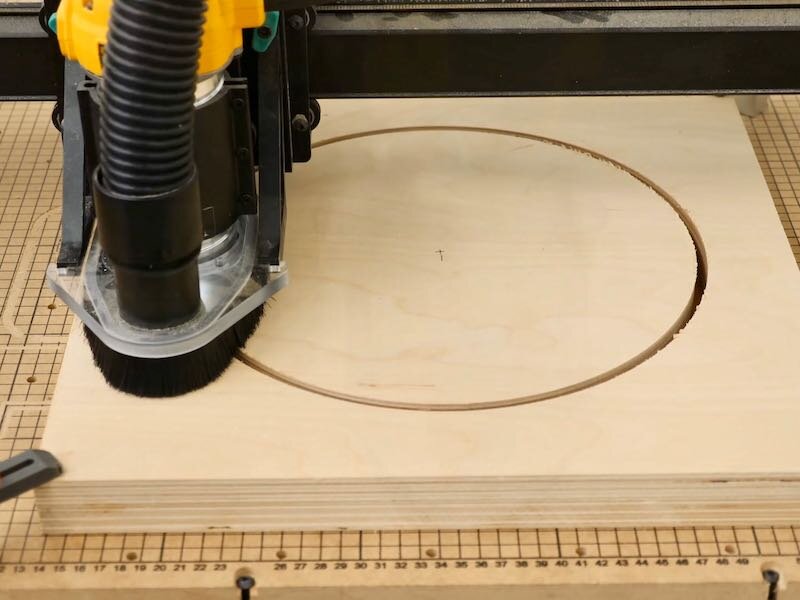
I always like to do a quick test cut on a scrap piece of plywood on these types of builds, just to make sure everything looks good before cutting into hardwood.
Since the test cut looked good, I proceeded with the real deal, first working on the bottom piece. I decided to add a hole in the center of the base to lighten up the look a bit.
The bit I was using wasn’t quite long enough to get through this double layered plywood with the dust collection shoe attached, so I did need to trim it a little later, but it cut super cleanly otherwise.
With the double layered plywood piece cut, I moved on to the Oak, which again had the issue with the bit length but otherwise cut very nicely.
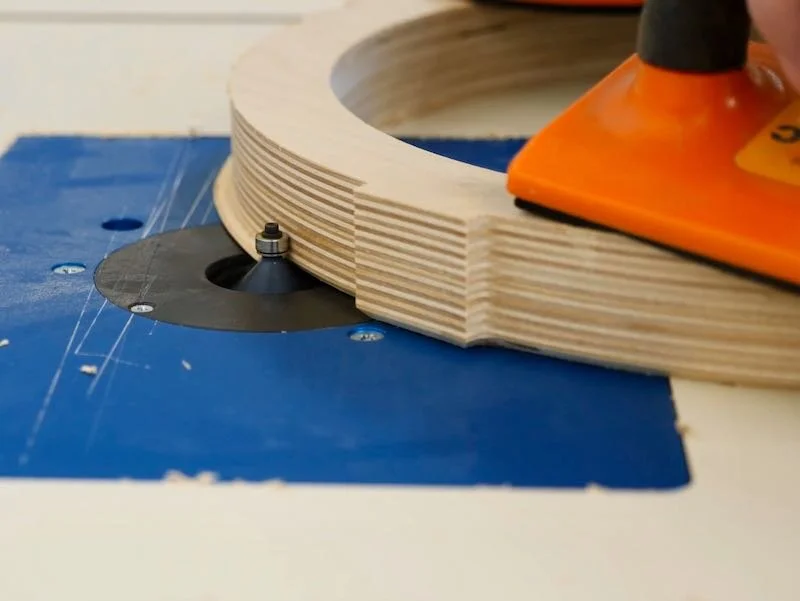
I had to cut these pieces free from the blanks with a jigsaw, which I did off camera, and it left this small bit of extra material around the edges. I wanted to chamfer the edges of these parts anyway, so I killed two birds with one stone by setting the chamfer bit high enough to take care of the extra material.
Step 3: Create Aluminum Legs

After getting the pieces chamfered, I could cut the legs to length. I used 1 ½” wide aluminum flat bar for the legs, which I just picked up at the home center. The great thing about aluminum is that it cuts easily with standard woodworking tools, so I just cut the pieces to length at the miter saw.
Also, cutting aluminum in slow mo is pretty dang satisfying.

With the pieces cut to size, I taped them together with some painter’s tape and cleaned up the ends at the edge sander, to make sure all of the pieces were the same length.
And then I removed the tape and broke the sharp edges at the ends of the pieces, again at the edge sander.
Next, I drilled holes for the screws that attach the legs to the base and top. I first marked the hole locations, center punched them, drilled them and then finally countersunk them so the screw heads would sit flush.

To attach the legs to the base, I held them in place, using a flat surface to reference the legs off of, and then pre-drilled the holes with a self-centering drill bit. Then I could drive in 1 ¼” screws to attach the legs to the base.
I just repeated this step for the rest of the legs, and I really love this shot as it shows what these kinds of collaborations are all about. All of us working simultaneously, goofing around with each other and helping out where needed.

Also, I wanted the top to sit slightly higher than the top of the legs, so I added a small spacer under the legs when attaching them to the top.
Step 4: Plan Out Your Power Carving

Finally, with everything dry fit, I could stand back and take a look at the table and then start figuring out how I wanted to carve it.
I sketched out some lines where I thought I should carve, making sure to mark the high points so I wouldn’t carve them away immediately, which was a tip I got from Mike. I ended up marking these lines a little close together, but they still ended up being a pretty good reference. I also made sure to avoid carving around where the screws attached to the top, so that I wouldn’t compromise the strength of the screws.
Before getting to carving, I needed to drill some holes for the stand offs which would hold the pane of glass I used for the actual surface of the table top. I decided to make these through holes, since I figured I could cut dowels all to the same length and just make sure they were flush to the bottom to end up with a level top.
Step 5: Power Carving

With that, it was finally time to get to the main event, power carving. I used the ArborTech TurboPlane for the bulk stock removal, and I’ve used the TurboPlane on a one project in the past, but this was a much different type of carving and there was a definite learning curve.
I think the thing that made this carving particularly difficult is how stringy and open grained Red Oak is, which means it wanted to tear out if I tried carving in the wrong direction. I found that going across the grain really helped, as well as taking light passes rather than trying to scoop out huge portions quickly.
I eventually got the hang of it, and it was super fun when I started to feel more comfortable.
After getting my initial lines carved in, I just continued to further refine them, really trying to use the thickness of the wood to my advantage. Since the top was over 1 ¾” thick, I could easily carve down over an inch without compromising the strength of the top.
This allowed me to get some really visually striking valleys, although there was a limit to how narrow I could make these valleys due to the diameter of the TurboPlane. I think one of the smaller tools from ArborTech would have allowed me to get even more interesting textures.
I’m also interested in experimenting with creating these textures in Fusion 360 and cutting them on my X-Carve. I think using plywood would look amazing, considering the layers of the plywood would be exposed, creating the appearance of something similar to a topographic map.
Step 6: Power Sanding
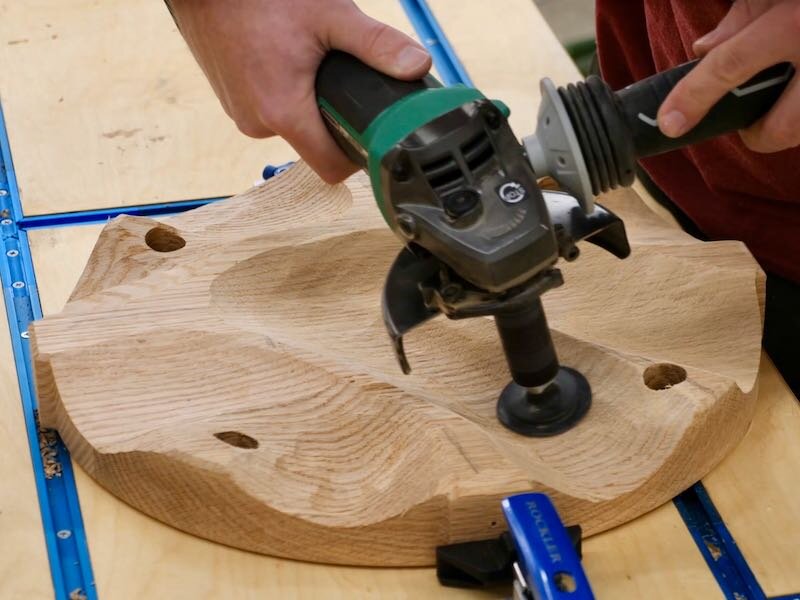
Anyway, after getting as smooth as I could with the TurboPlane, I switched over to the ArborTech Contour Sander, which was the perfect tool for smoothing out all of these curves.
I picked this tool up at Rockler while I was there since I knew I’d have a lot of sanding ahead of me, and it just attaches to a standard angle grinder. It’s basically a tiny random orbit sander at that point, and it comes with a bunch of different grits of peel and stick sandpaper.
I had to spend a decent amount of time sanding, due to the fact that I wasn’t the most precise power carver, but it still went fairly quickly.
Step 7: Apply Finish To Your End Table

After getting the top sanded up to 180 grit, I could get the dowel standoffs cut to length. These will go all the way through the top and allow the glass top to float above the carved top.
With all of the pieces cut and sanded, I could move on to finishing. For the base and standoffs, I decided to go with white, as I really wanted the carved top to be the focus here. I applied a few coats of white spray paint and let those pieces dry overnight.

For the carved top, it seemed only fitting that I use Maker Brand Simple Finish, since I was hanging out with the guys who started Maker Brand. Simple Finish is, as the name implies, really easy to apply and it really made this Red Oak look great.
After flooding the surface, I let it soak in for a few minutes and wiped off the excess, allowing it to fully dry overnight.
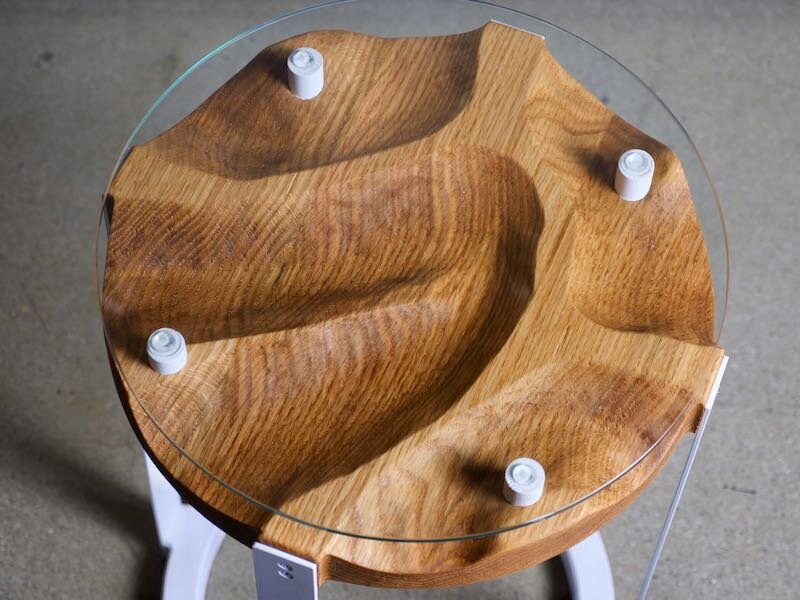
Next, I could get the dowel standoffs installed, and I just added a little glue and then pounded them into place with a rubber mallet. The paint on the standoffs did tend to flake off of the sides when doing this, which was definitely frustrating, but I was able to remove it with a rag.
Also, in retrospect, I wish I had gone with three standoffs instead of four, since it’s basically impossible to have things unbalanced when you only have three points of contact. I was able to shim any differences with rubber bumpers which I needed to add anyway, but I think three standoffs would have been the better option here.
With that, this project was finished!