
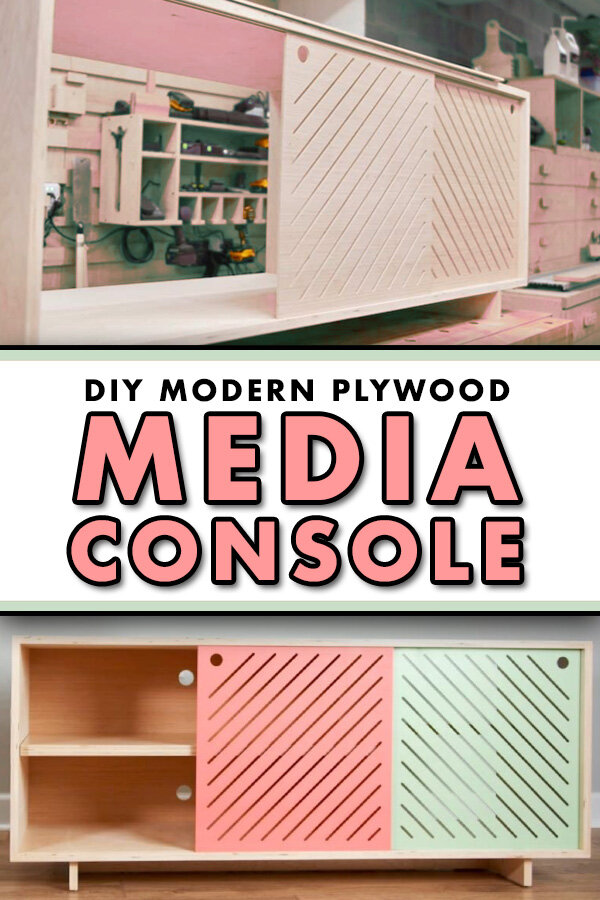
How To Make A DIY Modern Plywood TV Stand or Media Console
I built this modern TV stand or media console from Baltic Birch plywood and brass rod! This TV stand is perfect for storing all of your home theater electronics in one clean, modern package. I have plans available for this project as well, in case you’re interested.
Note: The links below are Amazon affiliate links
🛠 Tools Used On The Plywood TV Stand:
📦 Materials Used On The Plywood TV Stand:
Pin it!
How To Build A Modern Plywood Media Console:
Step 1: Choose Building Material For Media Console

My goal with this project was to use up some materials I already had on hand, since I’m going to be moving my shop here pretty soon. I decided to embrace the all-plywood look on this build and made the case of the cabinet out of a 5x5 sheet of 3/4” Baltic Birch plywood.
Step 2: Use Your Cut List To Mill Parts
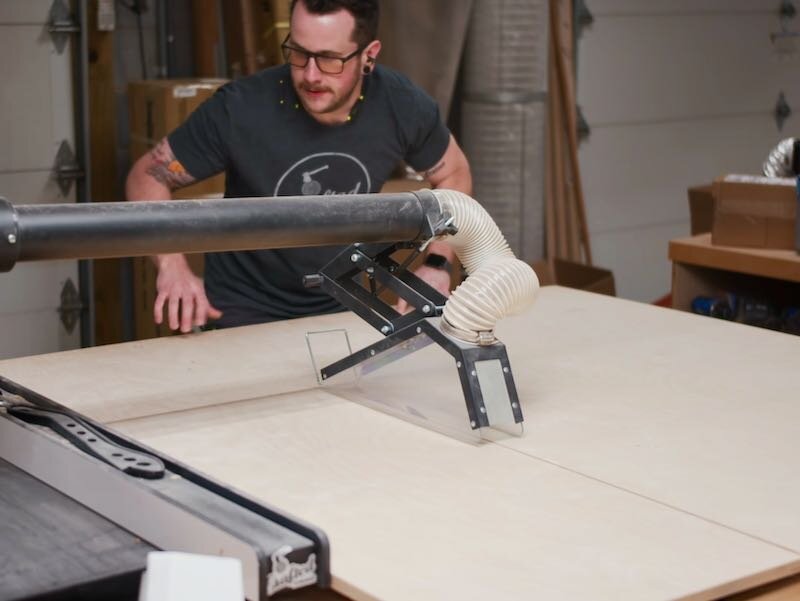
I started by breaking down that 5x5 sheet at the table saw. Also, I do have plans available for this cabinet if you’re interested, which include a detailed cut list and cutting diagram. I sized the cabinet to fit standard home theater receivers and it has plenty of room for video game consoles and other electronics.
For the shelves, I decided to go with double layered 1/2” Baltic Birch plywood, again because it’s what I had on hand. I cut these pieces to size and then laminated them with glue and 3/4” brad nails to create 1” thick shelves.

While the shelves dried, I continued working on the cabinet. I decided to try sliding doors on this cabinet, something I hadn’t tried before but something I’ve seen my buddy Chris from Foureyes use a bunch.
Step 3: Creating Sliding Doors With The Table Saw

To make these types of doors work, you need to cut two grooves along the full length of the top and bottom panels of the cabinet. I used 1/4” plywood for the doors, so I set up my dado stack at 1/4”. By the way, this is a new Dadonator dado stack from Infinity Tools and man, it cuts super cleanly.
For the grooves on the bottom panel, I set the blade height to 1/8” and set the fence 1/4” away from the blade. After making this first cut, I verified the fit with a piece of 1/4” plywood and then moved the fence over another 1/4” to create a second groove.
For the grooves on the top panel, I raised the blade height to a little over 1/4”, so that I could easily add and remove the doors after the cabinet was assembled. I could then repeat the same process of cutting the grooves on the top panel.

For the joinery on the cabinet, I decided to go with rabbets. The main reason for this was that it allowed me to cut the grooves for the doors the full length of the top and bottom panels, and then the rabbets would cut away the end of the grooves, leaving me with a perfectly clean end to the grooves at the sides of the cabinet.
I set up my dado stack to a width of 23/32”, the actual width of 3/4” plywood, and a depth of 1/2”. After confirming the fit with a few test cuts on some scraps, I cut the rabbets on the ends of the panels.
Or at least, I started to make the cuts before realizing that I hadn’t actually cut these panels to their final length.
I pulled out my track saw and cut the panels to length quickly, double checking that everything was square.
Finally, with the panels cut to length, I headed back to the table saw to cut the rabbets into the ends of the panels.
Step 4: Brass Rod Plywood Joinery

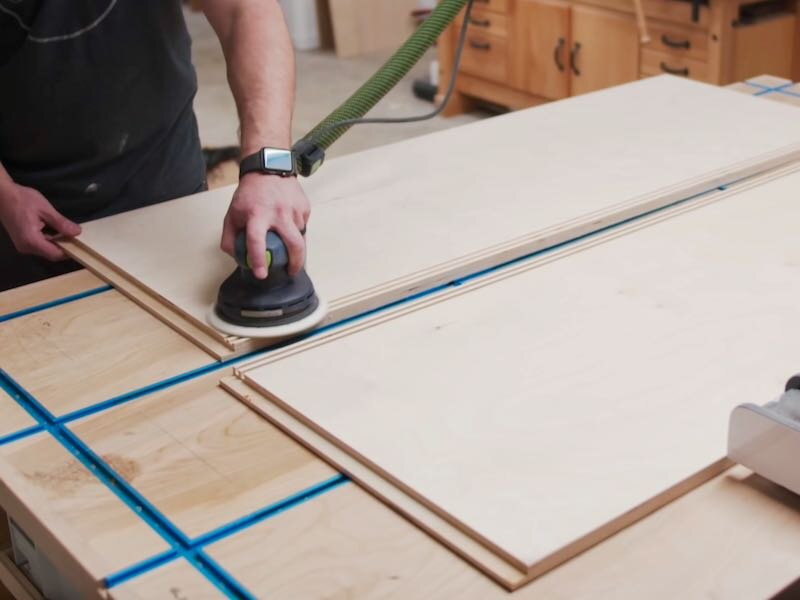
Before gluing up cabinets, I like to sand all of the inside faces, since it’s a heck of a lot easier to do this prior to assembly. On Baltic Birch and other veneered plywoods, I usually start and finish at 180 grit, since they’re pretty smooth from the factory and I don’t want to risk sanding through the veneer.
Assembly went fairly smoothly, which is one of the reasons I love using rabbets and dados, they are self squaring. I did have a little trouble with the top panel bowing under clamping pressure, but I added a scrap piece of 2x4 in the center to keep this from happening.
While the glue dried, I could cut the center divider to size based on the actual dimensions of the finished cabinet. I was able to get the cabinet top and bottom, sides, and this center divider out of one 5x5 sheet of plywood with almost no waste, it worked out really well.
I decided to attach the center divider with brass pins on the top edge and screws on the bottom edge, so after marking out the location of the divider and verifying it was square, I drilled 1/8” holes and then added some 1/8” brass rod using CA glue. Epoxy would have probably been better, but I think the CA glue will hold up fine.

I would recommend using painter’s tape to catch the excess glue or epoxy, as the CA glue soaked into the Birch veneer and required a dangerous amount of sanding to remove, with me worrying about sanding through the veneer the whole time.
On the bottom, I initially used these trim head screws to attach the divider, but I ended up going back and changing them out for some Powerhead screws, which have quite a bit more holding power.
To strengthen the rabbets and give them a nice subtle accent, I decided to pin them with brass as well. I created a quick little drilling jig and then cut the 1/8” rod to size using my portaband.
While I’m cutting the brass, I wanted to take a second to thank my YouTube members. Their monthly support really helps keep this channel going and I love connecting with my members with the behind the scenes videos I made for them. If you’re interested becoming a member, check out the card in the upper right corner or the link in the video description.
This time, I did use epoxy to attach the brass, and I also added some painter’s tape before driving in the rods.
You can see how cleanly the tape can be removed after the epoxy cures, leaving no excess epoxy behind.

Brass is soft enough to cut with pliers, although it requires some force. I have used a flush trim saw in the past, but it will wreck the teeth on saws with very fine teeth.
After cutting the rod with the pliers, I sanded everything flush, again using 180 grit to avoid sanding through the veneer.
Step 5: Assembling The Plywood Doors and Carcass

Next, I cut the back panel and doors to size from 1/4” plywood.
I decided to add a little design to the doors using my Inventables X-Carve, to allow my remote to communicate with my home theater receiver even with the door in front of it, and this actually ended up being fairly tricky.
Instead of cutting these panels oversized, I tried cutting them too close to final size and kept having issues with my dust shoe running into my clamps, which caused the X-Carve to go off course.
After finally getting this figured out, I realized I had too many lines in the design which caused the door to be extremely floppy in the center, which caused the door to lift on the final pass and screw up yet another piece.
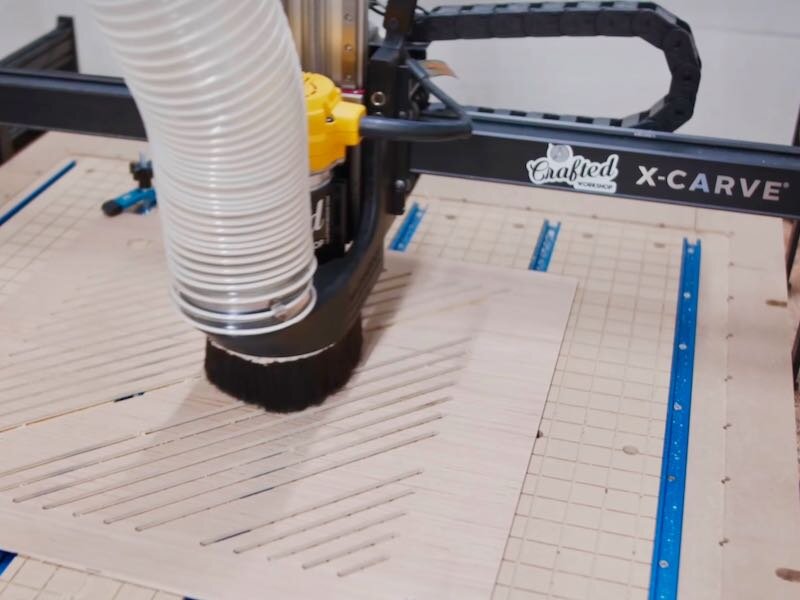
Finally, I removed half of the lines from my design and ended up with a perfect door, and it only took four failed attempts to get it right.
After cutting the doors on the X-Carve, I removed the tabs using a flush trim bit at the router table and then I could install the doors.
You can see that they slide up into the groove on the top panel just enough to be able to clear the surface of the bottom panel, and then drop into the groove on the bottom panel.
The doors slide surprisingly easily, even without any finish or wax, and this is definitely a technique I’m going to use more in the future.
Step 6: Drilling For Shelf Pins

With the cabinet carcass and doors fairly complete, I went back to the shelves and got them cleaned up and cut to size using the table saw and my Rockler crosscut sled.
Any time I’m laminating two pieces like this, I always leave them oversized to allow me to trim off any excess glue squeeze out and clean up anywhere where the two pieces don’t meet up perfectly.
Also, I always sneaks up on the fit on adjustable shelves like this, as you really don’t want them to be too narrow.
To drill the adjustable shelf pin holes, I used a jig I made probably two years ago now, and I keep telling myself I’ll replace it with a more durable commercial version when it wears out, but it still hasn’t.
Also, I’ve learned that you don’t really need shelf pin holes every inch, especially on a cabinet like this with only one shelf.
After drilling the holes, I installed some shelf pins and dry fit everything, and it was all looking good so I went ahead and got the back panel installed.
Before installation, I drilled some holes in the back panel to allow cables to pass through. It really helps reduce tearout when drilling through plywood with a Forstner bit like this if you drill most of the way through, then flip the panel and finish drilling from the other side.
Step 7: Construct The Back Panel and Base Of Media Console

To install the back panel, I just used glue and brad nails, and you’ll notice I only have the back panel on the left two-thirds of the cabinet. That’s because my home theater receiver will live in the right third and I didn’t want anything obstructing my access to the wiring coming from the back of the receiver.
I like to chamfer my back panels, which give them a really nice finished look and also trims them flush with the cabinet, all in one pass.
With that, the cabinet was done, so the last part to work on was the base. I kept it really simple with the base and again embraced the plywood end grain.
I took one long strip of 3/4” Maple plywood that I’ve had lying around for a few years, cut it in half and laminated it to form the center beam of the base.
After the glue dried, I trimmed the center beam to width, along with two strips of 3/4” Baltic Birch, and then cut all of the pieces to length at the miter saw.
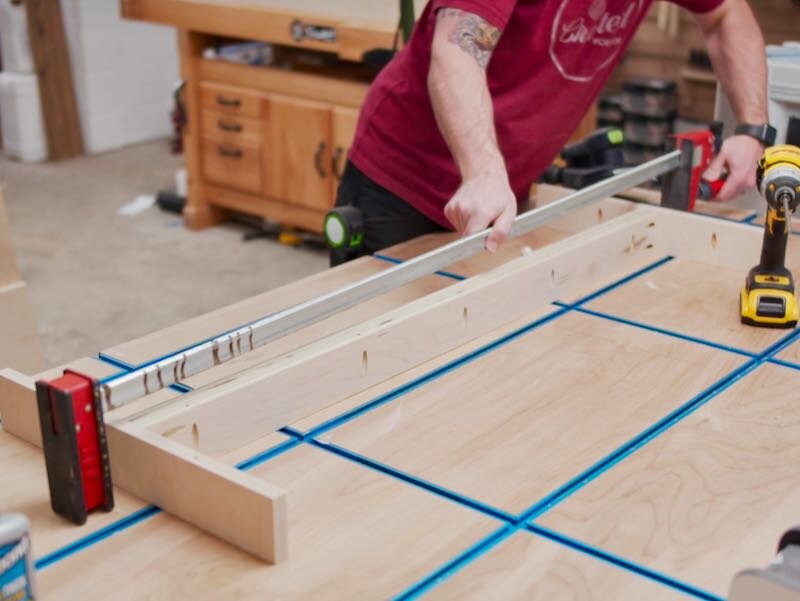
To connect the base parts to each other, as well as to connect the base to the cabinet itself, I used pocket screws, so next I drilled a series of pocket holes in the pieces prior to assembly.

Assembling the base was as simple as adding glue to the parts, clamping them together, and then adding the pocket screws. Also, I think this shot illustrates why I love this assembly table. All of my most used screws are stored right below the top, and having a big, flat clamping surface like this makes assembly super simple.

After sanding, I moved on to finishing the cabinet. For the doors, I decided to add a pop of color and spray painted them a pale pink and green color. I think these light colors really play nicely with the light Birch plywood.
For the finish on the cabinet and base, I used a water based polyurethane, which I really prefer on Maple, Birch and other lighter woods, as it doesn’t add any yellowness to the color. This finish is what’s referred to as “water white”, as it adds basically no color, which really enhances that pale Birch plywood look in my opinion.

After the finish dried, all that was left to do was attach the base to the cabinet, which I did using 1 1/4” pocket hole screws. I also made sure to clamp the base in place when adding the screws, to keep it from moving.
I also added a small amount of wax to the grooves, just to make the doors glide a little smoother, although it probably wasn’t totally necessary.
With that, this media console was finished!
