
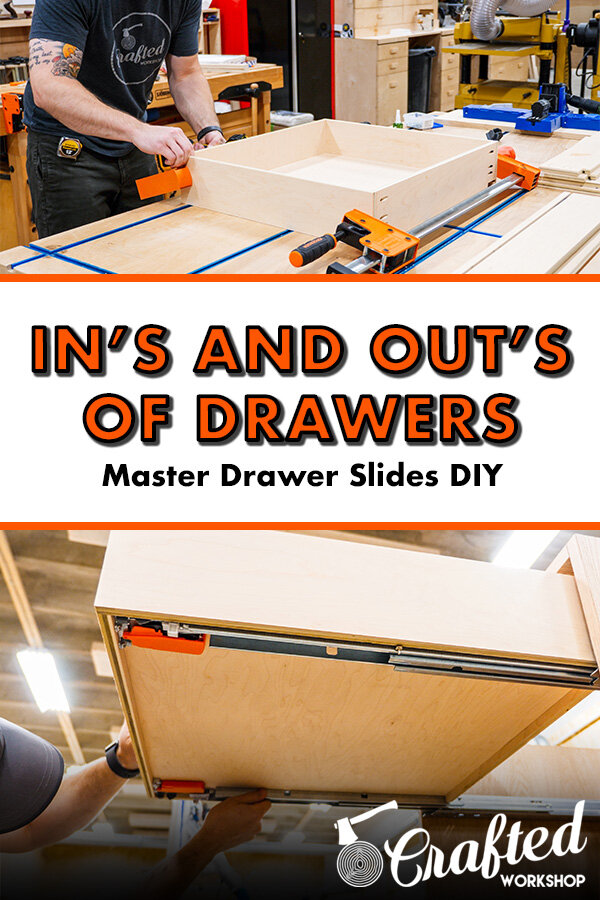
How To Make Easy DIY Drawers with Blum Undermount Slides // Home Bar Pt. 2
Learn how to build easy DIY drawers using pocket holes and plywood! Also, learn how to install Blum Tandem undermount soft close drawer slides.
Note: the links below are Amazon affiliate links
🛠 Tools Used On The Drawers Build (affiliate):
📦 Materials Used On The Drawers Build (affiliate):
Pin it!
Soft Close Drawer Slide Installation Process:
Step 1: Planning Out Spacing Of Each Drawer

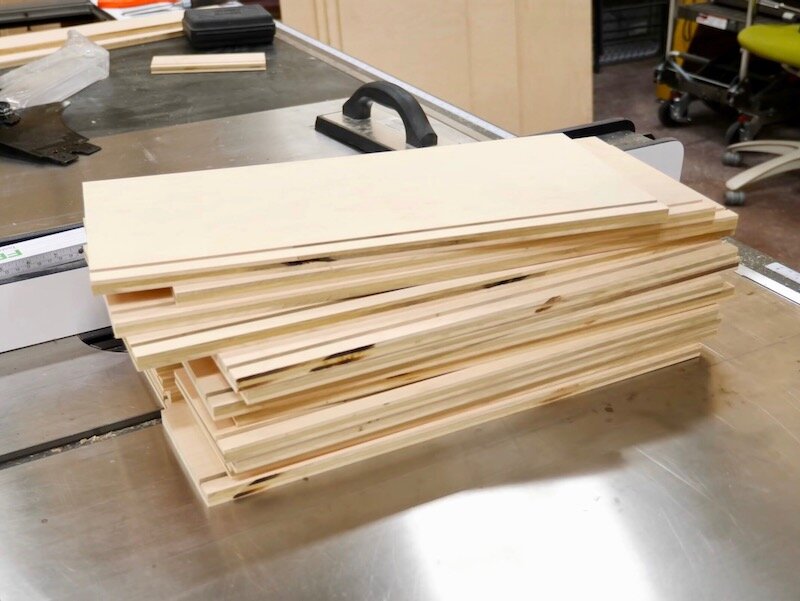
I used ½” Maple plywood for the drawer sides and ¼” Maple plywood for the bottom and broke down the pieces for the sides on the table saw to start.
Before moving on, let’s hop into SketchUp so I can show you how these drawers need to be assembled to work with these Blum undermount hinges.
The inside faces of the drawers need to be spaced 13/16” of an inch from the inside of the cabinet. While this sounds like a pretty specific number, it’s actually pretty simple to work out the length of the front and back of your drawer boxes.
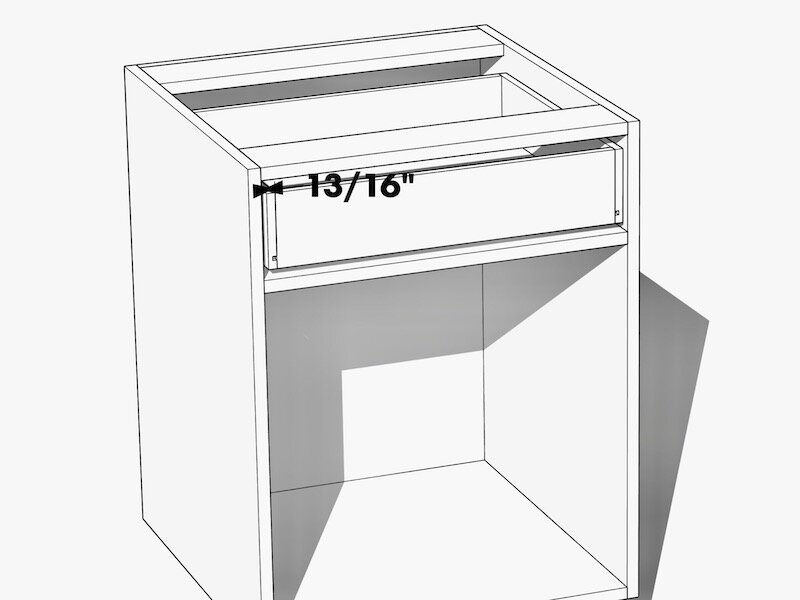
First, take the inside width of your cabinet, 22 ½” in my case, then subtract 13/16” of an inch times 2, which is 1 ⅝”. This left me with a measurement of 20 ⅞”, which is the length of the front and back panels on my drawer box.
The length of the sides is much easier, it just has to match the length of the drawer slides, 21” in my case.
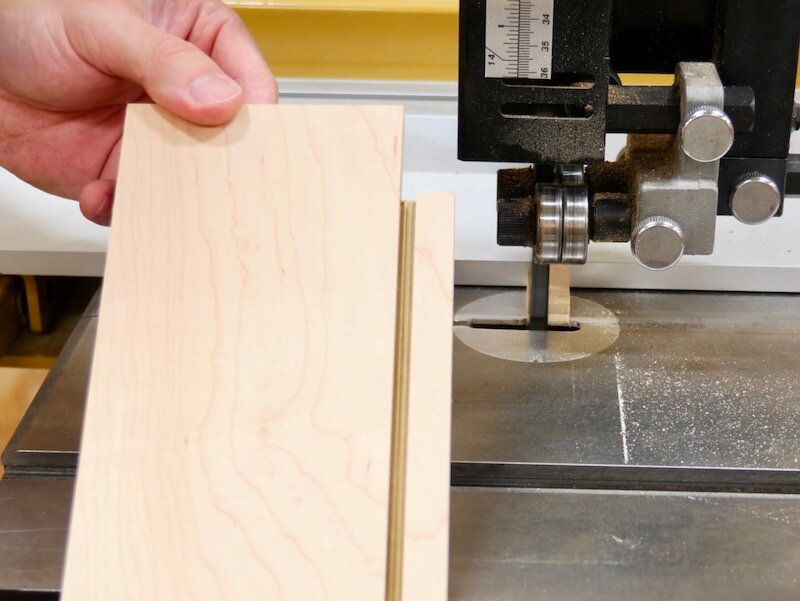
The bottom of the drawer has to be inset in from the bottom edge of the drawer box ½”, regardless of the thickness of your drawer bottom, and this provides clearance for the slides. To do this, I housed the bottom panel in a groove that was half the depth of the sides.

Finally, I needed to notch out the back of the drawer to provide clearance for the slides. This notch needed to be ½” tall by 1 ⅜” wide, and I needed to cut a notch on both sides of the back.
That’s pretty much all of the details you’ll need to build your drawer boxes, so let’s get back to the build.
Step 2: Material Preparation For Soft Close Drawers
As I mentioned, I needed to have the bottom housed in a groove, and it needed to be set in exactly ½” from the bottom edge of the drawer. I set my blade to ¼”, set the fence of my table saw to ½”, and then made my first pass on all of the drawer sides.
After making the first pass, I moved the fence over a little less than ⅛”, made a cut, tested the fit on a piece of ¼” plywood, and then made a second pass on all of the boards. You want the fit to be tight, but not so tight that the drawers will be annoying to assemble.
Next, I needed to notch out the backs of the drawer boxes to accept the undermount slides, and I did this at the bandsaw. I feel like this was one of the faster ways to do this, but there are plenty of options here. You could use a dado stack on the table saw, or I know my buddy Shaun Boyd, who has a great video on installing these undermount slides, uses a template and a flush trim bit.
Anyway, as you’ll see, I accidentally notched the fronts and backs of the drawer boxes, so I had to go back and recut the fronts, but eventually everything was notched out correctly and I could move on to assembling the drawer boxes.
Step 3: Drilling Pocket Holes In Drawer Box Parts

Once again, I called on pocket holes for assembly here, which will be completely hidden in the finished drawer. Since I used ½” plywood, I swapped over to the Kreg Micro-Pocket guide, which drills smaller pocket holes which work better with thinner stock. You can use the standard pocket hole jig, but I got a lot better results with this micro guide.
Once that was set up, I drilled pocket holes on each end of the drawer fronts and backs.
Step 4: Drawer Bottoms and Assembly

Now that the drawer sides were to their final size, I could cut my drawer bottoms to size. Again, I used ¼” plywood here.
To assemble the drawers, I added a bead of Krazy Glue to the grooves and ends of the sides and then put the parts together. I then clamped the drawer box together, used a mallet to make sure everything was flush, and then added the screws. I used ¾” screws here, which are the perfect size for this ½” material.
After adding the screws, I checked the drawer box for square, and also checked to see if the sides were bowed at all. This plywood was slightly warped as I mentioned and, if there was any bow, I just added a clamp to the center until the bow was removed.
Step 5: Soft Close Drawer Slide Mounting
Next, I just repeated the process for the other four drawer boxes and then I could get the Blum slide hardware installed.
This Blum system uses these two clips at the front of the drawer boxes, which clip onto the slides. The orange levers allow you to easily add and remove the drawers and also provide some adjustment to the finished drawer.
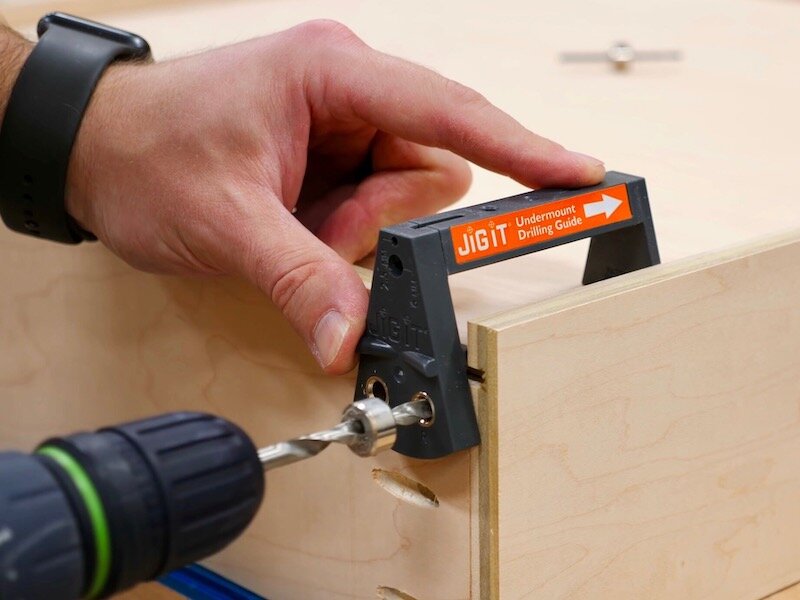
To allow the drawer to accept the slides, there are a few pretty specific holes you need to drill. First, this hole on the back of the drawer accepts this pin on the back of the slides, which hooks into the drawer box and keeps it securely in place.
To drill these holes, I used this awesome jig from Rockler, which is also where I got these slides. The jig has metal bushings to guide the drill bits, which are also included with the jig, and the jig has a locator channel which allows you to easily set the stop block on the bits.

Anyway, after drilling the holes on the back of the drawer box, I used the same jig laid on its side to drill the pilot holes for the clips. These need to be drilled at an angle, and this jig makes that super simple.
I just repeated the process on the rest of the drawers and then I could move on to installing the slides.
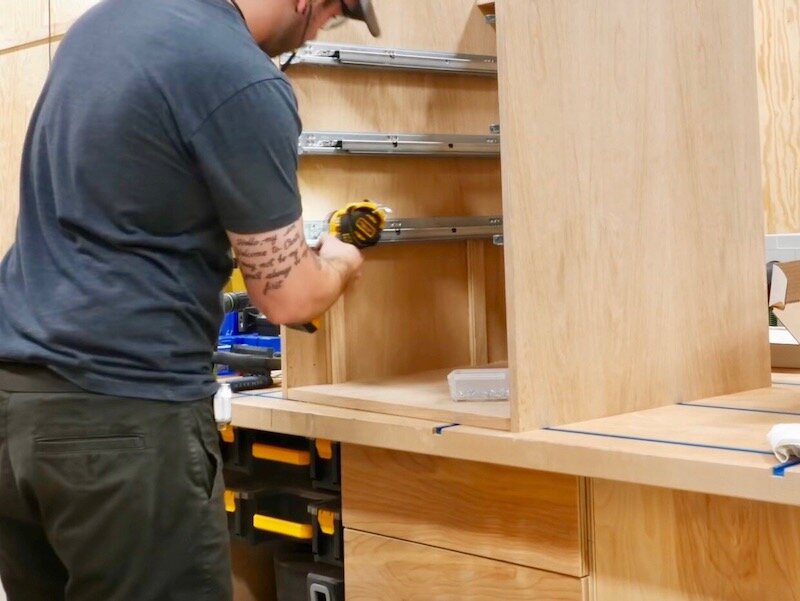
Once again, I called on another jig from Rockler, this undermount drawer slide jig, which made installing these slides super easy. The jig sets the proper setback from the front edge of your cabinet and also holds the slide securely in place while giving you a nice clamping surface.

I also cut some spacer strips out of scrap plywood to help make sure everything was aligned, and these strips combined with the jig made this honestly the easiest drawer slide installation I’ve ever had.
I used a self-centering drill bit to drill the holes and then added screws.
Once the slides were installed, I could install the drawer, which just drops onto the slides and clips into place, and that was it. As you can see, these slides have an awesome soft close action and the adjustability makes them pretty much foolproof.
Also, you can see just how easily you can remove the drawers by pressing the two clips. If you can’t tell, I freaking love these slides and will be using them on basically every project I can in the future.
Anyway, to install the rest of the slides, I would first cut down my spacer strips at the miter saw and then just repeat the process. This went super quick and, once all four drawers were in, I could get this super satisfying shot closing all of the drawers.
Step 6: Installing False Fronts To Soft Close Drawers

And with that, the drawers were built and installed, so I could move on to adding the false fronts, which I covered in the previous bar build video, which I’ll link here in case you missed it.
