
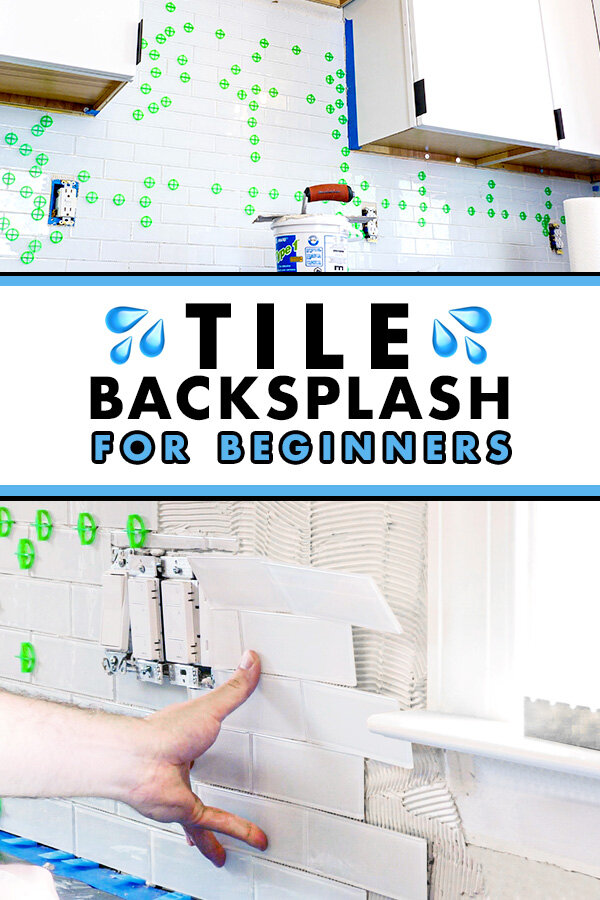
How To Install Subway Tile 🛠 Installing TILE BACKSPLASH for the FIRST TIME
Learn how to install a glass mosaic subway tile backsplash from a beginner's perspective! I've completed my first tile backsplash installation, let me show you all of the tips and tricks I found along the way.
Note: The links below are affiliate links
🛠 Tools Used On The Tile Backsplash Installation:
Tile Spacers (between tiles)
Tile Spacers (between tile and counter)
📦 Materials Used On The Tile Backsplash Installation:
🍳Samsung Appliances :
Installing Glass Subway Tile Process:
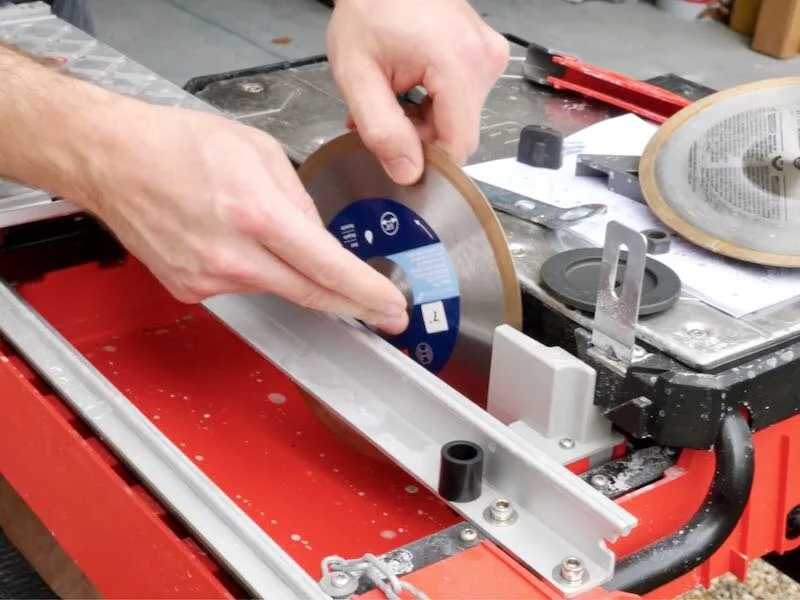
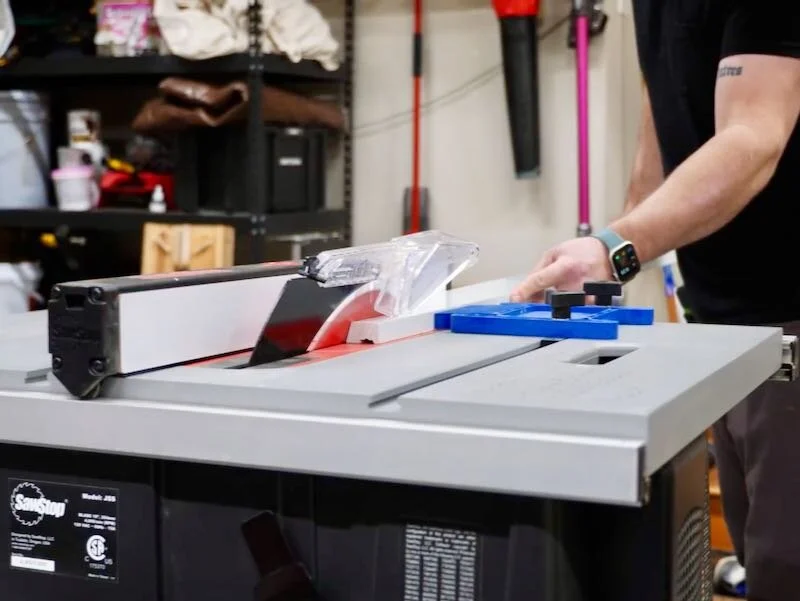
Step 1: Choose Your Tile Cutting Tools
The last major project to work on in the kitchen was getting a tile backsplash installed. This really needed to wait until the rest of the kitchen was put together, but I can tell you that making this much of a mess in the new kitchen was a little stress inducing.
Anyway, the tile I ended up picking was a glass subway tile, so the first thing I needed to do was swap the blade on my tile saw over to a glass cutting blade. This is important, as using a normal tile blade will cause you a lot of issues with chipping and ragged cuts.
As you can see, this glass specific blade left me with a pretty clean cut overall, but I actually think a snap cutter would have been better in some of these situations, but I’ll cover that later.
Step 2: Plan And Measure Out Your Kitchen Backsplash And Decide How To End Your Run Of Tile
Before actually getting to adding tile, I needed to figure out where I was going to end the run and how I would make that look purposeful. I decided to use this Schluter strip for this, and I really like the look the strip gives the end of the tile run.
That said, I inadvertently purchased the wrong sized Schluter strip, which I didn’t realize until I went to lay my first pieces of tile, but we’ll get to that in a bit.
These strips are aluminum and cut easily with a normal miter saw, and I just got them pre-cut and temporarily taped them to the wall with some painter’s tape.
I started my tiling from the end of the run with a piece of this mosaic cut in half, and I figured out this would work by laying out the tile in SketchUp, a 3D modeling software.
Even if you don’t fully model your kitchen in 3D like I did, you should definitely spend some time measuring out the width of your wall and figuring out how to start and end your run. You don’t want to be left with a bunch of tiny slivers to install, as it will not only be difficult to install, it’ll look weird too.
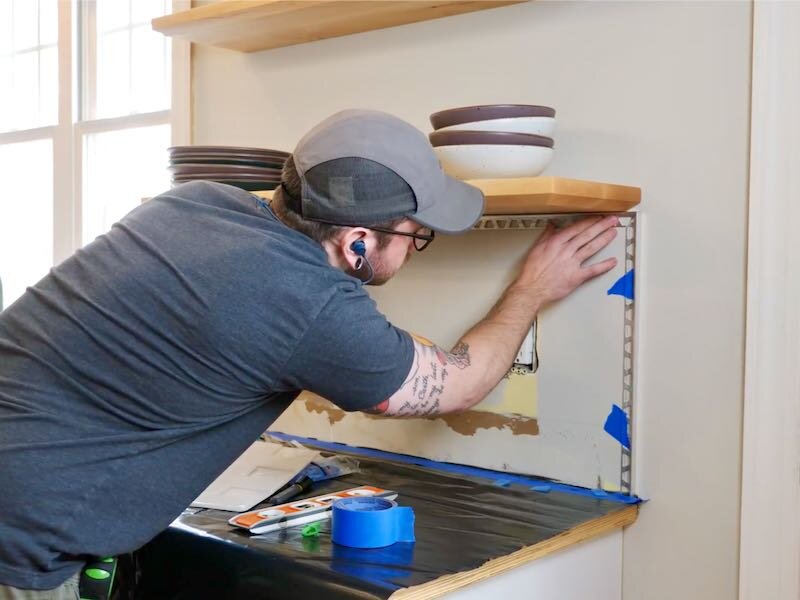
Step 3: Dry Fit The First Tile Mosaic

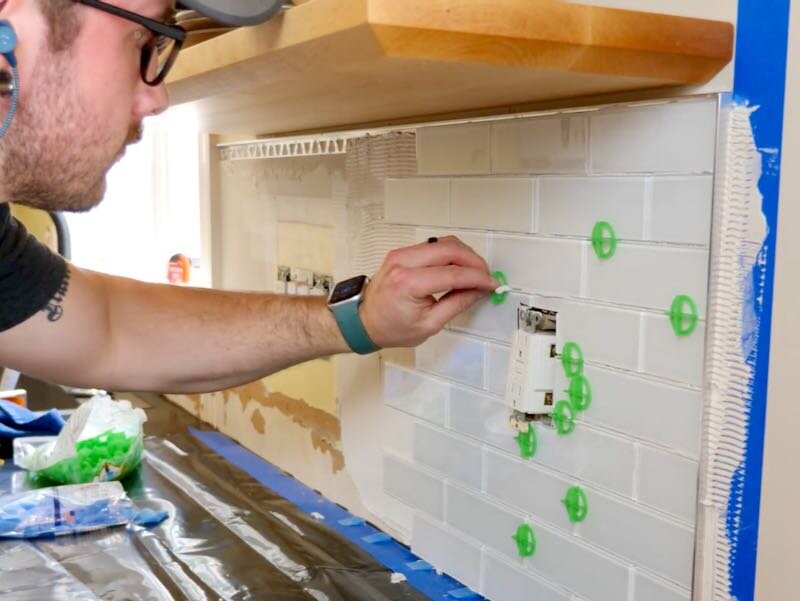
Anyway, of course the first piece to lay intersected with an outlet, so I needed to notch out a few of the subway tiles to fit around the outlet. This was actually a pretty easy process on this particular piece, as I could make the rip cut with the wet saw and then use a pair of glass tile nippers to crosscut the piece. This got a little tricky later on when the outlets feel in the middle of the mosaic, but we’ll get to that.
With the first piece dry fit, I could dry fit the piece for the second row, which is just one of these mosaic pieces cut in half horizontally, and this is when I realized these tiles were a little short for a standard 18” wall area between the countertop and cabinet, and that’s even with me using 3/16” spacers below the tiles. I’m not sure why the manufacturer decided to go with this sizing, but I probably wouldn’t go with these specific tiles again in the future because of this.
After dry fitting, I cut down the vertical Schluter strip, repositioned the horizontal strip, and, after confirming that everything was spaced evenly, I could continue dry fitting more tile.
Step 4: Apply Tile Adhesive To Wall With A Trowel
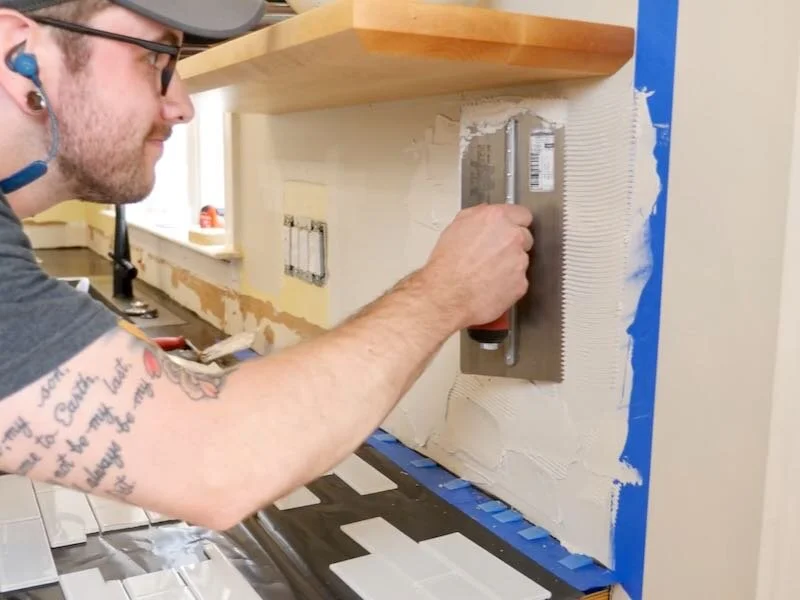
Once I had the first few pieces for the first and second rows dry fit, I moved on to actually applying the tile to the wall. I used a pre-mixed tile adhesive here, which I picked up from my local Lowe’s, and it was definitely nice to avoid having to mix the adhesive myself.
I applied the adhesive to the wall with a notched trowel, using a notch size recommended by the tile manufacturer, and I just tried to get the adhesive onto the wall as evenly as I could. This is only my second tile project ever and my first tile backsplash, so using a trowel still feels really awkward to me, but I think I managed to do a decent job.
Step 5: Adhere Tile To Wall
I did have a lot of issues with excess adhesive squeezing out between the tiles, and I really should have focused more on cleaning up this excess as I was applying the tiles. If you’ve got any tips on avoiding this squeeze out, I’d love to hear them in the comments below.
You can see how the Schluter strip I used was too tall for the tile, as it sticks up above the surface of the finished tile. I’m not sure how I got this wrong, as I checked this with this exact tile in store, but just know that these strips are available in shorter depths if you’re using thinner tile like I am.
Again, I used 3/16” spacers below the tiles, and this left room for me to add a color matched caulk after grouting later. You don’t want your tile to be installed right on top of your countertop as, otherwise, there won’t be room for seasonal movement.
Also, I installed my cabinets and countertop myself with a line laser, so I knew they were perfectly flat and level, but you might need to account for inconsistencies in your countertop by either adding more spacers or scribing your tile.
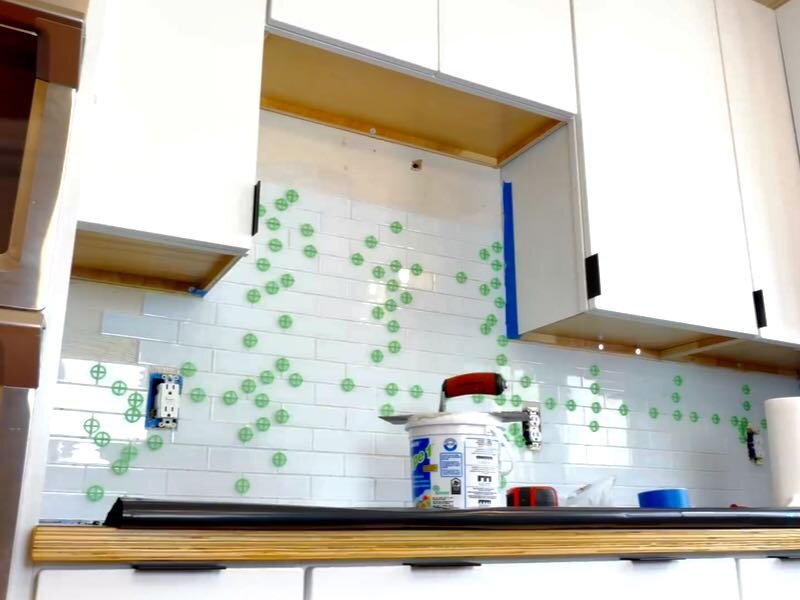
Anyway, I just kept working my way down the wall, adding spacers between the sections of mosaic pieces and also anywhere the mesh backing wasn’t keeping the tiles aligned. In retrospect, I should have bought another bag of spacers and used them in more places, as I ended up with a few uneven joints in the finished backsplash. That was because the mesh backing didn’t do as good of a job keeping the spacing consistent as I’d hoped, and more spacers definitely would have helped with this.
Also, you’ll notice a sanding block sitting on the counter, and one thing I forgot to show on camera was scuff sanding the wall prior to starting applying tile. This just helps to remove any grease and grime that’s built up over the years and will help the tile adhere more consistently to the drywall.
I also added another Schluter strip to the top edge of the tile on the left side of the sink, just to match the strip on the right side.
I called it quits for day one after finishing this first wall, since I didn’t start till about midday, and, before getting started on the second wall the following day, I needed to remove the spacers. I found that a pair of needle nose pliers worked great for this, and you can see some of that squeeze out I was mentioning in the video.
Step 6: Remove Tile Spacers After Tile Adhesive Dries
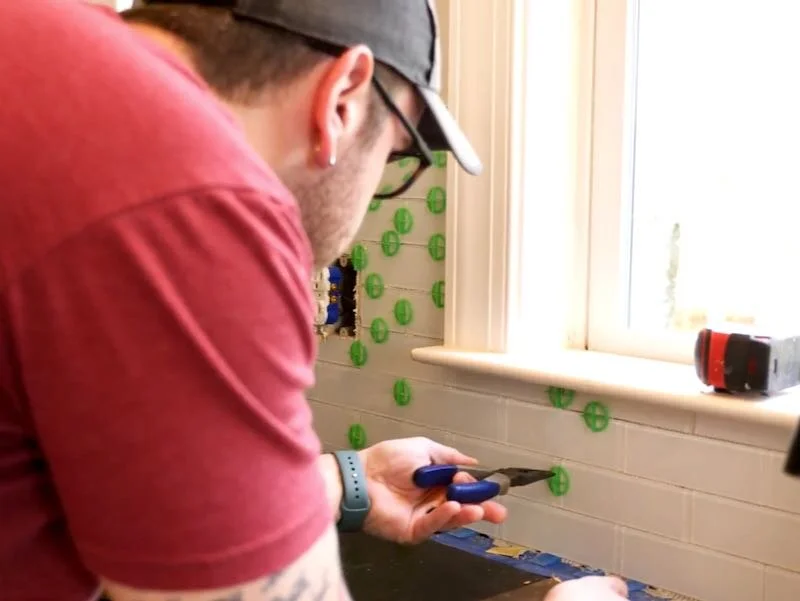
I’m still not sure how to go about adding the spacers and removing the squeeze out without making a huge mess but, again, any tips would be appreciated.
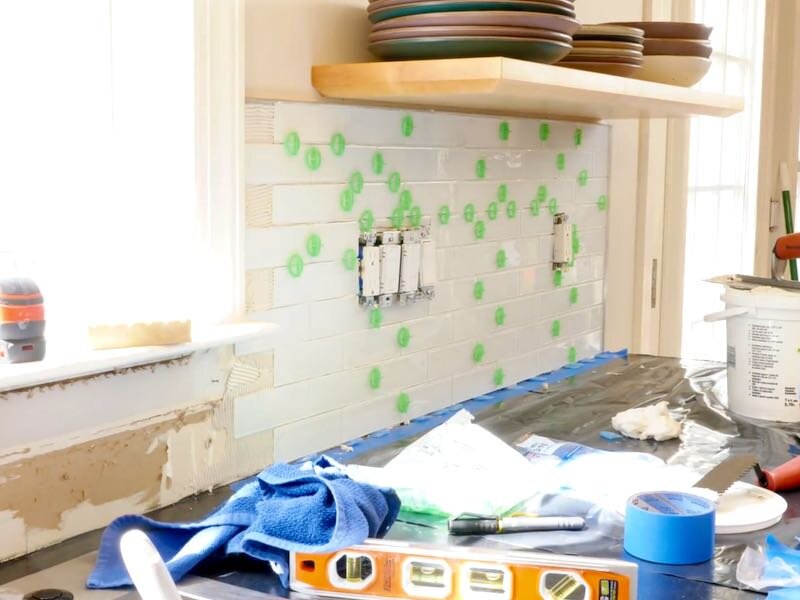
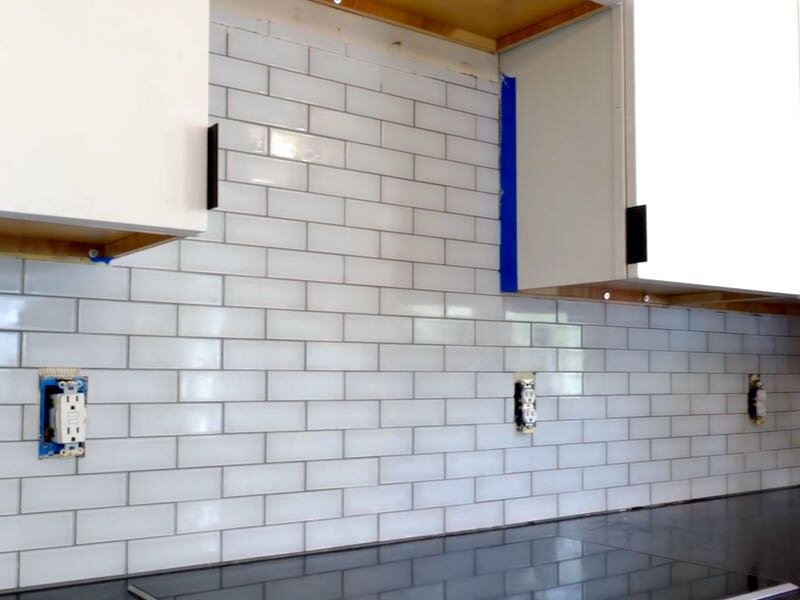
This second wall was really just more of the same for the most part, except that I had to run tile a little higher in the area above the cooktop. I was also able to use up some of the awkward off cuts from the tiles I used below the window at the sink for the top row here, and I actually went higher than I needed with the tile.
This will allow us to change range hoods in the future if needed without worrying too much about the tile running high enough for the hood to cover it.
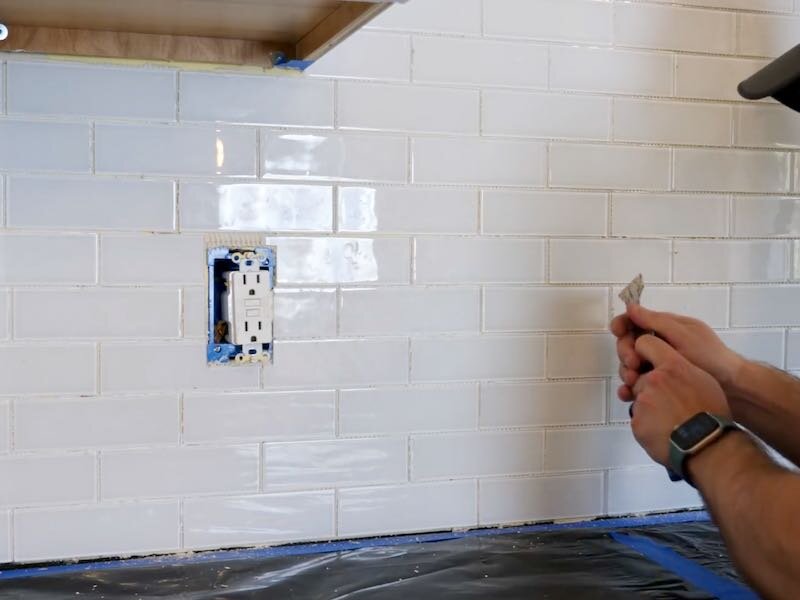
I also really struggled with the outlet locations on this wall, as they all seemed to fall right in the middle of one of the mosaic sheets. I ended up trying to cut around them, which was extremely difficult, but I’d recommend you just cut the sheets up but cutting the mesh backing in areas like this.
Also, I mentioned that I think a snap cutter might have been better than a wet saw in some of these situations, and I’m specifically talking about anywhere where you need to crosscut an entire mosaic section, like where the tile met the walls or cabinets.
The glass tile had a tendency to chip out right at the end of a cut when using the wet saw, which you can see in a few spots in the final install, and I think a snap cutter would have worked better in this scenario. Snap cutters are also much cheaper than wet saws, which is a bonus.
Anyway, with that, the tile was up, so I let the adhesive dry overnight and then could get to grouting the next day.
Step 7: Apply Grout Between Glass Subway Tile With Grout Float
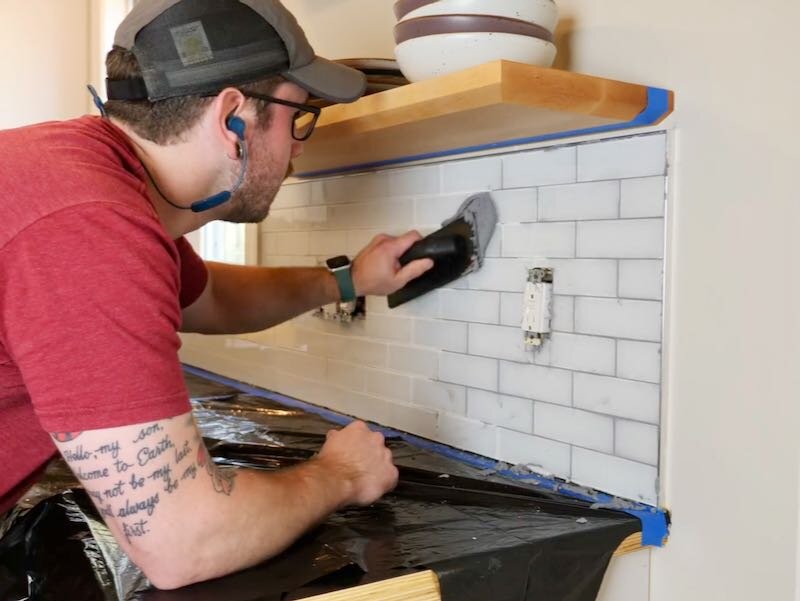
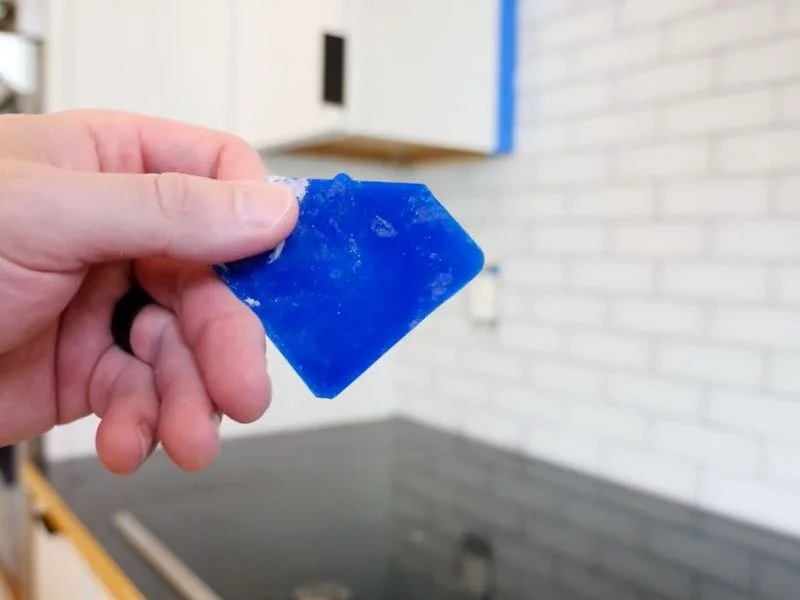
First, though, I needed to deal with all of that squeeze out I mentioned. Unfortunately, since this adhesive is white and the grout I used was grey, any remaining adhesive would be super obvious in the finished backsplash, so I spent a lot of time and used a lot of elbow grease trying to remove the excess adhesive.
I used a 5-in-1 tool to scrape out any large chunks and then came back with a grout pad to remove any of the adhesive on the surface of the tiles. I actually waited a few days between installing the tile and doing this, and I really should have done it the next day, as this adhesive was much harder to remove after curing this long. This was quite the workout and I was totally shot by the time I got the grout added at the end of this day.
With the joints as clean as they were going to get, I could get to grouting, and I used a pre-mixed grout here, which I also picked up at Lowe’s.
Now, I’m not sure how it could really be avoided, but I felt like I made an unbelievable mess during this process, and I think more grout ended up on the counters than in between the tile. Thankfully, I put down trash bags and painter’s tape before starting this process and they made cleanup pretty easy, but I guess I need some more grouting practice.
The basic process when grouting is to pack the grout into the joints using a rubber grout float, pushing the grout in from multiple sides to make sure there aren’t any voids left in the joints.
After filling the joints, I scrapped off most of the excess grout with the float and then just continued working down the wall.
This particular grout, which I also used in our laundry room, dries really quickly, so I made sure to come back with a sponge and remove the excess grout before too long. When doing this, it’s important not to use too much pressure, as you don’t want to remove too much grout from the joints. The sponge should also just be damp, not dripping wet, as otherwise it can actually lift the color from the grout.
I just continued working my way around the kitchen, doing my best to avoid filling the gap between the counter and tile with grout, until all of the joints were filled, and then I could clean up the huge mess I made.
I should mention that, while I really love the look of this contrasting grout, it also definitely highlights any uneven spaces between your tiles, so you might want to take that into consideration if you’re new at tile work like I am.
After about an hour, the grout had dried enough to come back and wipe away any haze left on the surface of the tile, of which there was plenty in my case.
One thing I found out after grouting is that the manufacturer of this particular grout recommends changing the water for your sponge frequently when applying the grout, something I didn’t do. I think this would have helped cut down on the haze drastically, but it wasn’t too hard to remove with a little more elbow grease and a damp sponge.
Step 8: Apply Caulk Between Tile And Countertops
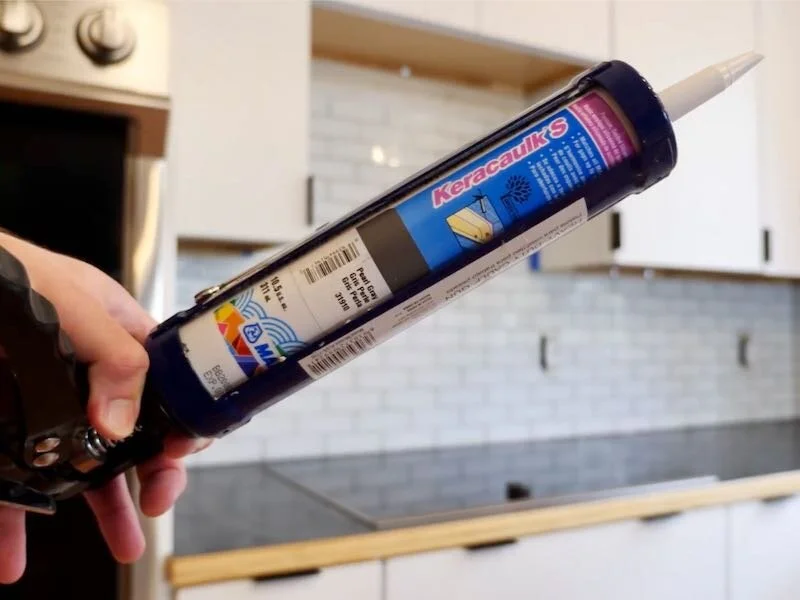
With the haze removed, I let the grout finish drying and then I could come back and add the color matched caulk I mentioned earlier. This caulk is made by Mapei, the manufacturer of the grout, and it’s perfect for any spots where the tile meets another surface, like a countertop, cabinet, etc.
I had a little trouble getting the caulk to look good at first, since the grey caulk against the white tile and black countertop made any excess really obvious. After a little frustration, I dug around in my shop and found one of these caulk tools, which I picked up from Lowe’s awhile back, and this thing was a real lifesaver.
I was able to get a super consistent caulk line and the tool left me with a perfectly clean backsplash and countertop. I’d highly recommend picking one of these up before caulking.
With that, the backsplash install was complete, so I could add the outlet covers back. I was able to use these awesome screwless plates on this first section, which I think looks super clean. Also, depending on the thickness of your tile, you might need to get some longer screws for your outlets, and I also found a rubber spacer kit that I used where needed to keep the outlets secure.
Step 9: Installing Outlet Covers After Tile And Grout Is Set
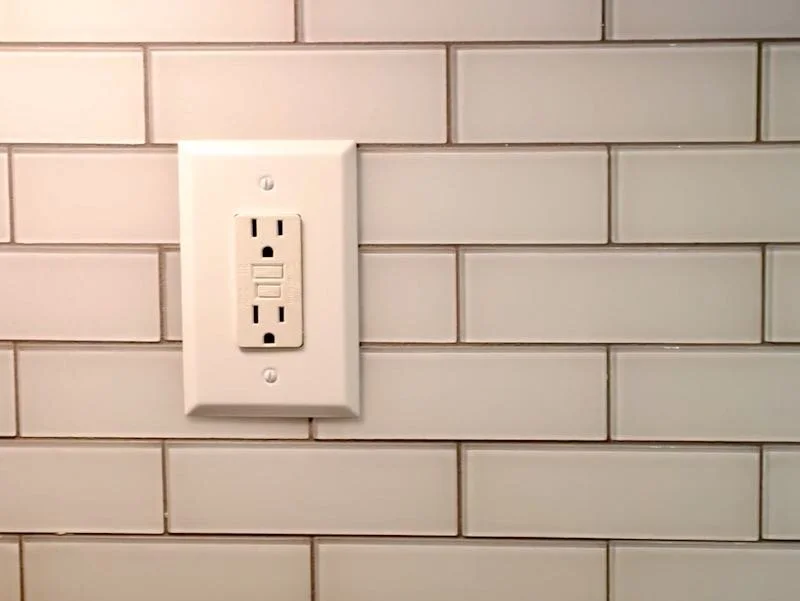
Unfortunately, I did have to use some jumbo plates on the wall behind the cooktop since I didn’t cut in around the outlets tight enough. These look fine, but that’ll just serve as a lesson to be more careful in future tile projects.
Step 10: Installing Bluetooth Range Hood
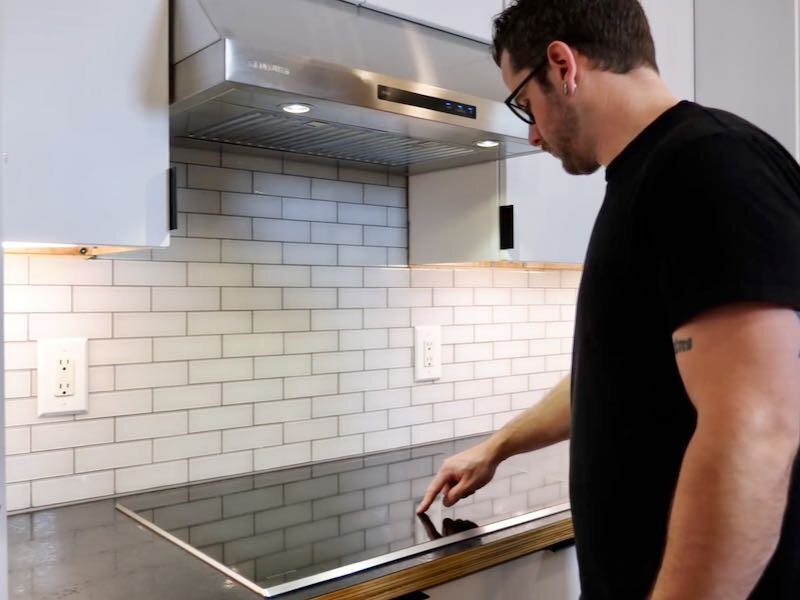
With the backsplash complete, I still had a few odds and ends left to finish up the kitchen, the first of which was installing this Samsung range hood.
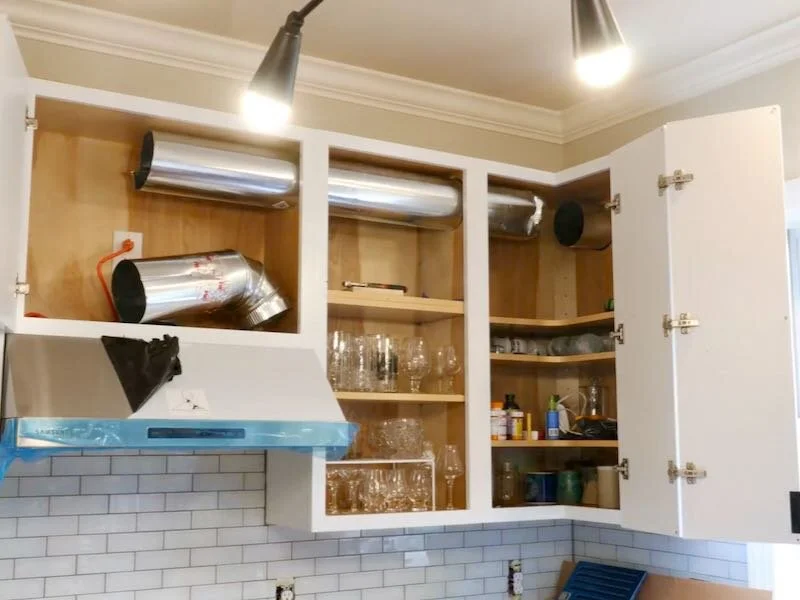
The first step was to cut a hole in the cabinet above the range hood and then get the range hood temporarily hung on a few screws, which was pretty tricky by myself.
After getting the hood in place temporarily, I could start laying out where I was going to run the 6 inch ducting to vent the range hood. Unfortunately, the microwave range hood that was in this area when I started the kitchen remodel wasn’t vented, so I had the fun task of drilling a 6 inch hole through the side of our house during this process.
Obviously, I wanted to get this right, so I spent a good bit of time laying out where the ducting would run, making sure I wasn’t going to run into any studs in that outside wall.
I used a 6 3/8” hole saw to drill a series of holes through the very top of the cabinets, so the ductwork would be hidden, and then out the side of our house.
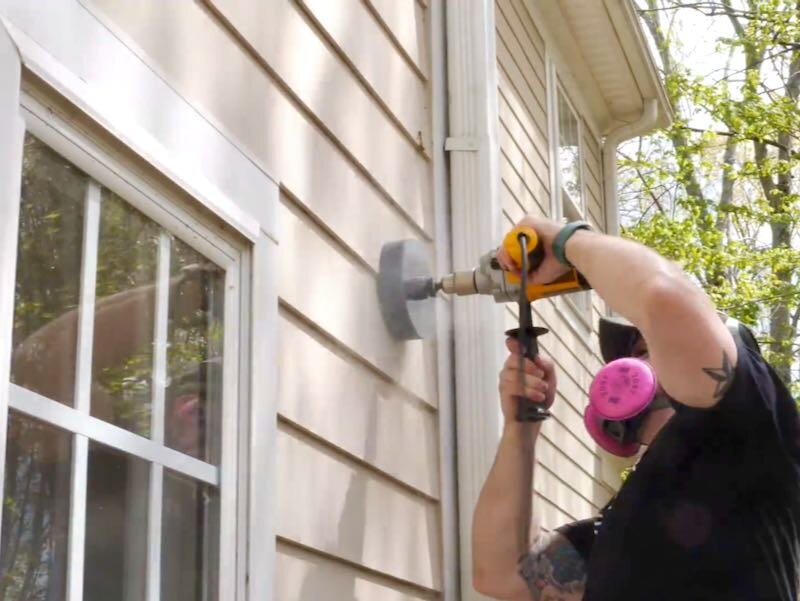
Our house has Hardie plank siding, which I tried to muscle through with my hole saw, consequently ruining it, and I had to switch over to a carbide tipped oscillating tool blade to finish the cut. Since the hole saw was completely dull after its scuffle with the Hardie plank, I switched over to my jigsaw to finish the cut through the OSB and then I could fit the vent.
Back inside, I wired up an outlet for the range hood to plug into and added a whip to the hood so it could be plugged in.
Finally, I could run the ducting through the holes, which proved to be a little tricky, as the outside hole going through the house was a little out of square, but I managed to persuade it into place with a 2x4 and hammer.
I added a bunch of exterior rated caulk to the vent outside, attached it to the house with a few screws, and then connected the ductwork inside, taping the seams with aluminum tape. The finished ductwork isn’t the prettiest, but it seems to be well sealed and, let me tell you, this hood moves some air.
I am amazed at how much air pressure there is coming through this vent outside, and I think this is going to make a huge difference when we’re cooking smoky, stinky, or steamy foods.
One other nice bonus is, since I also have a Samsung induction cooktop, I can link the two through Bluetooth. This means that, when I turn on a burner on the cooktop, the range hood will automatically turn on as well. Pretty nifty.
Step 11: Installing Under Counter Smart Lighting
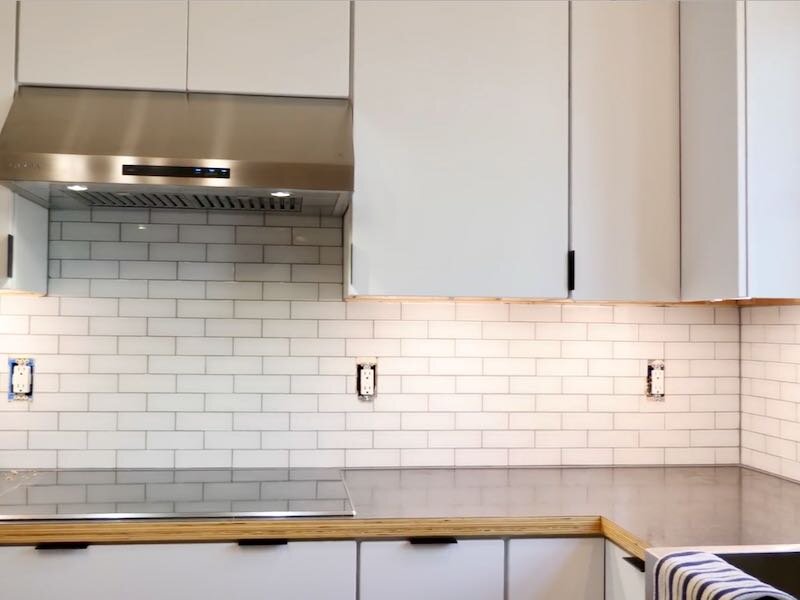
The next item on the final checklist was some under cabinet lighting, and I used some lights I picked up at Lowe’s from their Enbrighten line. I really liked how easy these were to install, since they’re linkable and just plug into the wall, and I just needed to drill a few holes through the cabinets to run the cables.
I used one 12” fixture on this left cabinet and then an 18” followed by two 12” fixtures on the right section of cabinets. You can add one on/off button in line to control all of these lights, but I plan to use a smart lamp dimmer to control these lights using my smart home system.
Step 12: Adding Filler Strip To Hide Gap Between Kitchen Cabinets And Wall
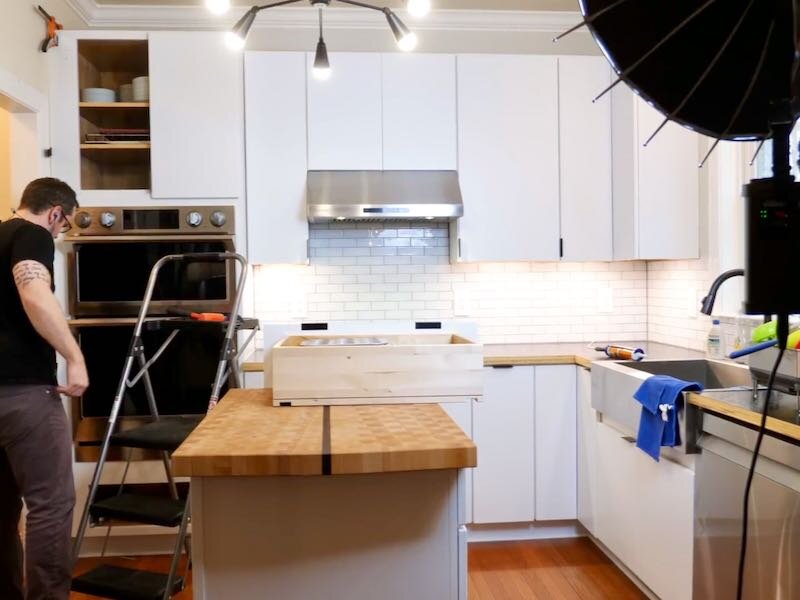
The last little detail on this kitchen was to add that filler strip next to the wall oven cabinet, which got delayed from the original order. Adding a filler strip here was a little tricky, as the face frame on the wall oven cabinet was too wide to run a screw through.
Instead, I decided to add some blocking, in the form of a few pieces of 2x2, flush with the back edge of the face frame, and then the filler strip could butt up against this blocking.
I got lucky and didn’t actually need to scribe the filler strip to my wall, since it was reasonably straight, so I could just rip it to width on the table saw. I did set my blade to a slight angle, so that the edge of the filler strip that met the wall would have a much smaller contact area. This just made it easier to fit the filler strip later.
Speaking of which, after test fitting, I could get the filler strip permanently installed. I added a few beads of construction adhesive on the 2x2 blocking, as well as the edge of the filler strip that met up with the cabinet, and then I could add the strip.
As you can see, having that slightly beveled edge allowed me to roll the strip into place, making it easier to fit the fairly snug piece.
And with that, I could officially call this kitchen project done, at least for now. Before showing you the entire finished kitchen, let’s rewind and see how this kitchen started.