
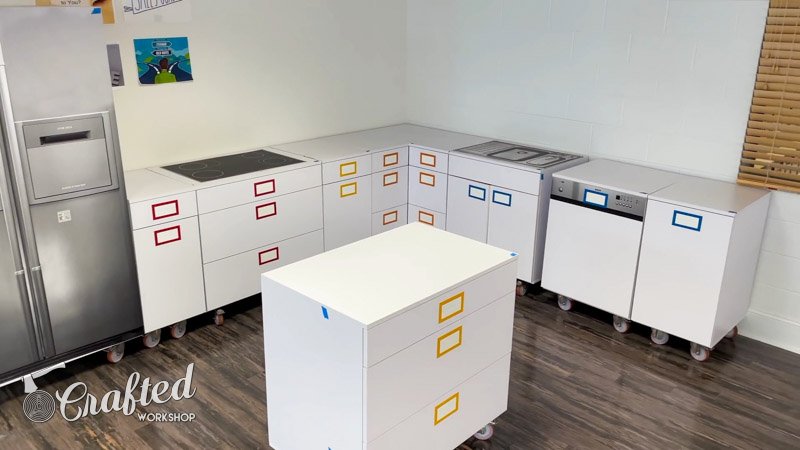
Building Touch-To-Open Kitchen Cabinets with No Handles
Learn how to build and install touch-to-open cabinet hardware for kitchen cabinets with no handles! I used Blum SERVO-DRIVE to electronically open the upper doors and drawers in these kitchen cabinets, plus Blum TIP-ON for the base cabinet doors.
📦 Materials Used On The Kitchen Cabinets (affiliate):
🛠 Tools Used On The Kitchen Cabinets (affiliate):
In case you missed last week’s video, I covered the cost of building your own kitchen cabinets vs. purchasing semi-custom cabinets, as well as the process of building these cabinet boxes with the help of my CNC.
In this week’s video, I’m going to cover the process of getting all of the hardware installed, including the awesome Blum SERVO-DRIVE touch-to-open door hinges and drawer slides, which are just ridiculously cool.
Tour Through the High Tech Blum Factory
Before we do that, though, let’s rewind a bit and take a look at some footage from my trip to Blum’s factory, which I was lucky enough to tour over the summer.

Their factory is a short drive from Asheville and, let me tell you, it was amazing to see all of this hardware come to life in person. I honestly had no idea this stuff was made so close to me, and this tour was like being in an episode of How It’s Made, only in real life.
I also got to see some of this touch-to-open SERVO-DRIVE hardware in person for the first time and immediately knew I wanted to use this hardware on these kitchen cabinets.
The folks at Blum were awesome enough to help me plan out the specific hardware I’d need and we spent some time going through my SketchUp model to figure everything out. They even went so far as to mock up the Not So Tiny House kitchen in their hands on design area and it was awesome to see the layout of the kitchen in real life after staring at the 3D model for the last year.
I also got some advice on installing some of this new-to-me hardware, which can definitely be a little tricky, and that was super helpful when it came time to install everything, as you’ll see in this video.
I just wanted to give a big thanks to Blum for having me out and providing the hardware for this project, and it was super cool to meet the folks there after using their products for years.
Installing Hardware for Base Cabinets
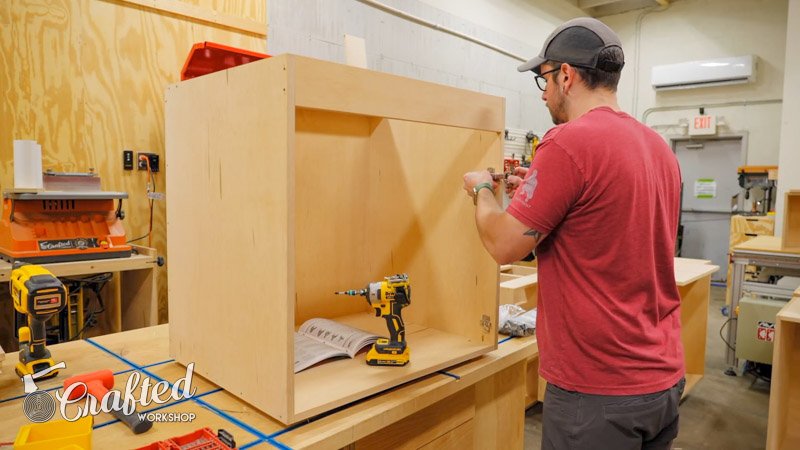
Fast forward a few months, I was finally back in my shop, building the cabinets. I decided to go ahead and knock out the hardware installation on the two base cabinets with doors first, and this sink base was up first. The CNC had already cut the holes for mounting the hinge plates, so I went ahead and got those installed, and then I could mark where I needed to install the hinges on the doors.
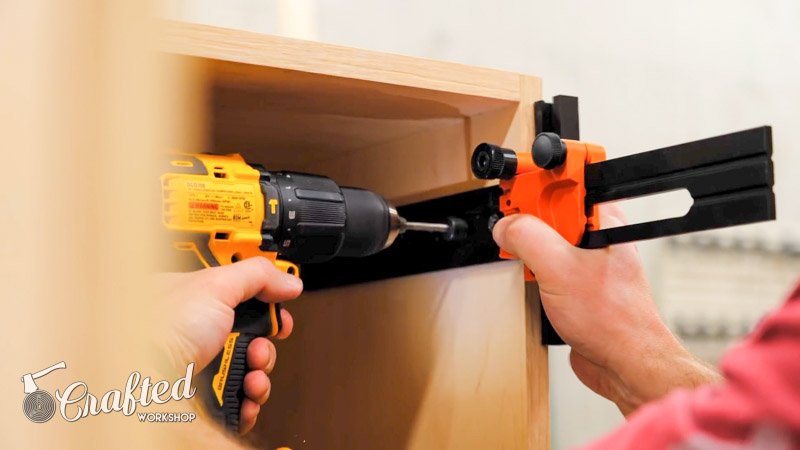
To drill the holes for the hinge cups, I used this drilling tool from Blum. The special thing about this tool, and what makes it different from hinge jigs I’ve used in the past, is it drills the 8mm holes needed for these Blum Inserta hinges.

This was my first time using these hinges and it definitely won’t be my last. They are so easy to install and uninstall, which definitely speeds up the cabinet assembly process.
Once the hinges were on, I snapped them onto the hinge plates and, after getting the door installed on the cabinet, I could make any minor adjustments to get the door lined up nicely.
I repeated the process for the other door and the doors were looking great.
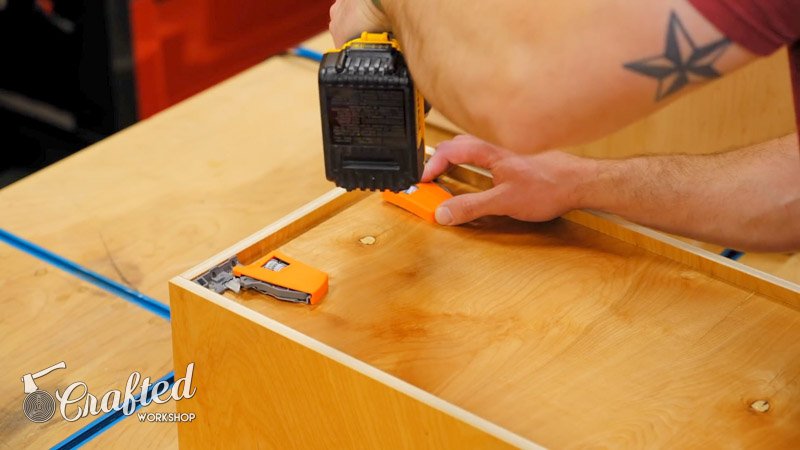
Before moving on, though, I needed to go ahead and get these push-to-open latches added, and these are Blum TIP-ON latches.
As you’ll see, all of the doors and drawers in this kitchen will be touch to open and, actually, all the doors and drawers will be electronically driven by Blum’s SERVO-DRIVE system. All of them except for these sink base doors and the blind corner cabinet door, which you’ll see next.
I figured the easiest place to install this TIP-ON unit was on this top stretcher, and this Rockler dowel drilling jig was perfect for locating the holes for the latches.

After drilling the hole, I slid in the latch and could test it out and it worked great. I repeated the process for the other door and could call the install done.
Installing Hardware for Blind Corner Cabinet
Next, I could work on the blind corner cabinet and, first, I needed to add a panel to the front of the cabinet. This cabinet will house one of these super cool Rev-A-Shelf corner slide out units, which is of course backordered till February, but the cabinet construction was pretty simple.
As you can see, the adjoining cabinet will butt into this panel, and this panel will give me something to attach the other cabinet to, along with the cabinet door, and it’ll also act as a kind of filler.
To install the panel, I just stapled and screwed it in place, adding edge banding to the inside edge off camera.
With the panel installed, I could to get the door hinges installed, and because of the weird orientation of this door, I had to get some specialized hinges from Blum, which I’ll link to in the video description.
I got the hinge plates installed inside the cabinet about 3 inches from the top and bottom of the cabinet, and then I could get the hinge installed on the door, which was the same process as before.
Once the hinge was installed, I could attach the door to the cabinet and, as you can see, this hinge has to kind of wrap around the side of this panel to work.
Thankfully, the hinges worked great and, with this door open, the slide out unit will be able to add a ton of storage to this part of the kitchen.
I got another TIP-ON unit installed on this cabinet but this time I used the adapter plate option for mounting the latch since that seemed easier.
To drill the holes for this latch, I used this Blum universal drilling template, and I can’t believe it took me so long to pick one of these up, considering all of the Blum products I use. This template can be adjusted to work with a ton of different Blum hardware, as you’ll see later in this video.
Anyway, I got the adapter plate mounted to the cabinet using some 5mm screws and then the TIP-ON unit could just snap onto the plate, and the door was good to go.

Finishing Touches For Base Cabinets
With that done, I could move on to the rest of the base cabinets, which all featured drawers, and I went ahead and batched out the drawer boxes for the kitchen, cutting the parts at the table saw.
I was able to use the leftover 1/2” pre-finished plywood from the plywood walls in the tiny house here and this made great drawer box material. Unfortunately, this did mean I couldn’t use the CNC to cut these parts, which slowed me down a bit, but it was worth the tradeoff.
I cut the groove for the drawer bottoms into the sides at the router table and, once that was done, I notched the backs of the drawer boxes for the Blum undermount slides at the band saw.
I have an entire video that goes more in depth into this process of building drawer boxes for Blum undermount slides, which can be a little tricky if you’ve never done it before, so I’m going to skim over some of those details in this video.
I did add an little extra finishing touch to these drawer boxes by adding a bullnose profile to the top edge of the drawer box pieces, and this just gives the edges a nice, rounded profile with no sharp edges and essentially eliminates the need to sand the edges.
The last step before assembly was to drill pocket holes in the drawer boxes using the smaller Kreg Micro Drill Guide. These smaller pocket holes work great in 1/2” material and I could use 3/4” screws to assemble the boxes.
Speaking of which, next I could get the boxes put together, adding glue to the grooves for the drawer bottoms before clamping and screwing the pieces together.
As you’ll see, this assembly method leaves you with a super clean drawer box and the outside face of the drawer box doesn’t have any visible fasteners, which you really want with this kind of drawer box.
Since I used the same 1/2” material for the drawer bottoms, I could screw the locking devices for the undermount slides right to the bottom of the drawer boxes, and I used a self-centering drill bit to pre-drill these holes.
Also, since I’m using the SERVO-DRIVE electronic touch-to-open system, I needed to add these depth adjustment add-ons, as they will allow me to set my drawer box depth perfectly to work with SERVO-DRIVE.
The last thing to do on the drawer was drill these holes in the back of the drawer boxes for the hooks on the back of the undermount slides.
I used this awesome Rockler jig for this and the placement is always spot on, definitely worth buying for this kind of drawer slide installation.
With that done, I could slide the drawer into place in the cabinet and lock it into the slides. To open the drawer, I could tap the front of the drawer to trigger the SERVO-DRIVE unit to push the drawer out electronically.
How to Install a SERVO-DRIVE System for Touch-To-Open Cabinets
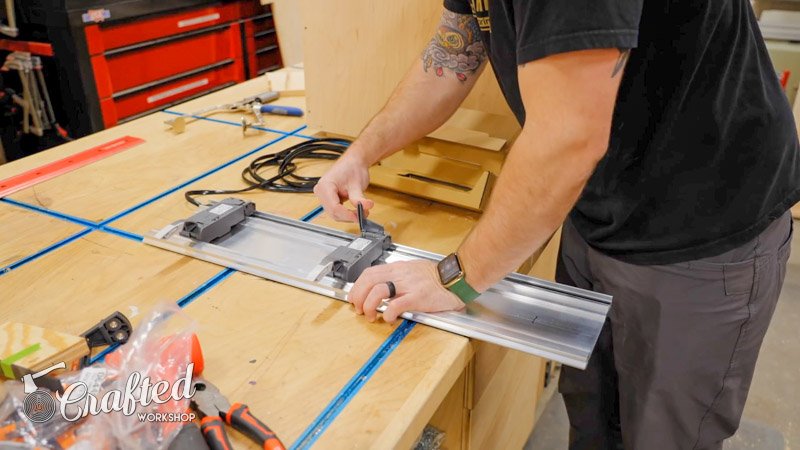
Let’s take a look at how this SERVO-DRIVE system is actually installed. The SERVO-DRIVE units are mounted on this aluminum channel, onto which a few lengths of 24V wire were pre-installed, and these wires allow the units to communicate and also supply power to the units.
To mount this aluminum channel inside the cabinet, Blum supplies these mounting brackets, and I needed to drill some very specific holes to mount these brackets.
I whipped up a little drilling jig, since I needed to install these brackets in multiple base units, and the jig has a center line for aligning with the center of the cabinet.
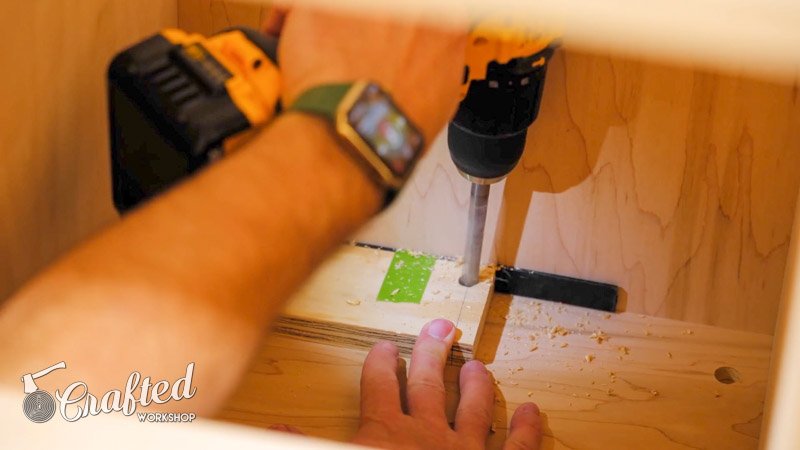
The two holes towards the center are just for locating the bracket, but the outermost hole is a through hole for the power cable to run through.
After drilling the holes, I vacuumed up the dust and then dropped the bracket in place, driving in the screws which expand the bracket to secure it.

I repeated the process for the top bracket, which you’ll have to take my word for as you can’t see anything I’m doing here, and then I could get the aluminum channel dealt with.
First, I needed to cut the channel to length and, since it’s aluminum, it cut easily on my miter saw.
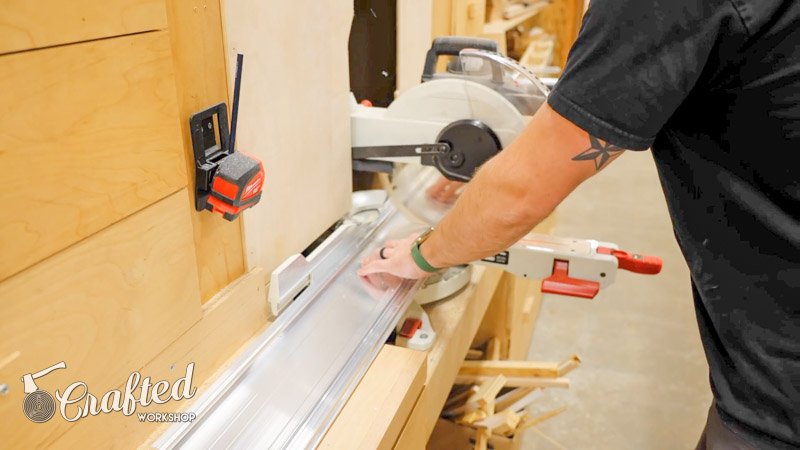
After cutting the channel, I test fit it into the cabinet and you can see how it locks into the mounting brackets.
Next, I needed to get the 24V cable installed in the channel, so I pulled it back out of the cabinet and started fitting the cable into the grooves in the channel.
Once the two cables were fitted into the channel, I could get the SERVO-DRIVE units installed, and I first marked out their locations on the channel.
This location corresponds with the drawer slide locations and all of the specifics for these locations is in the Blum installation instructions.
Once I marked out the locations, I pulled a SERVO-DRIVE unit out of the box and got it fitted on the channel, and it just snaps into place and clamps onto the cables.
I repeated the process for the other two drive units and then finally cut the cable to length, leaving about two feet of excess cable to give me plenty of room to connect to the main power supply.
Finally, I could feed the cable through the hole in the bottom of the cabinet and snap the channel into place in the cabinet.

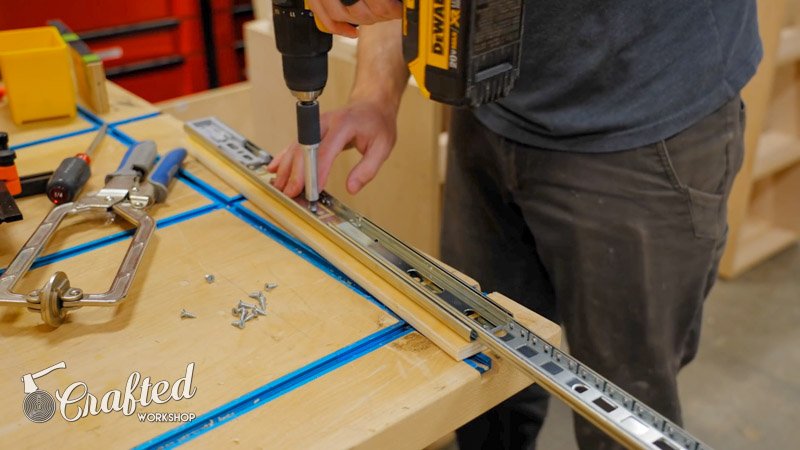
Next, I could get the drawer slides installed and, unfortunately, I hadn’t programmed the CNC correctly here so I needed to manually drill the mounting holes.
Thankfully, this was super easy with that universal drilling template, and I could just clamp it into place, spacing it off the drawer divider with a scrap piece of plywood, and drill the holes with a 5mm drill bit.
I repeated the process for the other drawer slides and then I could install the slides themselves, which was super simple with the holes pre-drilled. I once again used those 5mm screws here, and the slides went in super quick.
The bottom two slides here are actually the heavy duty version of these Blum Movento slides, which is probably total overkill for this application, but the heavy duty versions are slightly longer and require an additional screw, so I had to drill a hole there on these bottom two slides.
I repeated the process on the other side of the cabinet and then I could get the drawers installed and get the SERVO-DRIVE units powered on.
To connect the cable coming from the cabinet to the main power supply unit, Blum provides these clamping connectors, which make it super simple to splice these cables together. You can power a bunch of drive units off of one main power supply, which is why I left plenty of extra cable coming from the cabinet.
After connecting the cable, I noticed the LEDs on the SERVO-DRIVE units weren’t coming on, and it turned out this was because I had mixed up the cables on the aluminum channel.
There are two cables here, one for the different SERVO-DRIVE units to communicate with each other, in case you wanted multiple drawers to come out at once or if you had a particularly heavy drawer that needed two drive units.
The other cable supplies power to the SERVO-DRIVE units, and the orientation of these two cables is evidently important, which I figured out the hard way after the units weren’t powering on.
After swapping the cables and reinstalling everything in the cabinet, the LED lights were on, so I was good to reinstall my drawers and test everything out and, as expected, the drawers worked perfectly.
I don’t think I’ll ever get tired of how cool it is to just tap a drawer and have it pushed out, it just makes me so happy as a tech nerd and woodworker.
Anyway, next I could take everything back apart since I still needed to finish the cabinets and I could repeat the process on two more base cabinets, including the island cabinet with these super wide drawers.
After installing all of these drawers, I was scratching my head, wondering why the SERVO-DRIVE units weren’t working and, as it turned out, I completely forgot to install the units. Evidently, this cabinet building process is turning my brain to mush.
I got them installed and working, and then I could go ahead and get the drawer fronts installed on the drawers.
Installing Drawer Fronts on Kitchen Cabinets
To help me get the drawer front attached to the box temporarily, I used these little peel-and-stick dots from Rockler, and then I could partially slide out the drawer and clamp the front in place to hold it more securely.

I attached the drawer front using these 1” screws with a large pan head, and you can drill the holes in the boxes oversized if you want more room for adjustment.
With that, the first drawer front was installed, and I repeated the process for the rest of the drawer fronts, using 1/8” HDPE plastic strips to space the drawer fronts.
Once they were all installed, I could check the island cabinet off of my list and next it was on to the wall oven cabinet.
Build a Wall Oven Cabinet
Instead of a range, I’m using a separate Samsung cooktop and wall oven in the tiny house, so I needed to build this base cabinet to fit the specs of the wall oven.
The oven needed a solid shelf to be installed on, so I figured out the location of this shelf and got it installed in the cabinet with staples and screws.
I also needed clearance above the wall oven for the cooktop and I added another piece at the top of the cabinet to fill out that area, and this is where the cooktop will hang down into the cabinet.
After installing the shelf, I realized that I’d ended up with this little cubby I hadn’t accounted for. After a little consideration, I decided I needed a drawer for this spot, as it would be perfect for storing baking sheets.
Unfortunately, undermount slides were a no-go as they’d take up too much space in the drawer opening, and I also realized this cubby was so small I couldn’t get an impact driver in, so I needed another solution there too.
I went ahead and built a drawer box, which was almost comically thin, but I think it’ll still be useful. I used 1/4” plywood for the bottom panel to save some height and just glued and brad nailed it in place.

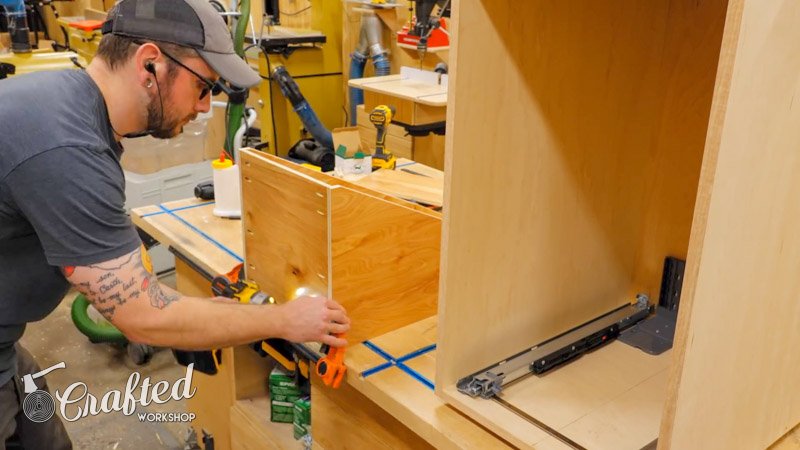
I decided on using side mounted slides instead and I figured I could mount them to wooden rails, which I could slide in and attach from the outside of the cabinet. I attached one half of the slides directly to the rails, flush with the bottom and front edges.
Next, I slid the assembly into the cabinet, set it back 1/16”, and clamped it in place before adding some 1” screws through the side of the cabinet. This actually worked great and was the perfect solution for this tight of a drawer opening.
I slid the drawer into the opening, adding some 1/8” spacers below the drawer, and then slid it out bit by bit to attach the slides to the drawer. I removed the drawer to add the last screw on each side, and then I could finally slide it back into the cabinet.
Attaching the drawer front was pretty tricky since the soft close mechanism on this hardware adds a lot of resistance, and my standard painter’s tape and CA glue trick wasn’t working.
Instead, I just slid the drawer out partially, lined things up using a square, and then clamped it in place, and this ended up working out fine.
Build a Trash and Recycling Bin Cabinet
The last base cabinet to deal was a cabinet for the trash can and recycling bin to be hidden in. This is a feature we have in our main kitchen and we love having both of these out of sight.
I started by installing the slides for the pull-out drawer which will house the bins and this was super simple considering they came with a template.
I of course forgot to build the drawer for this during my previous drawer building session, so I had to set everything up again to make this drawer.
After getting the drawer dry fit, I could test fit the bins and they were a little snug. To remedy this, I decided to remove an angle section from the side of the drawer, to give the recycling bin more room to slide back in the drawer.
I taped the two drawer sides together, marked out my cut, and then headed to the bandsaw to make the cut.

The cut was pretty clean off of the bandsaw, but I still cleaned it up by running the edges on my jointer, which got them perfectly straight.
I cut the back to fit off camera and then could do another test fit, and the bins fit perfectly. I also got the center divider fitting nicely, and this will just keep the cans from tipping.
With the fit looking good, I got pocket holes drilled in the pieces and got the drawer assembled and installed in the cabinet.
I also realized I had enough room for a drawer above the trash cans, so I built another drawer for this area, added a divider, and got the drawer installed.
Finally, I cut the drawer front into two pieces and then got them installed on the two drawers.
I added these little bumpers to the front edge of the cabinet, and these help with the functionality of the SERVO-DRIVE units.
How to Install AVENTOS HK TOP Hardware
Once all of the upper cabinets were assembled, I could get to work on installing the super cool touch-to-open hardware from Blum’s AVENTOS line.
I started with these HK TOP hinges, which were super easy to install. They come pre-installed with this little yellow alignment guide, which I butted up to the front edge of the cabinet, and then I could drive in the four included screws.

I could then remove the alignment guide and test out the hinge, sliding up on the orange safety lever to allow it to open.
I repeated the process for the right hinge, which was exactly the same process.
Also, I want to give a shoutout to this Blum EasyAssembly app, which has all of Blum’s various installation manuals plus a bunch of videos in one easily accessible spot. I referred to this app a ton and would definitely recommend downloading it if you’re going to be installing a lot of Blum hardware.
Next, I needed to drill some mounting holes for the remote units, which mount on either edge of these cabinets. This hole is a little tricky to drill, as it actually goes beyond the front edge of the cabinet and, as you can see, the first jig I came up with failed miserably and the bit ran off course.

Thankfully, the damaged area will be covered by the remote, so I came up with another jig which fully surrounded the Forstner bit and this worked much better.
As you can see, the remote just snaps into the hole and this is how you close the upper cabinet doors electronically, as you’ll see in a bit.
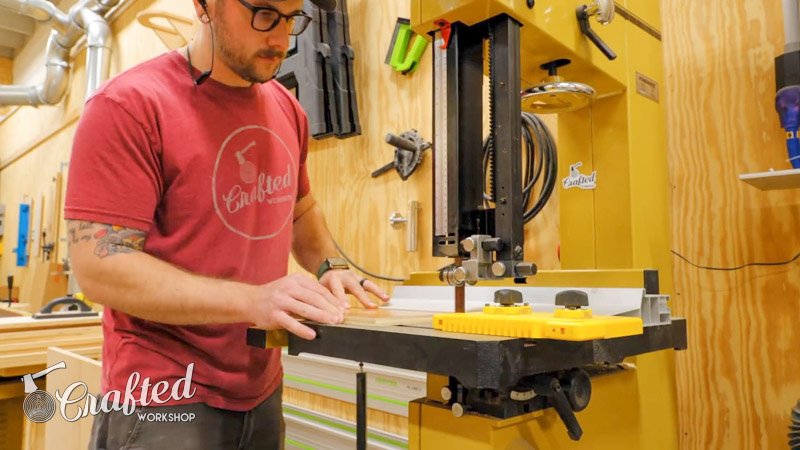
Speaking of the upper cabinet doors, next I needed to cut the doors, which I hadn’t actually done yet. This is real time footage of the CNC cutting through the full depth of this 3/4” sheet, it’s nuts how fast this thing works.
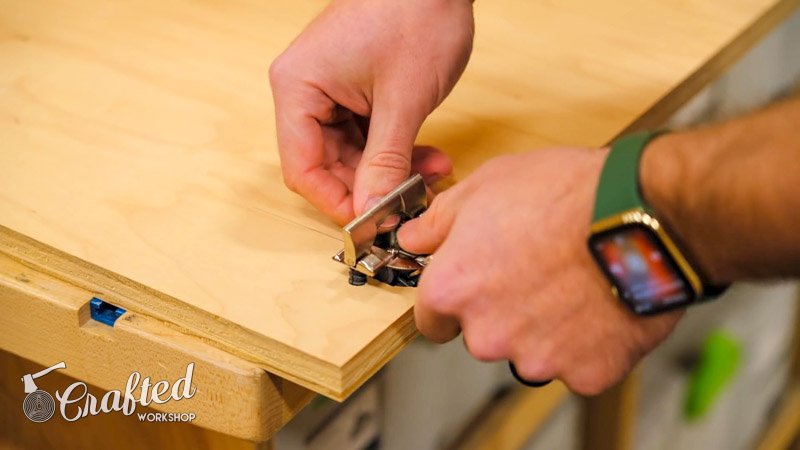
After cutting, I got the doors edge banded with my little Rockler edge banding machine, which I talked about more in the last video in this series.
Once the doors were edge banded, I could get them installed, and Blum makes this little jig for marking the hole locations on the doors. The jig snapped into the hinge and then I could set the door in place, centering the door using the little adjustment wheel on the jig, and then I gave the door a couple of taps to mark the hole locations.
With the hole locations marked, I could line up this Blum universal drilling template with the holes to make sure I drilled the holes nice and square and then drilled them to depth with a 5mm bit.
I could then install the mounting plate on the back of the door with 5mm screws.
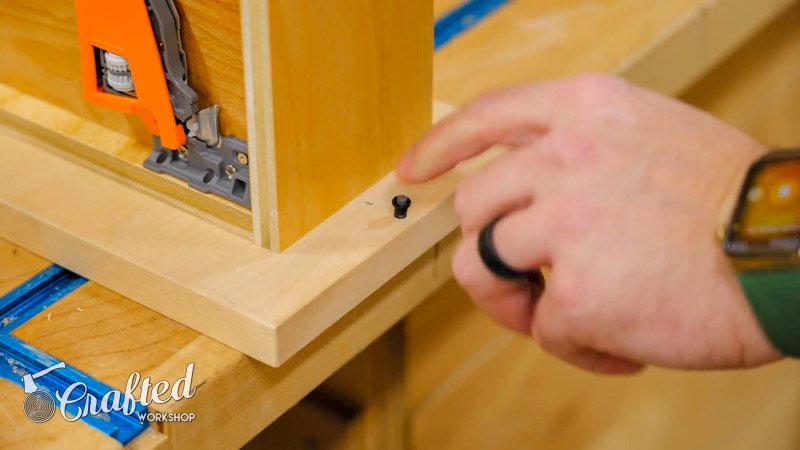
The last thing to do before installing the door on the hinges was to add these spring-loaded distance bumpers, which space the door off of the front edge of the cabinet by about 1/8”. These install in another 5mm hole near the corners of the door.
With that done, I could extend the hinges and then snap the adapter plates in place, and thankfully everything seemed to line up nicely. I could test out the door and it worked great, and I just made a few minor adjustments to the hinges to set the angle.
Next, it was time for the real fun part, making this hinge work electronically. Blum makes this SERVO-DRIVE unit for these AVENTOS hinges and they use the same power supply as the SERVO-DRIVE drawers I installed in the last video.
This drive unit needs power, so I added a 24V cable to the back of the unit and then clipped it onto the HK Top hinge, and I had removed the door to give myself more room to work here.
With that done, I could connect the unit to the power supply with one of the included cable connector clamps and the unit was powered.
Next, I needed to pair the drive unit with the remotes, which was as simple as pressing a few buttons.
After pairing, the unit asks to do a few test cycles, and you want to make sure your door in installed when doing this, as otherwise the safety mechanism on the hinge will cause the test to fail.
I got my door installed and re-ran the test cycle, and man was it cool to see this thing moving on its own. The test cycles went great, so I could pair the second remote and then geek out over this ridiculously cool hardware.
To open the door, you just tap on the front and then to close it, you just press either remote. How cool is that?!
Double Up Fixed Shelf in Cabinet
I repeated the process of installing these AVENTOS HK Top hinges on the other two upper cabinets, and, before doing installing the lower door, I needed to double up the fixed shelf in this cabinet, as I needed a thicker shelf for these two doors to break on.
To do this, I just added a strip of 1 1/2” Maple to the front of another piece of 3/4” plywood, gluing and pin nailing it in place.
Once the glue dried, I added glue to the top of the existing shelf and then dropped the new piece in place, clamping it in a few spots to make sure it bonded well. I also sanded the top face of the shelf flush off camera, which you can probably see without me telling you.
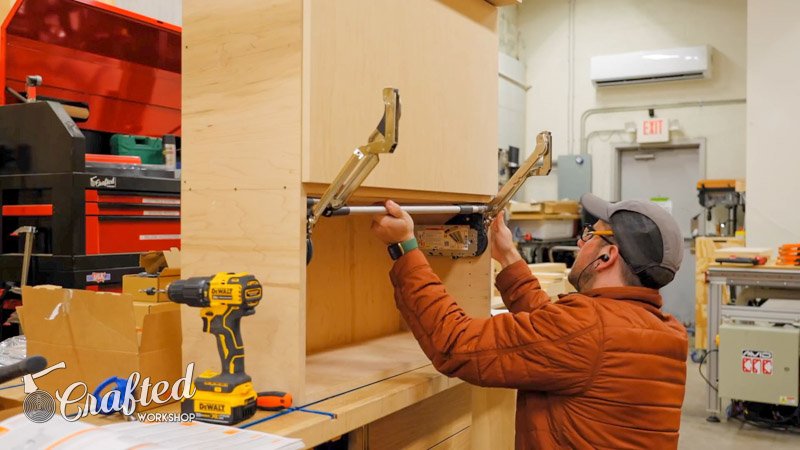
How to Install Aventos HL Hinge Hardware
Next, I needed to install a different version of the AVENTOS hinge, the HL, on the bottom half of this upper cabinet. I forgot to start the camera here, but I got the hinges attached to the inside of the cabinet and got the arms installed, and then I needed to cut this stabilizer rod to length.
The rod is aluminum, so it cut easily on the miter saw, and this rod connects the two hinges and makes sure they operate at exactly the same time and speed, so the door is lifted evenly.
After getting the rod installed, I could get the hinge adapter plates installed on the door and unfortunately my jig didn’t work here, so I had to do some measuring to figure out my location.
Thankfully, the drilling template still worked for the hole spacing and I used the template to actually drill the holes.
Also, one other tip here would be to pick up a metric tape measure, and I got this one from Blum when I visited their factory a few months ago. Since all of these numbers in Blum’s manuals are in metric, it’s much easier to just use a metric tape rather than trying to convert everything to imperial.
Anyway, I got the adapter plates installed and then I could attach the door to the hinges and, amazingly, it fit perfectly.
I did need to adjust the door angle and I also needed to lowering the lifting force since this door was much lighter weight, but overall this hinge worked great.
I didn’t hook up the SERVO-DRIVE system on this hinge yet, since I knew I’d just have to take it right back apart again for finishing, so you’ll have to wait until I install the cabinets in the kitchen to see this hinge in all its glory.
With that done, I wrapped up the rest of this upper cabinet, drilling the holes for the remote, and then I could take everything back apart for finishing.
Building a 12” Cabinet Next to Microwave
The last upper cabinet to work on was this little 12” wide cabinet to the left of the microwave, and I kept it super simple with this cabinet and installed a standard set of door hinges. I did add one of the TIP-ON touch latches that I showed in last week’s video, as there will be no handles on any of these doors or drawers.
Once that was done, I could wrap up the last few odds and ends of the upper cabinets, starting by gluing up a few adjustable shelves. I made these shelves out of two layers of 3/4” plywood,as I was worried about them sagging otherwise. This was probably overkill, but I had plenty of plywood leftover so I figured why not.
After the glue dried, I trimmed the edges flush at the table saw and then added a strip of Maple to the front edge to act as edge banding. As always, these Rockler Bandy Clamps work great for this kind of work.